Yearbook curriculum
Looking for inspiration, design tricks, how to make a great cover, promoting your yearbook and engaging your community?
Most recent

Why camera aperture is critical to taking good yearbook photos
If you’re a shutterbug like me, you’re always after the perfect yearbook photo. But perfect shots are relative to the elements and subjects we’re aiming at. If it’s a picturesque landscape in Yosemite National Park, we’ll want Bridalveil falls and all surrounding elements in focus. If it’s a ladybug perched on the petal of a yellow daisy, this time, we’ll want to draw the viewers attention to the insect’s red shape. And, like most yearbook photos, if it’s of a group of students, we’ll want to make sure all of their smiling faces are crisp and clear. When it comes to achieving these goals you’ll need to master depth of field. And you can only do it through use of your camera’s aperture.
What is the aperture?
Simply put, the aperture is the physical opening in the lens that allows light to pass through. The wider the aperture opens, the more light can pass through. Want to know how to take yearbook photos, and for that matter, great ones? Master the aperture.
F-stops
Cameras measure their aperture settings in what are called f-stops, written f/1.4, f/8 and so on. You can typically find the maximum aperture marked on the lens itself. What’s important to remember, is that a camera’s f-stop setting shares an inverse relationship with the the width of the aperture opening. Huh? In a dark room, with low lighting, by setting your camera to f/2.8 or smaller, you’ll be creating a very wide aperture opening, thus letting a lot of light in. A smaller f-stop number equals larger aperture opening. Remember this inverse relationships as I’ll refer to f-stop numbers for the rest of the post.
Large f-stop numbers
There is something else that happens by using different f-stops, and sometimes with dramatic effects. Depth of field. In the image below, the f-stop is set at f/8. Some professionals call this the “sweet spot” because it is the aperture setting that provides the sharpest focus for a lens. Notice how all of the elements of the photograph are in focus?
Small f-Stop numbers
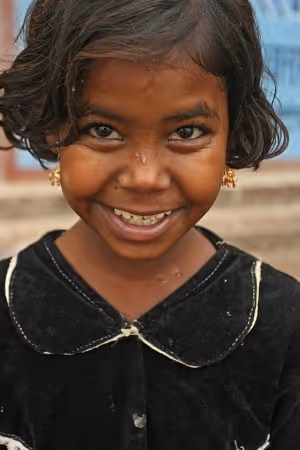
Now, let’s take it to the extreme by setting the camera on a wide open aperture setting (remember this means a small f-stop number). The photo below was taken by a lens with a maximum aperture setting of f/1.4. Notice how the baby’s eye is practically the only thing in focus, and that even her ear begins to “vanish”. This can create moody and dramatic effects with your photographs, especially for portraits or single elements.

Depth of field and the aesthetic quality of the blurred portions of photographs is such an important part of photography, that the Japanese have turned it into an art. They call it boke. Boke (BOH – KAY) focuses on the parts of a photograph that are not in the current plane of focus. We see these areas as blurry or hazy in the final work. The following photograph illustrates the beauty of Boke. Notice how the background almost appears to be painted due to its smooth texture?

3 tips for using aperture in your yearbook photos
Let’s cover a few technical applications of depth of field depending on the subject matter in your yearbook photos.
Portraits
Yearbook portraits are probably one of the most common yearbook photos your school will capture. You’ll want to follow some key rules of composition, being certain that you are filling the frame with faces, but you’ll also want to make sure that the critical element of the photograph is in focus: The face. When taking portraits of one person, you’ll have a lot of flexibility in choosing your aperture setting. Be sure to focus on the subject’s eyes when using a low f-stop number (f/5.6 or lower).
Yearbook setting shots
When taking photographs of the school grounds and building, or of events and activities with large gatherings of people, be sure to use an f-stop setting of f/8 – f/11. This will ensure that the focus of all the elements in the photograph are sharp.

Yearbook group photos
The great documentary photographer, Arthur Fellig, when asked how he was able to capture critical moments of rapidly changing events, simply replied “f/8 and be there.” When taking group photos, you’ll also want to use an f-stop number of f/8 or larger. That way, the faces of all of your subjects will be sharp. This will also allow you to focus on your composition.


Yearbook photography laws: etiquette vs. legal rights
Have you ever wondered about yearbook photography laws and whether you can take pictures somewhere? Fun fact: photographing the Eiffel Tower is legal during the daytime, but things get more complicated at night. Learn what is okay and what's not in our list of photographers' rights.
Everyone has a camera in their pocket these days, don't they? It’s good to know that we can capture the moments that mean the most to us. But few of us think about or even know our rights or limitations in being able to do so.
I didn’t either until a store manager approached me one day. I was attempting to take a picture of my daughter and her friend in front of a display in the middle of the mall. The manager nicely explained that their store carries a stringent "no photography" rule and I would not be allowed to post my photo anywhere online.
I immediately complied with the manager for a few reasons. First, I didn’t consider it to be a big deal. It was just a posed photo - and I had taken a dozen more that day - so there was no importance to that particular shot. Also, I didn’t want to make more of a scene in front of the kids than had already occurred. And lastly, I needed to familiarize myself with yearbook photography laws and my rights as an amateur photographer.
To prevent finding yourself in a similar situation, read up on your rights to take and publish photographs. You can use this information to determine what is acceptable in your school's yearbook.
The laws
Not all "no photography" signs are clear, so always be on the lookout.
The general rule is that if you’re in a public place and can see it, you can shoot it. So, if you’re at the park or beach, whatever you see is open for photographing. Taking pictures on government property is mostly considered okay but prohibited on military bases and inside government buildings. (So, photos at the Washington Monument are fine, but taking pics inside your local courthouse isn’t.)
The line blurs a bit regarding what is called expected privacy. You’re not allowed to take pictures on public property if there is an expectation of privacy. For example, public restrooms are off-limits from photography. Similarly, taking photographs inside someone’s windows while standing on the sidewalk on public property is unacceptable.
When you’re on private property, the rules are more defined. The property owner can dictate what you are and aren’t able to photograph. You can be cited for trespassing if you do not adhere to these rules.
You can take pictures of strangers in public places without their consent. However, you cannot sell them without their knowledge or permission. For example, you can’t snap a picture of a stranger walking past you on the street and then sell it for profit as an advertisement to Coca-Cola. But, when you take a picture of someone at the science fair, publishing it in your yearbook is okay.
Err on the side of etiquette
Many public places like zoos and museums have photography rules posted directly on their website. But if you’re out on a school trip and can't find information about the photography regulations, ask someone who works there. Some locations allow and even encourage photography. Others allow photography as long as you don't use flash. Still others prohibit all photography, whether you intend to publish it or not. In the case of banned photography, management can ask you to leave the premises or, in extreme cases, have the authorities called. Again, save yourself the hassle and ask an employee.
When photographing other people, especially children, even though it’s legal to take their pictures in public, it’s still better –and more polite– to ask first.
At the beginning of the school year, students should receive a photography waiver for their parents to complete and return. This form allows families to decide whether their child’s photo can be taken and placed in school publications such as the yearbook. Make a list and keep it with you to avoid cross-referencing later.
The ACLU also recommends carrying this printable pocket guide of photographer’s rights with you in case someone approaches you despite being within your legal rights. Had I had such a document when that store manager spoke with me, I could have politely explained that malls are open to the public and I was within my rights.
Hassle-free yearbook publishing
Educating yourself on what is and isn’t acceptable in the world of yearbook photography laws can save you a lot of headaches when creating your yearbook. You’re already using Treering to make designing and publishing your yearbook easier, so following these simple rules will ensure you spend time on the fun aspects of yearbook creation rather than time-consuming hassles.
Are you still wondering what's up with the Eiffel Tower? The twinkle lights that come on at night are considered their own art installation and are still under copyright. Want the full coq au vin? Click ici.
Please note: this is not a legally binding guide. Photographers should always check the rules and regulations of all establishments and with parents before taking pictures.

Teaching yearbook: game on
Camaraderie. Team work. Unity. Stress relief. Fun. These are just some benefits of adding games to your yearbook class. Balancing academics, extracurricular activities, and personal commitments can be demanding for students and advisers. Obvious statement: the yearbook production process adds a layer of responsibility. Playing games with your yearbook team early in the school year can be a way to break down walls. At the end of the year, playing games is a way to reconnect, rejuvenate, and review (because, if your district requires it, games can be a summative assessment.) Our curriculum team put together three games.
1. Off-limits, yearbook-style
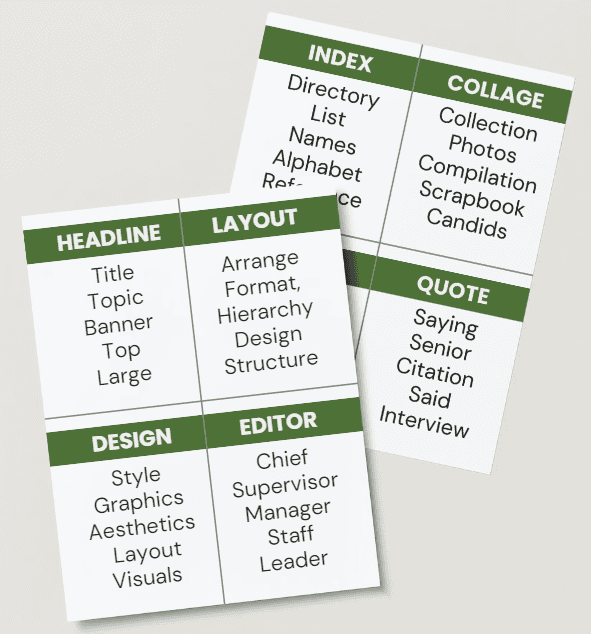
This is the game of forbidden words. In teams, students try to get their teammates to guess the word on the card without saying the word itself or any of the off-limits words listed on the card. We created a mini-deck of 12 cards as a quick (and potentially loud) warm-up.
Rules
- Divide the group into two teams.
- Each team will alternate as the guessing and enforcing teams.
- In each round, one person from the guessing team will serve as the clue-giver. The clue-giver draws a card from the deck and tries to get their teammates to guess the word written on the top of the card. The clue-giver is not allowed to say the word itself or any of the “off-limits” words listed on the card.
- One member of the enforcing team will keep an eye on the “off-limits” words. If the clue-giver accidentally says an off-limits word (this includes variants) or phrase, the word is forfeited with no points awarded.
- Set a timer for each turn, typically 30-60 seconds, depending on age.
- When the guessing team correctly guesses a word, they earn a point.
- The game continues until all cards have been used. The team with the most points at the end wins the game.
Variations for play
- Project a card on the screen, and have the guesser stand in front while classmates deliver clues.
- Send a card via Team, Slack, Band, etc. and have team members comment with clues.
- Share a card on social and see if your followers know yearbook terminology.
2. Sketch charades
Drawing and guessing go hand-in-hand in this guessing game. It challenges players' drawing skills and ability to interpret visual cues.
Rules
- Divide players into two teams. Each team selects a player to be the “artist” for their turn.
- At the start of each round, the artists draw one card.
- Without using any letters, numbers, gestures, or verbal clues, the artists sketch an image representing the word or phrase on the card. Both teams are guessing the same word.
- Set a timer for each round, typically 45-60 seconds, depending on age.
- If a team guesses the word correctly before time runs out, they earn a point.
- Rotate artists each round.
- The game continues until all cards have been used or until a predetermined point goal is reached. The team with the most points at the end wins the game.
3. Category countdown
Based on a classic party game, Category Countdown facilitates players to try to come up with unique words or phrases that fit specific categories in a hurry. Creative thinkers come up with some answers that push the limits–that’s why this is a crowd favorite.
Rules
- Display a category related to yearbooks.
- Set a timer for one minute, and have students take turns writing down items that fit within the category.
- When time is up, have a student read off their list. If no other student has the word, it’s one point.
- The student with the most unique answers after five rounds wins.

Variations for play
- In larger yearbook classes or clubs, break students into teams. One team can negate the others with duplicate words.
- Have students create a yearbook alphabet by brainstorming one answer per letter, A-Z.
- Use a random letter generator to limit responses to one letter.
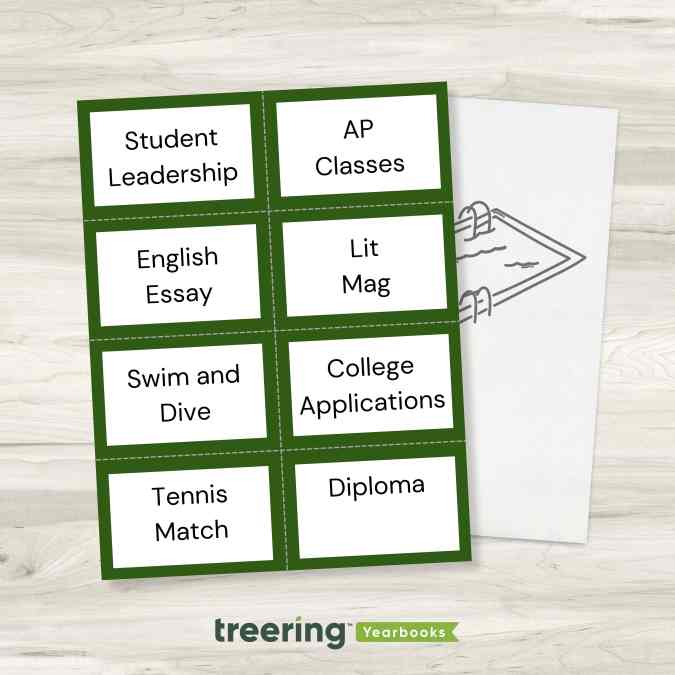
Bonus: yearbook escape room
We created this yearbook freebie, which includes four puzzles that “unlock” the final clue. Yearbook advisers, use this print-and-go lesson for vocabulary review.
When you use these games for moments of shared fun, be sure to tag us on Facebook, Instagram, or TikTok when you share the videos.

The history of the yearbook: how technology is reshaping it.
The history of the yearbook begins
We all know it’s a steadfast tradition in American schools, but what exactly is the history of the yearbook? According to a story by NPR, a Boston photographer named George Warren leveraged an advancement in photographic technology called the glass negative process to easily create many prints from one photograph. Warren encouraged his student subjects to purchase multiple portraits, share them with each other and then turn those collections of portraits into professionally bound books. The “Warren Yearbook” was born. The National Museum of History in Washington D.C. has the 1860 Rutgers College Yearbook on display, an example of a Warren Yearbook.
1900s and the printing press
The next big shift in the history of the yearbook came in the early 1900s with the invention and adoption of the printing press. Those books that were previously hand bound, one of a kind albums, could be mass produced with the creation of printing plates. Costs dropped, making the yearbook more accessible to schools and students from all walks of life. The stage was set for the growth of the traditional school yearbook
The computer age
Between 1985 and 2008 an explosion of technology brought on massive changes in the yearbook’s history, like desktop publishing, digital printing, social media and the widespread adoption of digital photography. The computer age disrupted almost every industry in the world including incremental improvements to the yearbook. Desktop software made it easier for schools to layout yearbook designs and digital photography provided a larger variety of shots from throughout the year.
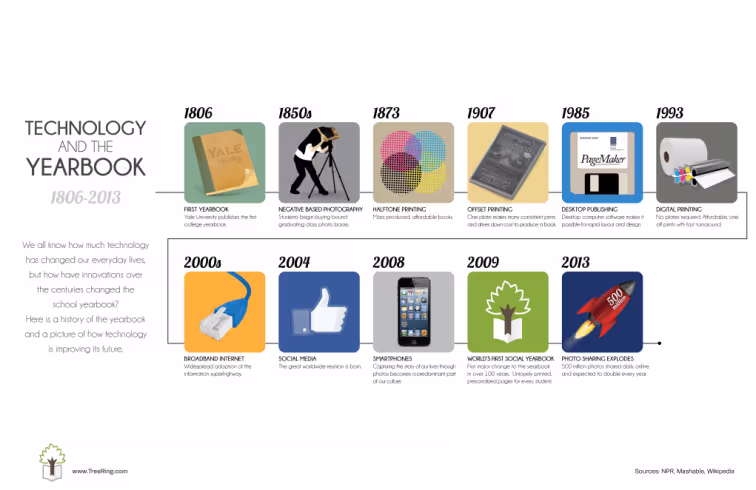
The social yearbook
In 2009, with the mass adoption of social media and its prevalence as a part of the American culture, the yearbook made its first major shift in over 100 years. Digital cameras and innovations in online software make it easy for students and parents to create their own memories and add them to their uniquely printed version of the yearbook.

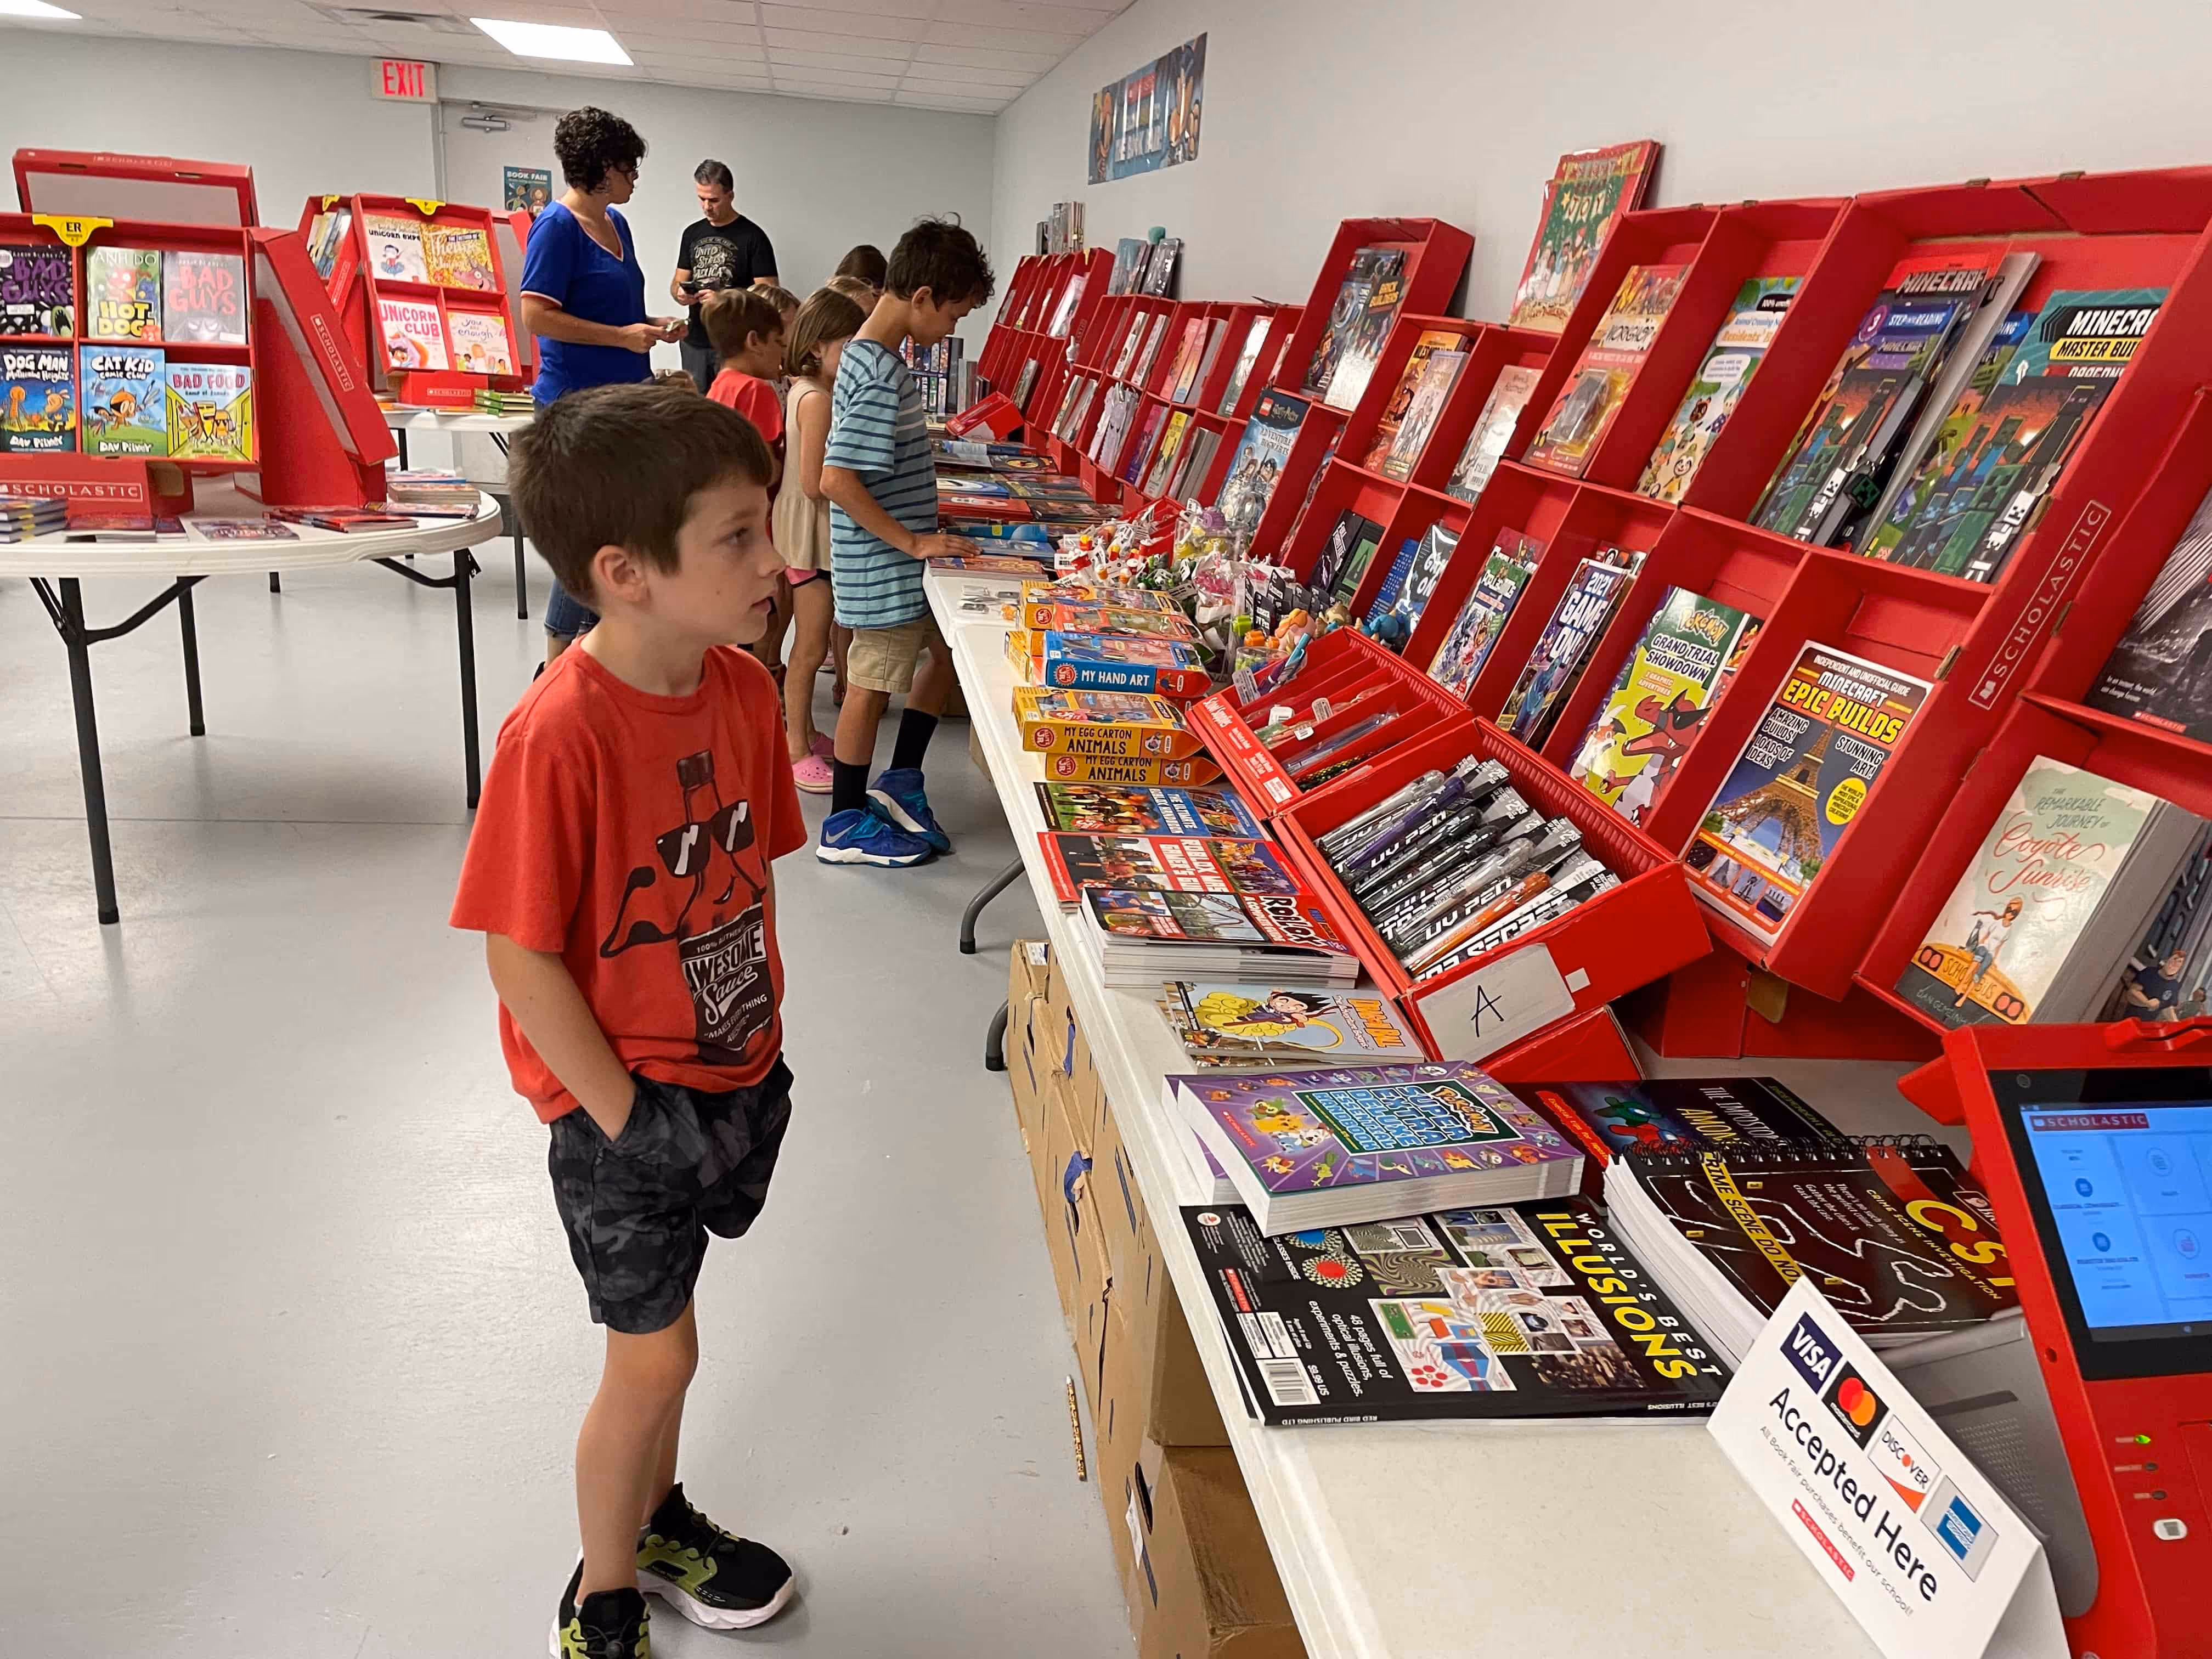
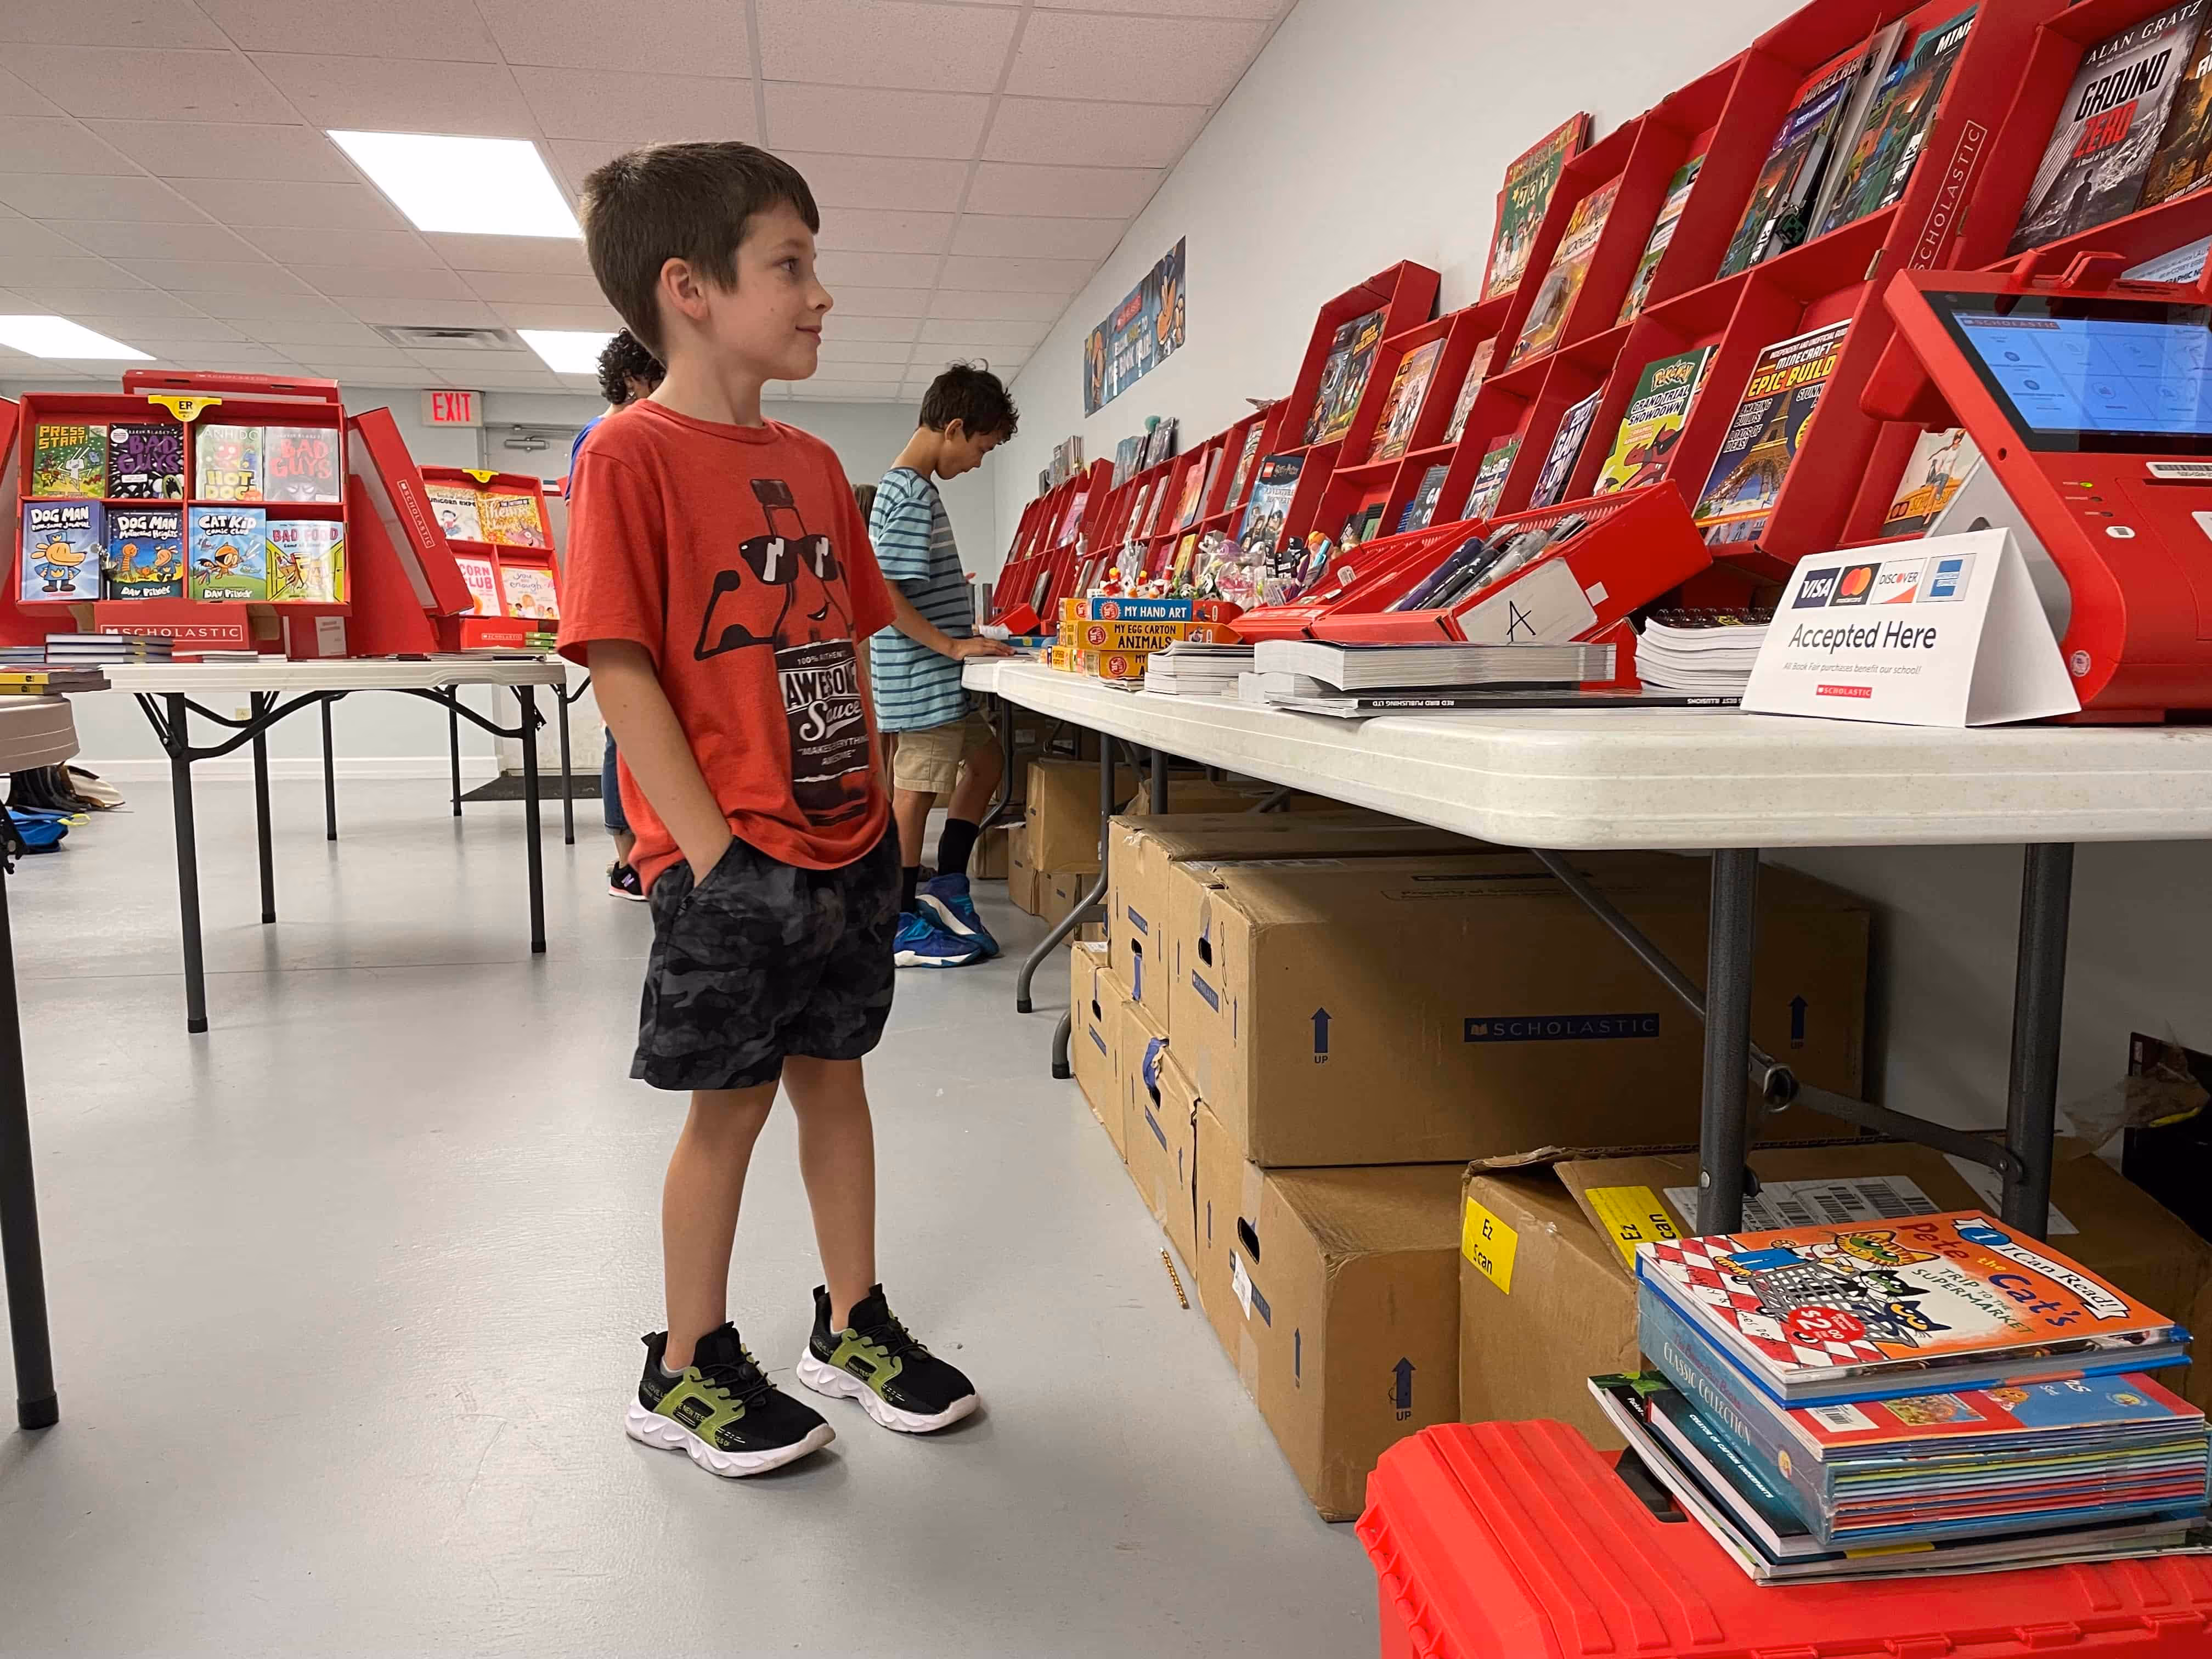
10 Ways to relieve adviser burnout
It’s second semester, and we’re exhausted. Book fairs, grading, packing lunches, classroom celebrations, and family obligations are fantastic. We love them. They also wear us out. Layer the laudable task of gathering storytelling photos and husting the greatest yearbook your campus has yet to see, and it could be too much. If you're a team of one or two (or forty-two), yearbook adviser burnout is an especially strong possibility.
Treering staff member and yearbook mom Tevis D. said, “It’s okay to be not okay.” We just hope you don’t remain that way.
Remember your why
It’s a privilege to be entrusted with this task! It’s the opportunity to capture meaningful moments. The impact this year’s book will have cannot be measured now. It's not just about the visual elements, but also about the sounds of laughter captured in photos, the feel of the pages as you flip through them, the scent of freshly printed paper, and the breath of satisfaction as you see the finished product.
1. Express appreciation
Recognize and appreciate the efforts of your volunteers and the people on campus who champion your yearbook program. We know gratitude changes attitudes. It’s a great way to rejuvenate.
2. Recognize yearbook milestones
Celebrate throughout the yearbook production process to boost morale and maintain momentum. Upload your roster and toast yourself with a latte. Create a ladder with the team, then go out for pizza. Other steps to consider:
- Every x spreads marked complete
- Selling 25-50-100 yearbooks
- Having all the sports team photos complete by a certain date
Sometimes, a celebration can be as simple as a hat day or a classroom dance party. (Even high schoolers like a throwback GoNoodle video.)
3. Practice mindfulness
Incorporate mindfulness exercises into your routine to reduce stress, increase focus, and maintain a sense of perspective and balance. Schedule regular breaks during yearbook production to rest, recharge, and prevent burnout.
Ask for help… and get It!
If you’re creating the yearbook solo (or just feel like it), help is available.
4. Use your publisher
Treering Customer Success Manager Liz T. tells advisers, “If it is stressing you out—and yearbook related—contact me.”

If you’re not a Treering editor, what are you waiting for? call your publisher and tell them you are at a standstill. They should have resources and training to help you move forward and create a workflow to simplify your process.
Newer to the yearbook game, you may not yet know what you don’t know, so it helps to follow a plan. Here are two popular ways to tackle a yearbook project:
5. Create a support network
Reach out to fellow advisers in your district, journalism mentors, or your publisher for guidance, advice, and support. Bring in experts as guest speakers to do some teaching for you: utilize your area journalists, alumni yearbook students, or even the Team Treering.
Strengthen your workflow
You can release stress from your mind by systematically addressing and resolving challenges in your yearbook project. It's about taking a methodical approach to problem-solving, allowing yourself to let go of stress, and approaching each task with renewed focus and energy. Remember: you don’t have to do it all at once!
6. Chunk your work
Breaking it down is more than a call to action on the dance floor: it’s a project management technique.
Here are some tips from the Treering staff:
Yearbook Specialist Karen B. said, “I like to stay on top of my pics and layouts: right after the event, I create the spread. This way, I'm never buried in spreads from October when it's January. And on slow event months, I catch up on other spreads.”
Yearbook Specialist Ali J. gives herself a cushion with her public deadline (yearbook purchases and custom pages). “As an elementary school advisor, I always set the deadline earlier than needed for parents to submit, then added a few days for the procrastinators (mostly for me),” she said.
The lone yearbooker
Identify and prioritize the most important tasks, focusing on those that contribute most significantly to the yearbook's quality. Typically, this encompasses your ladder, school portraits, and candid photos.
Some easy ways to simplify your workflow from Yearbook Specialist Kate H. include:
- Re-using layouts from previous years and changing out the headlines and captions
- Copy portrait settings from one class to the next
- Create photo and text styles
- Use pre-made page designs or templates
“One of the hardest things for editors to do is get content. Without it, you don’t have a book,” said Customer Success Manager Jason S. He helps advisers set up a system to collect photos from homeroom teachers.
Remember, saying no to additional responsibilities or requests that may overwhelm you is OK.
Managing a class or club
After you break down the yearbook project into smaller tasks, distribute them to your team. This way, there are no surprises on who is expected to cover what.
General tasks to delegate include:
- Photo management: uploading, crowdsourcing, tagging, selection
- Layout selection: templates, style guide
- Interviews: questions, scheduling
- Sections: people, athletics, student life, reference
- Copy editing and proofreading
7. Set clear expectations
We all need to clearly communicate roles, responsibilities, and expectations to volunteers, staff, and students from the beginning. The same goes for ourselves.
Think about the tasks you'll need to oversee, such as organizing photo assignments, designing layouts, and marketing the yearbook. (And remember, using Treering means we handle payment processing, yearbook sorting, and order tracking. Phew!)
8. Receive (and share) ongoing training
Find training sessions and shareable resources for inspiration or to fill in knowledge gaps. It may seem counterintuitive to add something when you’re feeling overwhelmed. Sometimes, an outside force (hello, inertia) is the change we need to pivot in a more positive direction. Our go-tos include:
If you are part of a class, club, or committee, use these opportunities to up your skillset as team building. Oreos also help.
9. Use automations
Embrace the ways tech can help increase efficiency. Treering’s software helps you create polished layout effortlessly by
- Auto-flowing portraits from any photographer
- Laying out your photos in a professionally design yearbook spread

We tossed the orange wax pencils and scaleograph for a reason!
10. Addition by subtraction
Sometimes, to move forward, we have to take a page from the Oregon Trail playbook: jettison what’s holding you back and keep moving forward.
These strategies can help you navigate the challenges of yearbook advising while staying motivated, resilient, and passionate about your role as a memory-maker and historical record preserver. Say no to adviser burnout and yes to another great year(book)!

7 yearbook traditions we love
Building a yearbook program relies on building traditions with your staff and school community. When we build school traditions, we create a culture and expectations while transmitting values. That doesn’t equate with inflexibility, rather it provides a guide within which we ebb and flow. While the greatest tradition is the yearbook itself (more on that in a second), here are six others to build a lasting program.
An American institution since George K. Warren took photos of graduates in the late 19th century and sold them as prints to share, yearbooks are the definitive school tradition. What started off as a college-only record book now extends to elementary schools.
This adviser has watched students from world history classes grab yearbooks from the idea library and scour copies from other schools while awaiting the bell to ring. With no connection to the students, these school desk critics compared how our programs—such as ASB, athletics, and the arts—matched up with theirs. They evaluated the theme, mainly the visual components, and gave me a three-minute critique. [Pats self on back for not laughing.]
1. Staff traditions
Yearbook wedding
Trending with middle and high school staffs, yearbooks weddings are a pre-production celebration where students pledge themselves to the task.
- The yearbook staff writes vows. This can be as simple as providing a positive atmosphere and completing assignments on time, or as specific as SMART goals for coverage and sales.
- The adviser invites parents and stakeholders (admin, student leadsherhip, coaches, parent org leaders) to attend
- At the ceremony, students recite their vows and receive a ring
- Everyone eats cake
#Yerdsgiving
First of all, yerd means yearbook nerd and it’s polarizing: people loathe or love it. (For those of you playing along at home, I'm the former.) Regardless, #yerdsgiving is the annual gathering of journalism students over food before Thanksgiving break. Some students lead crafts or games, some practice the art of gluttony. Most take the time to craft thank you cards to school staff and students as well as vendors and parents who helped the yearbook team gain momentum at the start of the year. This yearbook tradition is also an avenue to invite alumni to inspire your current staff or even families to celebrate.

Holiday gift exchange
While it seems like you have a gift exchange for every group with which you’re involved, keep it simple:
- Hold a re-gift exchange where students bring in something they received and don’t want.
- Exchange variations on a theme such as socks or snacks
- Put dollar store stockings up with 3x5 cards so classmates can write notes of encouragement
Yearbook banquet
Being on yearbook staff has to have perks, and one is a fancy-pants dinner before distribution. (Please note fancy is a relative term: we’ve done everything from a chain Italian restaurant to a steakhouse to a revolving sushi bar.) Think of your typical sports banquet: the coach (adviser) stands and speaks a few remarks on the team then hands out the awards. Traditionally, the yearbook staff unwraps their yearbook and shares it with their family. It’s special because they have the first copies and it’s individualized time for parents to see all the work their child accomplished.
2. Thematic marketing
Theme surveys are a fun way to raise awareness that yearbook sales began as well as get buy-in from your school on the theme. While yearbook purists believe a theme should apply to one year only, you may find several coveted visual aesthetics from Treering Yearbooks’ theme gallery.
The big reveal can happen once you receive your printed proof and you can make videos and social media teasers with your staff. Some schools make it one of their back to school traditions to reveal the yearbook theme at the start of the school year and use it throughout to market the book and generate content by
- Making T-shirts and wearing them when they are photographing events (remember that QR code to buy!)
- Creating thank you cards, Google slide presentations, and posters via theme graphics
- Asking related questions via social media; for example, with a theme “Give + Take,” ask for multiple takes on the fun run or invite athletes give their top five songs for warm up
- Keeping everything yearbook-related in your theme colors
3. 3x yearbook coverage
Maximizing coverage should be a tradition for every yearbook staff. If we are truly telling the story of the year, it involves everyone on campus. From a yearbook marketing perspective, if students know they are in the book, they will want the book. If they want the book, parents will buy the book.
We love thinking of yearbooks as memory books—they are—they are also a component of the historical record.
4. Staff recruitment and announcement
Your yearbook team is a big deal. Say it with me, "We are a big deal!" Create yearbook staff traditions around recruitment and the announcement of who made the cut each spring. Some ideas include
- Host a party and pass out applications
- Crown your staff publicly (feather boas, sashes, and capes work well too)
- Publicize who is on your yearbook team in newsletters, on social media, and in the front office so parents, coaches, and prospective volunteers can get in touch with you
After all, your yearbook team is a big deal.
5. Freeze time
You don’t have to be Doc and Marty McFly to time travel. Year after year, yearbooks create a personal history; the yearbook might be a few hours of reading during summer, and when you fast forward five or ten years, it will be so much more. Moms, let’s face it, our yearbooks give our kids license to laugh at our hair, clothes, and priorities.
The value of a yearbook does not end at graduation.

6. Dedication
Does your school have a tradition of dedicating the yearbook to a member of your staff or community? If not, skip to the next section. This gets political.
A yearbook dedication could
- Thank a teacher for being a yearbook champion
- Recognize an administrator who is retiring
- Honor a member of the faculty who impacted the school community
- Be a blanket statement to a group on campus, such as the robotics team who went to the national championship for the first time
- Congratulate the promoting/graduating class
7. Yearbook distribution party traditions
Many schools have a special, extended lunch or tie distribution to an all-school event to celebrate the end of the year. A word of advice: if this is a new tradition for you, connect with school leadership early to plan your distribution day.
The good
A simple party with pens, tunes, and tables is all you need. Always invite non-buyers to include them in the signing. More than likely, they'll be the first to buy a book next year. (And if you're using Treering Yearbooks to publish, parents can still buy a book!)
Pizza, a DJ, and pens that correspond to class colors take it to the next level.
The extra
One K-12 school I know used to have students line up outside a bounce house. After they climbed up and slid down, they'd receive their yearbook.
Another elementary school invites the middle school cheerleaders to the signing party. They perform and pump up the 5th graders for fall.
Whichever yearbook traditions you employ, make sure they match your community. If you're just getting started, select one and own it. Once it's routine, add another.
QR Code is a registered trademark of DENSO WAVE INCORPORATED.

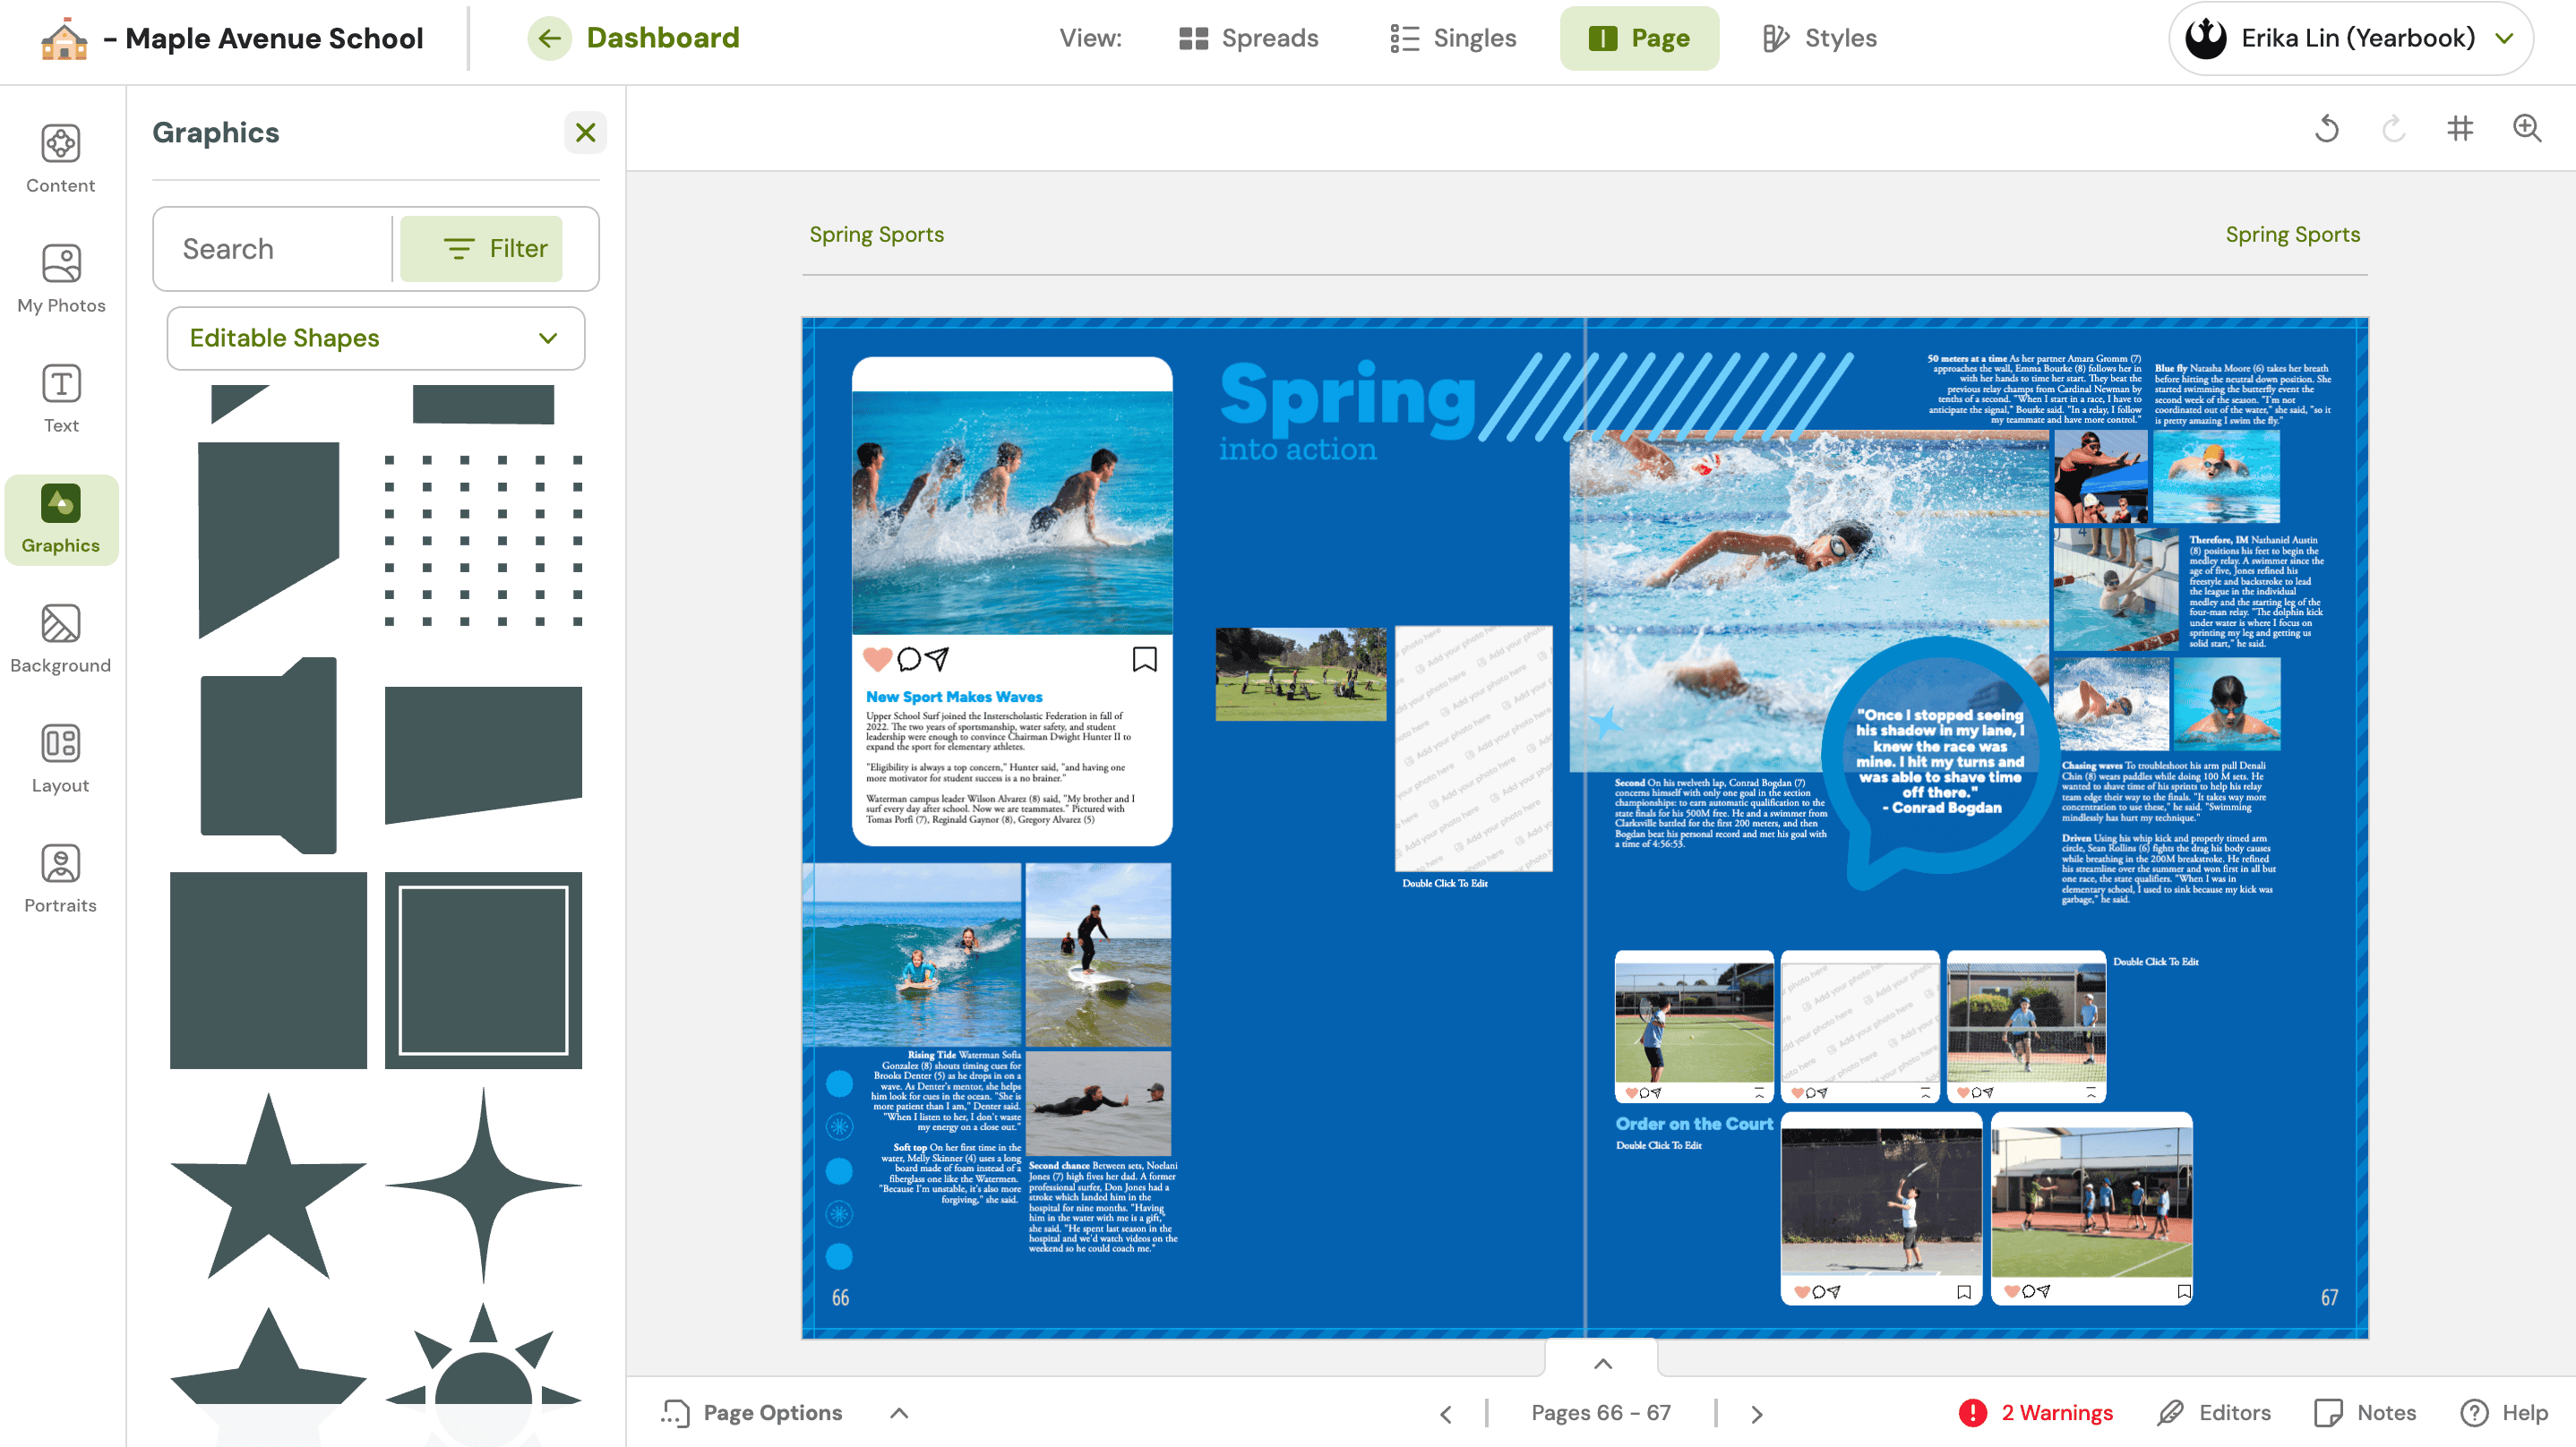
Teaching yearbook: design inspiration from anywhere
Treering’s click, drag, drop, and done tools aren’t for every design team. In an age of visual search, Pinterest, and AI, we advisers are refining strategies for guiding students in visual theme development. For those who take a more hands-on approach, there are generally two blockers:
Where do I find fresh design inspiration?
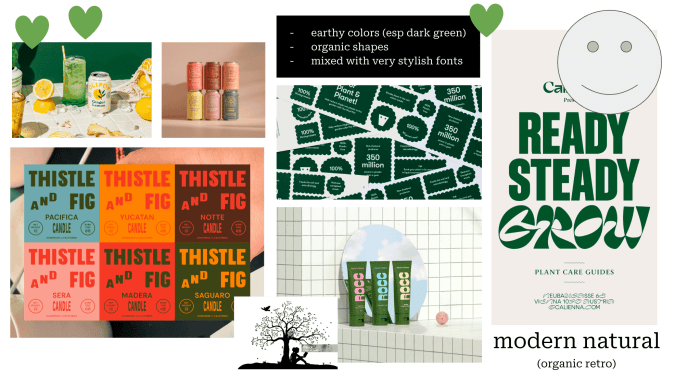
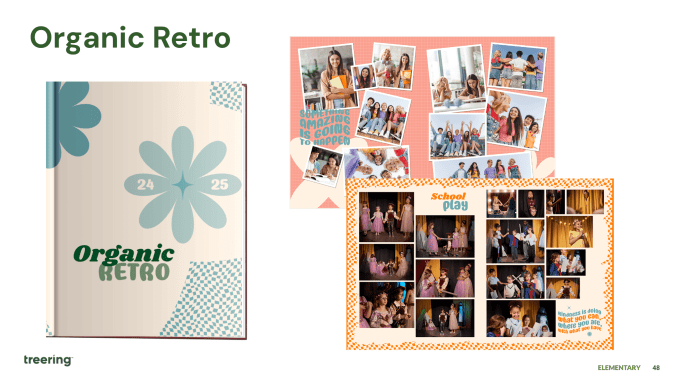
Look at the graphic design on visual media as a springboard for ideas, not as a rigid template to follow. These real-world examples can provide valuable insights into current trends, color palettes, typography, and overall composition.
Here’s how you do it with your yearbook class or club:
Two real-world examples and applications
Look at the Mendocino Farms' website: its layout, color scheme, and font choices. In the video below, yearbook creator Liz Thompson shows how to recreate similar elements within the yearbook page in fewer than four minutes.
Through practical demonstration, Thompson translates real-world inspiration into tangible yearbook designs.
Our second example features a magazine layout. White space, typography, and image placement could easily be adapted for a yearbook page.

Notice how Thompson uses the design's overall flow and visual hierarchy to draw the viewer's eye to specific areas of the page.
Treering-specific tricks
Bringing outside inspiration into your yearbook doesn’t have to be a manual process. Treering engineers incorporated tools to simplify the DIY design process. Our top three include:
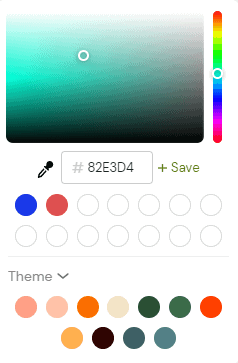
Using the color picker eyedropper
Extract colors from an image and apply them to the yearbook design. This technique allows for a more cohesive and visually appealing color palette.
Create and Apply Text Styles
Adjust font sizes, line spacing, and text alignment, then save it as a headline, subheadline, accent—wherever you want to name it—a style you can apply with a click.

Add editable shapes
Incorporating various graphic elements—lines, boxes, and illustrations—can serve as an accent for emphasis or visual separation if you’re using modular design.
How to use this at your next yearbook class or club meeting
As a group, watch the two instructional videos above. Follow Thompson's instructions to create a similar look.
Then, have students bring in an object with a design they enjoy. Discuss which principles of design are used. Pick one element you can re-create and add it to a yearbook spread. This can be a group or individual activity. The goal is to embrace a spirit of inspiration and collaboration as you breathe new life into your yearbook design.
This blog is adapted from Liz Thompson’s Design 201 session from TRL 24 POV: I’m on the Yearbook Team. Thompson, a former classroom teacher and yearbook adviser, serves on the Customer Success Team at Treering Yearbooks.
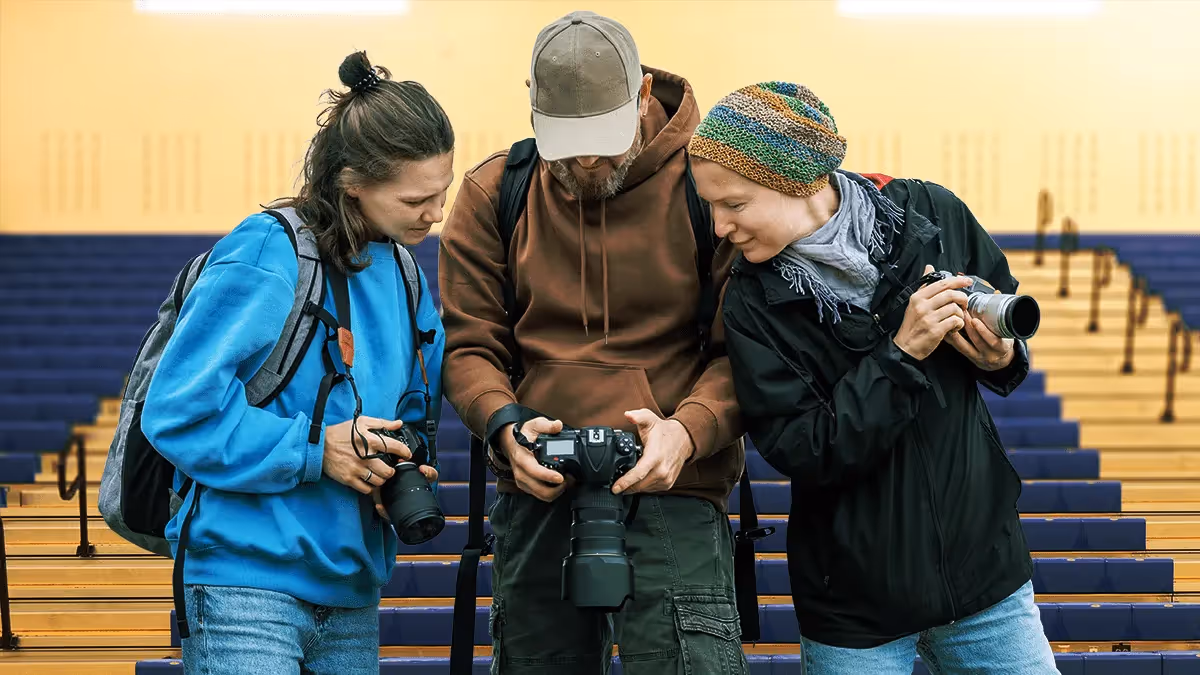
Yearbook photo ideas: 3 tips on composition
By improving the composition and lighting of your photos, you’ll be able to use any device with confidence. While drool-worthy mirrorless cameras are all the rage and DSLRs “look the part,” cellphones, tablets, and point-and-shoots can also produce great photos. The key is your perspective and awareness of the action.
Composition basics
Composition creates compelling photos. When composing a shot, think about elements like background, framing, balance, leading lines, depth of field, and viewpoint. Even at sporting events or the school musical—when you’re limited on where you can stand—take some time to go through this list in your head to intentionally get the strongest photos.
In the digital age (did you read that in my grandma voice?), just clicking away and hoping for a usable image can be a waste of time. Being intentional for five to ten moments will help you anticipate action and yield more authentic images.
Background
If it’s not drawing the eye to your subject, you might want to get rid of it. Take time to assess what is behind your subject:
- If possible, remove distractions like garbage cans, signs, or other people
- At sporting events, stand on the opponent’s side so you get your fans’ reactions
- Position a photographer backstage or in the sound booth to capture behind-the-scenes action
Simple camera fixes such as adjusting the aperture (see “Depth of Field” below) or environmental ones (see “Leading Lines”) can help improve your photos’ backgrounds.
Framing
Your photos should focus on key interactions. For example, a tight frame on a student meeting their teacher on the first day of school captures a meaningful moment.
Alternatively, a wider frame might show the atmosphere of an event. Consider how close you want to be and what details you want in the shot.
If the event and space allow, move around to add diversity to how you frame your subjects. My yearbook adviser used to say, “Zoom with your feet.” It’s the second-best piece of photo advice I’ve received. (Lighting takes first billing for those of you playing along at home.)

Balance
While symmetry works well in group shots, you might also want asymmetry to draw the eye to a specific part of the frame. Think about how elements are weighted in the frame to achieve the mood you want.
In the example above, the laptop is what holds us captive.

Leading lines
Use natural lines—like desks, edges of buildings, or stripes on the school bus—to draw the viewer’s eye towards the subject.
Depth of field
This can be easily achieved with portrait settings on phones and cameras. Blurring the background adds drama and focuses attention on the subject. Whether you’re using a DSLR or a smartphone, depth of field, or aperture, can elevate your images.
Viewpoint
Experiment with angles. Try taking shots from above, below, or behind to add variety and interest. Different perspectives help tell the story more creatively and capture aspects that a straight-on shot might miss.
Lighting essentials
To say lighting is crucial is an understatement. In photography, too much or too little light can impact the photo’s quality. Be aware of your main light source. If you’re at an event, take a moment to assess from where the best light is coming.
Tips for indoor photography
Windows can be problematic if they are behind your subject. Unless you are aiming for a silhouette, keep them to your side.
If the lighting isn’t ideal, adjust. Sometimes, just asking students to move to a better-lit area can make a big difference. They’re usually happy to accommodate. For example, if you are photographing a dance, set up an area to take group photos with good lighting.
Using flash can also help in tricky lighting. For instance, in a situation with backlighting (like a window behind your subject), a fill flash will illuminate the subject and balance the exposure. In low-light conditions, adjusting your camera’s ISO or shutter speed with the help of a tripod can also help capture the shot without losing detail.
Outdoor photography considerations
Outside, natural sunlight is ideal, and just like inside, positioning is important. Move so the sun is off to the side or behind your subject to reduce harsh shadows and prevent squinting. Most professional photographers avoid outdoor photoshoots when the sun is overhead for this reason. (Basically, when the fun run is happening.)
We recommend using a tripod and angling yourself so the sun is at your subject’s side.
Remember that a good photographer’s eye matters more than fancy equipment. Whether using a DSLR or a smartphone, focus on framing, lighting, and timing to compose meaningful moments.
This blog is adapted from Sandra Violette’s Photography session from TRL 24 POV: I’m on the Yearbook Team. Violette, a professional photographer and PTO mom, serves on the Onboarding and Engagement Team at Treering Yearbooks.

Yearbook in 60 days - part 2: get the word out
This blog is part two of a four-part series on creating a yearbook in 60 days. Each part contains two weeks' worth of tasks and inspiration, and this time, it’s all about promoting and designing the yearbook.
There are links to articles, videos, and additional blogs throughout. Treering editors, you'll need to log in to your dedicated help center to view some.

Yearbook (yes, it is a verb) along with us on Facebook, Instagram, and TikTok.
1. Share the good news
You’re building a yearbook, which is a mic-drop task in itself. People need to know how awesome (you are) the yearbook will be. Treering created flyers, QR codes, and personalized links for you to quickly share.

Yearbook marketing 101
“Buy your yearbook” is not your only message.
Yes, you are selling the yearbook. You are also rallying stakeholders (administrators, teachers, plus students and their families) to support the yearbook project by purchasing, sharing photos, donating books, and joining the yearbook staff next year. So, go get them!
Identify the best to reach each stakeholder where they live. In other words, go to them. Utilize all the communication channels available to you and evaluate which ones work best for each group.
Possible channels include:
- Staff newsletters
- Morning announcements
- All-call services
- Parent organization website
- In-school bulletin boards
- All-school events
- School meetings
- School sports games
- School arts events
- Social media
Yearbook marketing resources
2. Autoflow portraits
Ready to level up your yearbook achievement? Portraits comprise 40-60% of a yearbook. Between the choice of a Heritage Cover and building portrait pages, you’ll be halfway finished. Take a minute to let that soak in.
If a professional photographer took your school photos, chances are you have a PSPA (Professional School Photographers' Association) file. This is industry standard. With it, you'll be able to go to the portrait tab and follow the prompts. (If you don’t have a PSPA file, you can still use autoflow. See the resource section below for instructions.)
Portrait resources
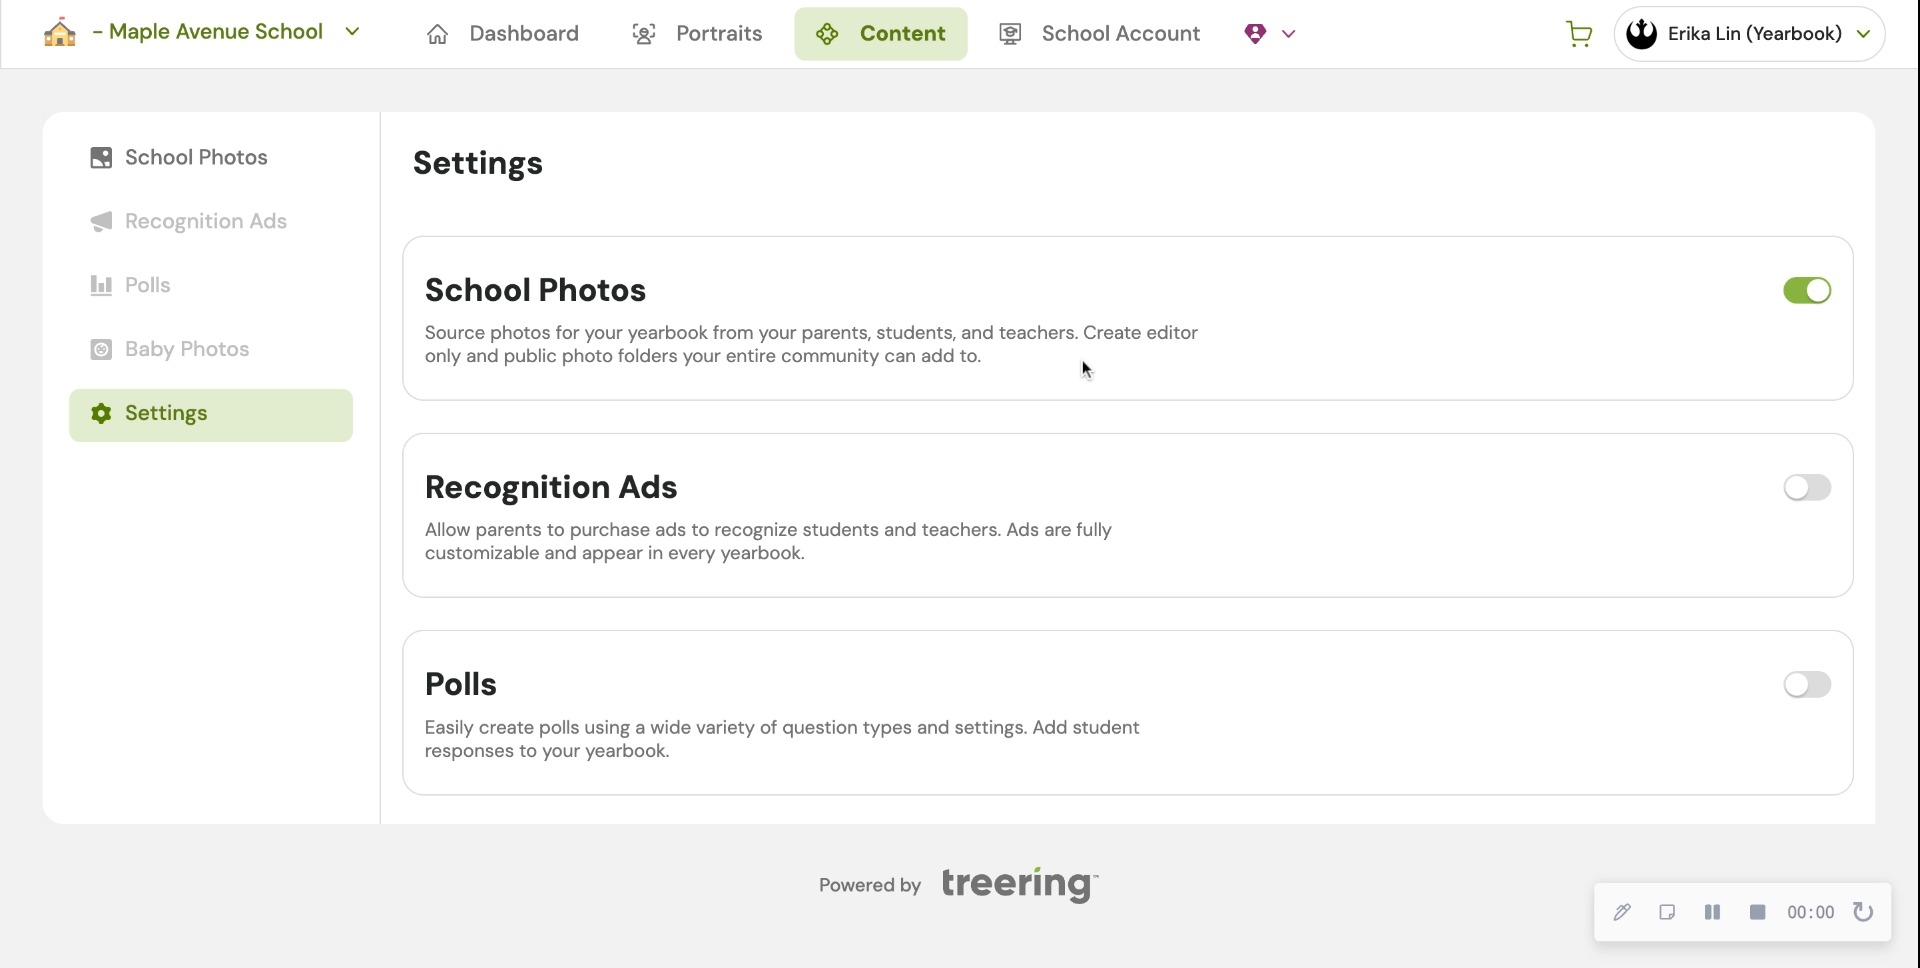
3. Fill your photo folders
Remember when we set up the photo folders, and some were green? That means only the editorial team (you!) can see them and their contents. The yellow public folders are marked public, and your school community can share photos by
Treering’s privacy measures prevent just anyone from uploading to your shared folders. Only your invited school community members with activated yearbook accounts can see and share.
Parents and editors can add photos from their computer or mobile device as well as third-party connections to your personal Facebook, Instagram, Dropbox, Google Photos, and Google Drive.
5 Ideas to source yearbook photos
If you build it, will they come?
- Send each teacher a link to their class folder; ask them to share it with their room parents
- Share event-specific (hello, last Friday’s zoo trip) asks via social media
- Show coaches and club leaders how to add photos via their phones
- Connect with event organizers so they know you have dedicated space and you need pics
- Comment, “Will you share this for the yearbook [email/link]?” on Facebook photos you want to include
Crowdsourcing resources
- Article: Email Photos Directly Into A Photo Folder
- Article: Sharing Photo Folders with the School Community
4. Build your spreads (First semester events)
As your photos fill your folders, drag them onto your spreads. There are two ways to quickly complete pages using Treering’s built-in tools: auto page layout and templates.

Everything is fully editable, so if you need to add or remove a photo, text box, or piece of theme art, permit yourself to do it!
Yearbook design resources
- Article: Changing the Background on a Page (remember to login to view)
- Article: Page Editing Options - Graphics
- Article: Page Editing Options - Layout and Design
Feeling adventurous?
Create your own layouts using Treering’s drag-and-drop design tools.
Intermediate and advanced design resources
- Examples: Winners of the 2024 Design Contest
- Blog: What is Modular Yearbook Design?
- Article: Setting Default Text Styles
- Article: Setting Default Photo Styles
- Article: Alignment Tool - Customizable Guideline Grid
- Templates: InDesign
Halfway through building a yearbook in 60 days, you should split tasks between gathering photos and adding them to the book. The cover is finished. Portraits are flowed. First semester events are filling in. Congrats!

Before teaching yearbook writing, read these 7 stories
One of the best ways to get better at writing is to read great writing. Similarly, the only way to teach students how to create exceptional yearbook copy is to absorb and share as much great writing as you possibly can. Here’s why: Good writing serves as a model of excellence for flourishing writers. It has the ability to teach and inspire at the same time. (Talk about powerful stuff.) Encouraging your staff to spend time reading—and imitating—good writing can drastically improve the quality of the yearbook copy they produce for your book. If your goal is to include yearbook stories that capture the minds and hearts of your community even more than the photographs do, reading and discussing great nonfiction is key. Ideally, you’ll be doing that before, during, and after a yearbook writing assignment, but we get that there are other parts of the book to cover, as well.
In any event, we figured we’d give your reading list a jump start by pulling together seven pieces of truly exceptional nonfiction. It’s probably worth noting that none of these pieces appeared in a yearbook. And there’s a reason for that. From saving a local library that has served a downtrodden community’s lone bright spot, to exploring the philosophical underpinnings of cooking live lobsters, these pieces offer young writers a guide to finding their voice and inspiration to chase a great story. They also happen to give you some great teaching material. Besides, we’ll pretty much guarantee you’ll walk away from each piece with beautiful prose flitting about your head, and tears (of joy, laughter or sadness) in your eyes.
7 stories to help teach better yearbook writing
1. “The North West London Blues,” by Zadie Smith
You need to read this because…
Zadie Smith is an excellent writer and one of the most influential writers in Britain (which is pretty much the same as saying she’s one of the most influential writers in the world, because, come on, we all know how much the Brits love to write). “The North West London Blues” is a piece in defense of the Willisden Green Library, a place she frequented as a child and that clearly functioned as a cornerstone of the community. Set to close and make way for commercial endeavours, the story is built around a community’s peaceful protest of the library’s closing.
Smith talks through her own experience with and passion for the library, generally speaking, as a necessary component of any community, and does so with beautiful prose. Her sprawling narrative introduction gives way to highly descriptive writing that weaves personal experience with an argumentative streak yielding a piece of writing your staff will love. Stylistically, Smith deploys parentheticals throughout the piece in an interesting way, using them to insert long swaths of supporting information, as if the speaker grabbed a snippet from a pertinent Wikipedia page.
Share this story with students who might enjoy weaving elements of personal narrative and rich description in a piece shedding light on a serious economic or social problem impacting the school community.
A Brief Snippet of What Makes this Story Great:
“Well-run libraries are filled with people because what a good library offers cannot be easily found elsewhere: an indoor public space in which you do not have to buy anything in order to stay.”
Read “The North West London Blues” here
2. “Taylor Swift Runs the World,” by Chuck Klosterman
You need to read this because…
Since the likelihood of your yearbook including a profile of some sort is rather high, knowing what a great one looks like is imperative. A profile shouldn’t be an all-out fluff piece, an unabashed celebration of an individual. But writing something that allows readers to get a glimpse of the subject without deifying them can be quite difficult. It requires tact, a strong voice, and the ability to sift through facts and quotes, determining what matters most before spinning it into a cohesive story.
“Taylor Swift Runs the World” is an exceptional example of a profile piece. Klosterman’s patented style (gratuitous hair metal references and self deprecation) makes for a great read, and the stark contrast it creates when compared to the version of Swift depicted creates great tension throughout the piece. Chuck Klosterman is a criminally underrated national treasure. The guy’s hilarious, impossibly smart, and writes with a truly unique voice.
A Brief Snippet of What Makes this Story Great:
“There’s simply no antecedent for this kind of career: a cross-genre, youth-oriented, critically acclaimed colossus based entirely on the intuitive songwriting merits of a single female artist. It’s as if mid-period Garth Brooks was also early Liz Phair, minus the hat and the swearing. As a phenomenon, it’s absolutely new.”
Read “Taylor Swift Runs the World” here
3. “Consider the Lobster,” by David Foster Wallace
You need to read this because…
“Consider the Lobster” is probably more of an assignment for an AP English class, where you’d discuss the underlying philosophical argument, and take turns wrestling with the obscure language and the paragraph-length tangential deep dives. You can read the essay’s eight pages over and over and come away with your mind blown every time.
David Foster Wallace is (in)arguably the most prolific essayist of the 90’s/aughts. His footnotes are often more illuminating (and more wonderfully written) than entire volumes produced by his peers. This essay is an interesting, off-kilter entrypoint into existential philosophy and the opulent-ish world of gourmandizing. Share this with your staff as encouragement to find their voice (no matter how “out there” it might be). Just be sure your staff doesn’t try too hard to emulate DFW: it’s impossible!
A Brief Snippet of What Makes this Story Great:
“Is it all right to boil a sentient creature alive just for our gustatory pleasure? A related set of concerns: Is the previous question irksomely PC or sentimental? What does “all right” even mean in this context? Is it all just a matter of individual choice?”
Read “Consider the Lobster” here
4. “The life and times of Strider Wolf,” by Sarah Schweitzer
You need to read this because…
If this one doesn’t make you cry, you’re wrong. Written over the span of months, Boston Globe reporter Sarah Schweitzer’s soul-wrenching story runs the gamut, detailing the life and circumstances of a young boy from rural Maine named Strider Wolf. A victim of horrific abuse, abandoned by his parents, and raised by his grandparents, Strider somehow manages to emit glimpses of optimism and happiness on a daily basis.
This is a phenomenal example of telling an utterly tragic story with tact and beautiful prose, and the perfect way to introduce your staff to emotionally impactful writing that isn’t overdone. An added bonus: the accompanying photography won a Pulitzer, so be sure to share this one with your whole staff.
A Brief Snippet of What Makes this Story Great:
“A few weeks later, shortly before the end of school, Strider sat alone, under a DARE sign, curled into a wall alcove. The lunch ladies in blue smocks had piled his tray with potatoes and carrots and chocolate milk, but he picked only at a package of Pillsbury mini-bagels. It was grab bag day. A dollar bought a brown paper bag of goodies, like pencils and erasers. Two mothers from the PTO were stuffing bags at the table over from him. Lanette had told him that morning she didn’t have a dollar.”
Read “The life and times of Strider Wolf” here
5. “Friday Night Lights,” by Buzz Bissinger
You need to read this because…
It revolutionized the way people write about sports. It’s a sociological study of small-town Texas in the late eighties. You loved the TV show. Football season is over. Need I go on? Bissinger’s essay (and book, if you haven’t read it) chronicle a Texas high school football team and the surrounding community in the late 1980’s. An outsider (from Philadelphia), Bissinger became a part of Odessa, learning the town's racial, social, and economic machinations, and penned his book in a way that tackles (had to) these themes very much head on.
While it’s unlikely your yearbook will feature pieces riddled with racial undertones, Bissinger’s ability to write about stories that didn’t take place on the field—as well as the actual accounts of football being played—in “Friday Night Lights” are excellent examples for your staff to check out.
A Brief Snippet of What Makes this Story Great:
“Crousen was saddened and dismayed. He couldn't help but wonder if Boobie, because of his natural athletic ability, had gotten too used to having everything handed to him.This August, while other college players prepared for the beginning of football practice, Boobie stood in front of his home in the Southside, chatting quietly with members of his family. It was then that his cousin Jodie found out that Boobie wasn't going back to Ranger and would sit out a year. She was shocked and worried."You're just going to rust up, "she said."It ain't gonna happen," replied Boobie, for he knew better. "It's a God-given talent."
Read “Friday Night Lights” here
6. “The Last American Man” by Elizabeth Gilbert
You need to read this because…
Don’t be shocked if you read this piece by Eat, Pray, Love author Elizabeth Gilbert and decide to move to the heart of Appalachia to build yourself a yurt and start clearing trees for fields. “The Last American Man” is another profile, though on the opposite end of the spectrum; instead of the subject being someone of unimaginable fame, Gilbert details the life and philosophy of a man who has chosen to eschew mainstream society, instead preferring the simplicity and joy of self-sufficiency (think Chris McCandless with more know-how and much better luck).
If you have a staff that swears its high school is so boring they’ll never be able to find a unique story inside its four walls, show them this. Gilbert proves that anyone, anywhere can be fascinating. Warning: There are a handful of F-bombs in the introductory paragraphs.
A Brief Snippet of What Makes this Story Great:
“Eustace hated to blow its beautiful head off, so he took his knife from his belt and stabbed into the jugular vein. Up came the buck, very much alive, whipping its rack of antlers. Eustace clung to the antlers, still holding his knife, and the two began a wrestling match, thrashing through the brush, rolling down the hill, the buck lunging, Eustace trying to deflect its heavy antlers into trees and rocks. Finally, he let go with one hand and sliced his knife completely across the buck's neck, gashing open veins, arteries and windpipe. But the buck kept fighting, until Eustace ground its face into the dirt, kneeling on its head and suffocating the dying creature.That's what living in the woods means.”
Read “The Last American Man” here
7. “Death of an Innocent,” by Jon Krakauer
You need to read this because…
A lot of high school students read Jon Krakauer’s Into the Wild. It’s a classroom classic; why not show your staff the essay from which it spawned? “Death of an Innocent” manages to combine a series of interviews, passages from McCandless’ own journal, scientific research, and even snippets of Krakauer’s own time spent wandering after college, to create a fascinating piece. Pay particularly close attention to the way Chris McCandless is characterized. Is his rugged individualism heralded, or is he painted as a brash young man woefully under-equipped for the circumstances he sought out? Is there even a definitive answer to this question?
A Brief Snippet of What Makes this Story Great:
“His education had been paid for by a college fund established by his parents; there was some dollars 20,000 in this account at the time of his graduation, money his parents thought he intended to use for law school. Instead, he donated the entire sum to Oxfam. Then, without notifying any friends or family members, he loaded all his belongings into a decrepit yellow Datsun and headed west, without an itinerary. Chris McCandless intended to invent a new life for himself, one in which he would be free to wallow in unfiltered experience.”
Read “Death of an Innocent” here
Read them. Learn from them. Teach with them. Talk through style and technique, pointing out the rhetorical devices and artistic flourishes that your young writers might incorporate into their yearbook writing. Most importantly, though: enjoy.

Yearbook in 60 days - part 1: yearbook quickstart
Two types of people start a yearbook towards the end of the school year: those handed the crown minutes ago, and those with hundreds of other tasks for the school and now have “free” time to begin one more. Creating a yearbook in 60 days is doable. Promise. We’re breaking it down for you in four parts, each with two weeks' worth of tasks and inspiration. Consider this your yearbook easy button.
Throughout the series, there will be resources for inspiration and help.
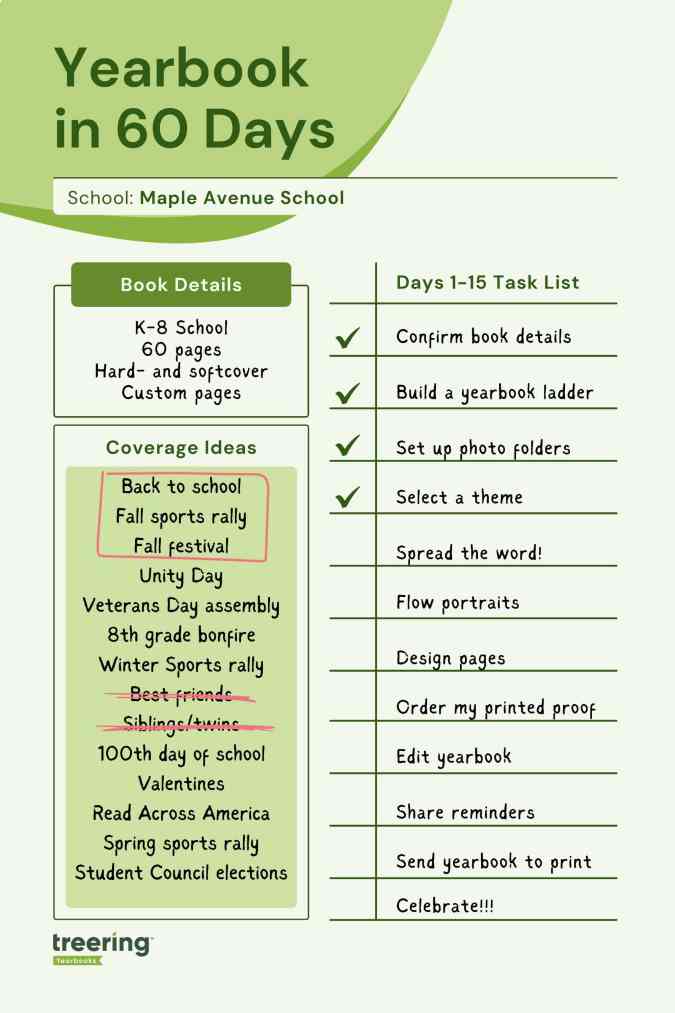
1. Confirm your book details
It’s tempting to jump into the glamorous yearbook tasks such as theme and design. There’s a little back-end work you need to do first for two reasons:
- Your dates will direct your workflow
- Your yearbook details determine the price of your yearbook
Dates
With Treering, you can change your dates at any time. Remember, your three-week turnaround begins once you hit Print Ready, and send your book to the printers.
For parents: custom pages deadline
Parents will see this date on their account, indicating when they should purchase the book or complete any customized pages. It doesn't impact the printing schedule.
Some parents {raises hand} need a little extra time and reminders to complete theirs. Treering recommends a cushion of about two weeks.
For editors: finish editing yearbook deadline and estimated delivery date
This is your one and only deadline for editing the book—and you set it! Select a date three weeks from when you want to distribute it.
You won’t be able to edit the delivery date directly. Treering automatically populates it by the date you choose for your deadline. If you need additional time to capture year-end events, no problem. Your three-week turnaround will align with your new deadline.
In part four, you’ll learn how to send your yearbook to print.
Pricing
The yearbook price will change in real time when you adjust the page count and cover finish. The best way to firm up your page count is to create a ladder (more on this below).

Shipping and index
Bulk shipping to the school is free. If you select this option, you choose how to receive your yearbooks:
- Sorted alphabetically
- Sorted by grade and then alphabetically
- Sorted by teacher and then alphabetically
Alternatively, many online or hybrid academies and schools electing to do a fall delivery choose the ship-to-home option. When parents order yearbooks, they also pay a flat rate shipping fee.
Book details resources
- Video: Chief editor dashboard
- Free Live Webinars: Treering’s Yearbook Club
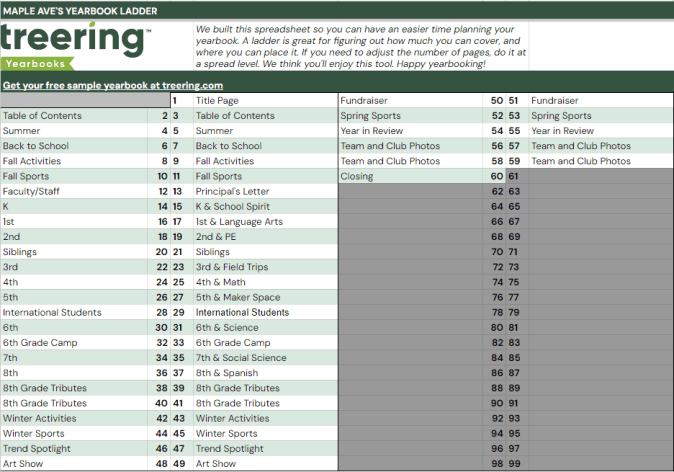
2. Build a ladder
A ladder is a chart that represents the pages in a yearbook. It’s the industry-standard tool to help you stay organized. On it, you allocate a topic to each yearbook spread (that’s yearbook-ese for two facing pages).
Because yearbooks tell the story of the year, there isn’t a codified order to how things go. Typically, they include
- Academics: school distinctives, achievements, and activities
- Events: fundraisers, activities, performances, before- and after-school activities
- Organizations: clubs and teams
- People: student, staff, and faculty portraits
- Thematic content: larger books employ divider pages to separate sections
To build your ladder, look at the last few yearbooks and the latest school calendar.
- Brainstorm the non-negotiable events, sections (people, arts, sports), and yearbook traditions
- Brainstorm features, specials, and theme-related content
- Decide how you will organize the book
- Allocate spreads
We love doing this digitally because it can be fluid. If your page count is looking overwhelming because of time or budget, combine some topics. Remember to update your page count on your book details so it matches your plan.
Yearbook ladder resources
- Google Sheet: Yearbook ladder template
- Google Sheet: Example ladders (there’s a separate tab for elementary, middle, K-8, and high school examples)
3. Set up photo folders
The best photo organization tip I can give came from Yearbook Hero Katie Parish. She said to create folders to mirror your ladder. This way, you know you are collecting content for every single spread you planned. And spoiler alert, your design process will look like this.

By investing the time to set up folders this way, you can simplify your workflow. Just open the corresponding folder and click, drag, drop, and done!
In the video below, you’ll see how to add folders and set up crowdsourcing features. Notice the Art Show folder is Editor Only. This means only you, the editor, can place photos in this folder. After activating their accounts, parents will see the yellow “public” folders and be able to share. At any time, you can make a folder Editor Only and vice versa.
In Part Two, we will give you five strategies to fill those shared folders with content so you can build your pages.
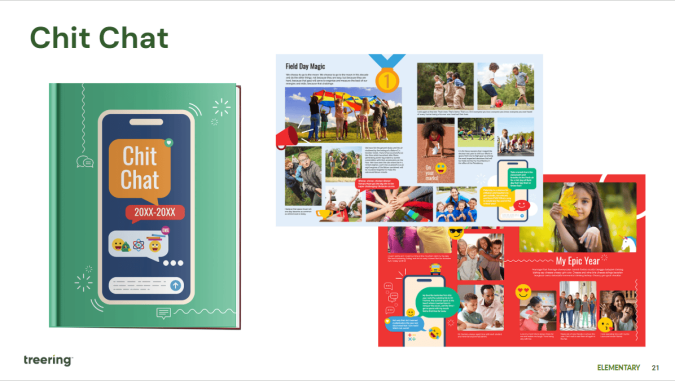
4. Choose a whole-book look
The Styles menu is where it’s at: you can create font and photo presets, adjust your margins (#TeamMarginsOff), and select the theme for your yearbook. Because I have 60 days to create a yearbook, I am skipping all the customization options and selecting a pre-designed theme to give my yearbook a unified look.
For a cover-to-cover drag-and-drop experience, the design team recommends the following Treering themes:


Theme resources
- Google Slides: All Treering’s yearbook theme kits
- Blog Category: Theme ideas and inspiration
Remember, get to know your dashboard; it’s the first thing you see each time you log in. Part two of this series will outline the promotion tools built in the yearbook builder and start the design process.
Yearbook with a friend
You can also recruit team members to help you build and market the yearbook. With Treering, you can set permissions and assign pages to help delegate your workload. Additionally, parents, teachers, and students can help gather content and promote book sales.
Organization resources for yearbook teams

Yearbook proofing tools
Raise your hand if you do your best proofing after the yearbook goes to print. We've all had that cringe moment when you notice two baseball players' names interchanged in the sports section or the student who joined the second semester flowed with the wrong class. We can all agree: proofing is critical for the yearbook creation process. Consistency and the proper tools will help you ensure no mistakes slip through the cracks.
One-time: printed proof
Would you like a copy of your yearbook before distribution day to check your fonts, colors, layout, cover texture, and photo quality? We've got you.
Once your yearbook is approximately 70% complete, order a printed proof of your yearbook to review the following:
- Cover alignment and bleed
- Portraits (accuracy, name size, and font)
- Gutter
- Bleed and margins
- Font choices, sizes, and colors
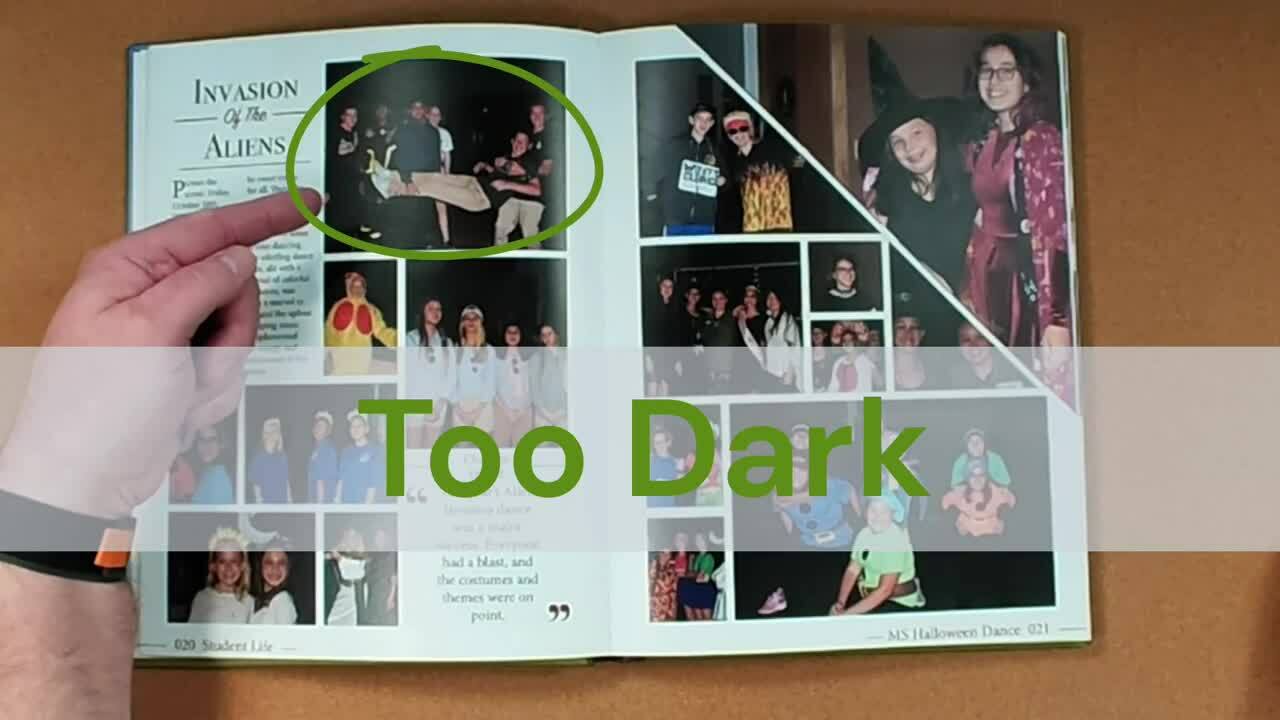
- Background contrast
- Spelling and attribution
- Photo clarity and color
Monthly: use PDF proofs
Print out a hard copy. Errors that are missed on the screen often jump out on paper. Create PDF proofs of class, event, club, and athletic pages to provide to the appropriate stakeholders for their review. Ask them:
- Is the content accurate? Is anything missing?
- Are names spelled correctly and referencing the correct person?
- Do these photos accurately represent the page's content and our student body?
Remember they need some time to review it, and should it require changes, you will need time to incorporate them.
Text proofreading tips
Read all captions, pull quotes, and headlines out loud. It may feel silly, and once you do it, you will see and hear the value:
- Tone, word choice, and sentence structure pop when you read them out loud
- If all your writing sounds the same, you may want to mix up sentence structure or type
Proofing yearbook quotes
Proofing is essential if your school uses expanded captions, pull quotes, or <gasp> senior quotes. A transcription tool for interviews, such as Otter.ai, which integrates with Google Docs, is handy for recording conversations.
Quotes must not be taken out of context. We do not alter quotations, even to correct grammatical errors or word usage. If a quotation is flawed because of grammar or lack of clarity, it may be paraphrased in a way that is completely true to the original quote. If a quote's meaning is too murky to be paraphrased accurately, it should not be used. Ellipses should be used rarely and must not alter the speaker’s meaning.
AP Style Guide
(Here's an article from CBS News and one from Slate that addresses language learners to review with your students.)
Sharing is caring: use printed proofs to tease the book
This isn't the first time we’ll make this suggestion, and it won't be the last.
Ongoing: rubrics and checklists
The best time to begin proofing yearbook spreads is after you’ve finished each page and well before you need to go to print. Informal editing can happen on screen with an editor or adviser. We also highly recommend peer editing on a projector with the whole team. Use a rubric to help guide the conversation.

Proofing and editing aren't a one-and-done thing. (Sorry not sorry!) It takes time to craft the perfect story and to create a solid layout from scratch. And if DIY is not your thing, the thousands of layout templates in the Treering library are at your disposal.