January 5, 2025
2
Min Read Time

A yearbook ladder is a nice—and concise—chart representing the yearbook’s pages. Use it at the beginning of the year, and you’ll be able to better plan your book length, prioritize all the ideas you have for sections and stories, and determine what you have room to cover. Best yet, it doubles as a visual reminder of what your book is supposed to look like when it’s done. It’s basically one huge, visual post-it note.
When it comes to planning a yearbook, our favorite piece of advice for new yearbook advisers is this: Begin at the end.
Tweet
It might sound counterintuitive, but knowing where you want to go before you start will help you get to that end goal a little faster—and a little happier. You can achieve most of that by picking your deadline, theme, and coverage goals, but there is one tool that will get you the rest of the way.
It’s the yearbook ladder.
Here’s what one looks like:
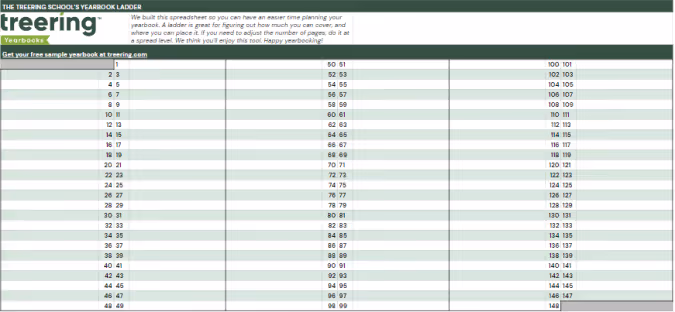
Other yearbook planning tools, like project management spreadsheets, editorial calendars and deadline charts, might seem to do everything except make your morning coffee for you, but those tools miss a key element that yearbook ladders offer: a “big picture” view.
Have you ever struggled to remember where, exactly, your Halloween parade collage is set to go? Or how many pages you had reserved for prom night?
Your yearbook ladder will tell you right away.
Because a ladder can show you your book from the proverbial 50,000-foot view, you’ll never be more than a quick glance away from knowing where in your book you planned for each feature to go (and how much room you gave them).
The ladder is an especially useful device that can help you determine the layout and flow of the book, to make sure that you’re not forgetting anything, and to check and see that any multi-page features look as good as possible in the way they span the pages.
To help you, we’ve compiled a quick list of things to do when you’re setting out to create your yearbook ladder:
Yearbooks are usually designed in facing pages, also known as spreads, where you will have one “story” on each spread. Keep this in the back of your mind when planning your layout, so you can make sure the content on your pages flows as smoothly as possible.
If you find yourself with features that are one or three pages long, consider placing candid photos, quotes, or filler items on the opposite page to complement the feature. It’ll help keep each spread cohesive.
And you know a good tool to easily tell if you’re going to run into that issue, right? Of course you do. Grab a yearbook ladder and get to work. It’ll help you make an even better yearbook.