Most popular


Subscribe to our blog
Most recent

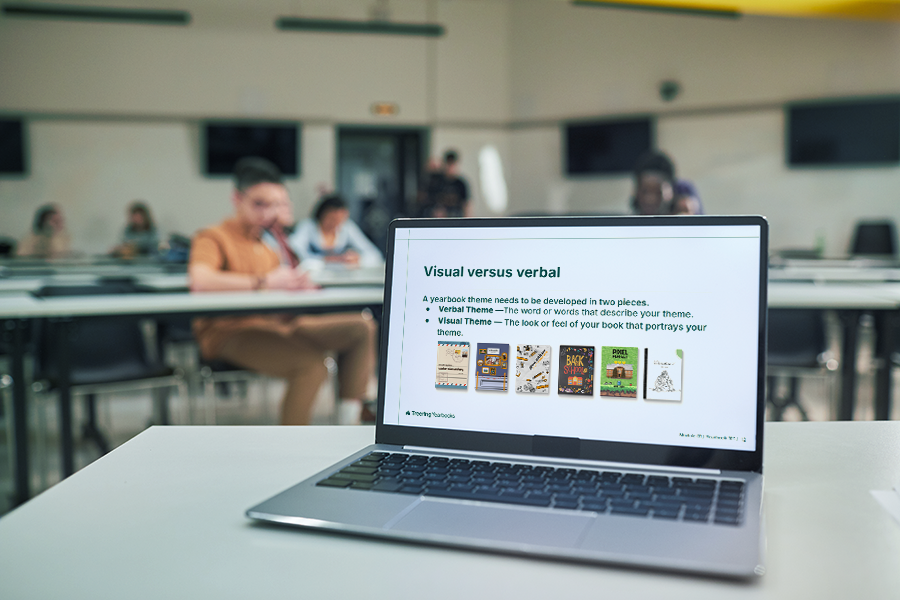
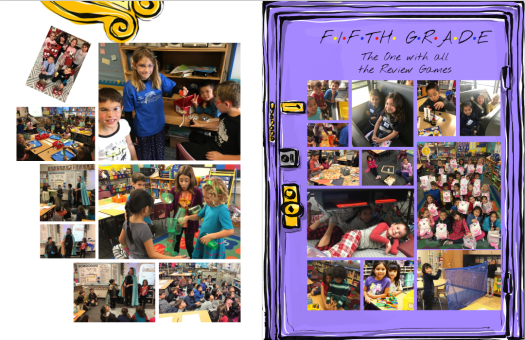
Yearbook examples: why studying sample content is critical (& how to do it)
Some days, you’re so deep into the pages of your yearbook that you can’t figure out how to solve a problem staring you in the face. That’s when you need yearbook examples from other schools.
School yearbook examples can be the single best tool in your arsenal when it comes to helping you solve design problems, find fresh story ideas and layout treatments, and build a library of best practices. It’s one of the reasons Pinterest has become a super-hot resource for yearbook ideas.The problem with Pinterest (and any other “lookbook” approach), though, is that you’re never going to get a full yearbook. And you’re certainly never going to get it in print. Both those factors mean you’re missing out on a lot; namely, context and the ability to easily revisit.
Why not, then, build up a library of yearbook examples from a bunch of other schools? It’s a tried-and-true approach at some of the best school yearbook programs across the country, and it’s really easy to do on your own. You just need to know where to look and who to ask.Inside this post, we’ll walk you through the reasons you should be getting your hands on other schools’ yearbook examples and how you can go about doing it.
Why you should be getting your hands on school yearbook examples
We already hinted at the big reasons for grabbing yearbook samples from other schools, but let’s take a second to make it super clear. You can’t beat having a whole book, in all its context, right in front of you. Think about it: You don’t release your yearbook one spread at a time on Pinterest for your students, do you? Of course not. You give them the whole thing, in all its printed glory, because that’s what the yearbook is all about. Each page and spread builds on the other to create a story of the entire school year. While learning how other schools shape their yearbook’s narrative is reason enough to collect yearbook examples, there are others, too.
Let’s explore a few of them:
- Find new design ideas. It’s a lot easier to have your yearbook team work through design problems and find inspiration when you have some great examples sitting in the same room as with them. And we’re not just talking about spread designs. Other schools’ yearbooks can serve as a way to work through design issues related to everything, including mods, folios, and section breaks—with the added benefit of seeing how those designs complemented theme development, were used as templates throughout the book, etc..
- Spot trends that fit your book. A new yearbook trend seems to pop up every year. Keeping track of them can be hard, and figuring out which ones are best for your yearbook can be even harder. It’s easier to spot them—and know which ones you like—when you have a library full yearbook samples from other schools.
- Identify story angles and themes. You might not know the students featured in other schools’ yearbooks, but that doesn’t matter much. They can still be a goldmine for identifying story angles, themes, and everything else that goes into shaping your yearbook’s narrative. Granted, you won’t use this stuff verbatim, but it’ll help you and your team look at your yearbook a little differently.
- Develop best practices. If you’re lucky enough to collect a bunch of yearbook samples that your team aspires to recreate, you’ve just found the ultimate resource for developing best practices. Gather those books, ask students to find commonalities among key aspects of the yearbook, and list them out. Use that as your guide for creating your own, best-of-the-best yearbook.
- Create new takes on old features. Some features, like table of contents and superlatives, are practically synonymous with the yearbook. But that doesn’t mean they need to be treated like status quo. In fact, a lot of schools have stopped doing that. Using your library of yearbooks as examples, you can find those refreshing approaches and draw inspiration to create your own.
- Practice critiques without hurting feelings. Teaching your yearbook team how to conduct critiques is important, but it’s not always easy when the only yearbook you have on hand is your own. It can be hard to be honest when you’re worried about insulting your friend’s work, and having yearbook samples can ease that tension and give everyone a safe place from which to practice critiques. Do that, and the actual critiques your team does will be that much easier and that much more effective.
If these reasons aren’t enough, well, here’s one more for you: Collecting yearbook examples can connect you with other yearbook advisers, volunteers, and students you would have never otherwise met. Those connections, which could become totally awesome friendships or just people to give you advice and listen to your yearbook problems, can be worth more than any of the other reasons listed above.
How to get yearbook examples from other schools
So, here’s how you can actually get your hands on yearbook samples from other schools:
- PTA/PTSA Meetings: Every PTA and PTSA is full of involved, invested parents. Some even create the yearbook. Start asking around at county-level or regional-level meetings to build yearbook connections and swap books with other schools in your area. Even if the PTA or PTSA doesn’t run the yearbook, they’ll be able to connect you to the person at the school who does.
- Principal Groups: Most principals meet in groups, whether it’s part of a school district’s requirements or a professional development opportunity. Before they go to their next meetup, have your principal ask his or her existing connections to bring a copy of their schools’ yearbooks, so you can have them. It’s an easy way to collect a bunch all at once. (Just be sure to give your principal enough books that he or she can return the favor.)
- State Associations: While most yearbook advisers likely know JEA and NSPA, the national scale of those organizations might be intimidating to some. Instead, look to your local scholastic journalism associations at the state level. These organizations can be less intimidating, and are focused solely on your helping schools in your state. Check out this list to find your state organization.
- Social Media: You’d probably be surprised at how many friends and family can be in a position to help you. And how many other people out there would be willing to help. Put out a request on Facebook or Twitter, and you’re likely to get dozens of offers for help. And don’t forget about LinkedIn. Nearly 6,000 people list themselves there as being elementary, middle, and high school yearbook advisers and volunteers.
Getting great yearbook examples for your yearbook team isn’t hard. You just need to know where to look and who to ask. Start following our tips, and you’ll quickly build a library of books that’ll help you solve design problems, find inspiration, and create a better book overall.

4 strategies for collaborating with parents, staff, and students on yearbook
Parents, school staff, and students all have opinions on what the yearbook should look like, cost, and include. That's fair, to a degree: the buyers and subjects of the yearbook are the key stakeholders in the yearbook creation process. Here are four tips for drawing (and keeping) them in close collaboration.
Yearbook collaboration tip #1: create consistent ways to contribute
Schools doing a Photo Dump Friday via social media or their weekly newsletter receive regular submissions. Using tools your school already utilizes is the best way to collaborate on photo collection from non-yearbook personnel, and a specific call-to-action yields the results you want:
- Share your first day snaps below! You may see them in the yearbook. #photodumpFriday
- We’re looking for sport photos for the yearbook! Share here! #photodumpFriday
- Get your child and fur baby in the yearbook: post your pet photo below. #photodumpFriday
Another way to partner with students and staff is to create timely contests:
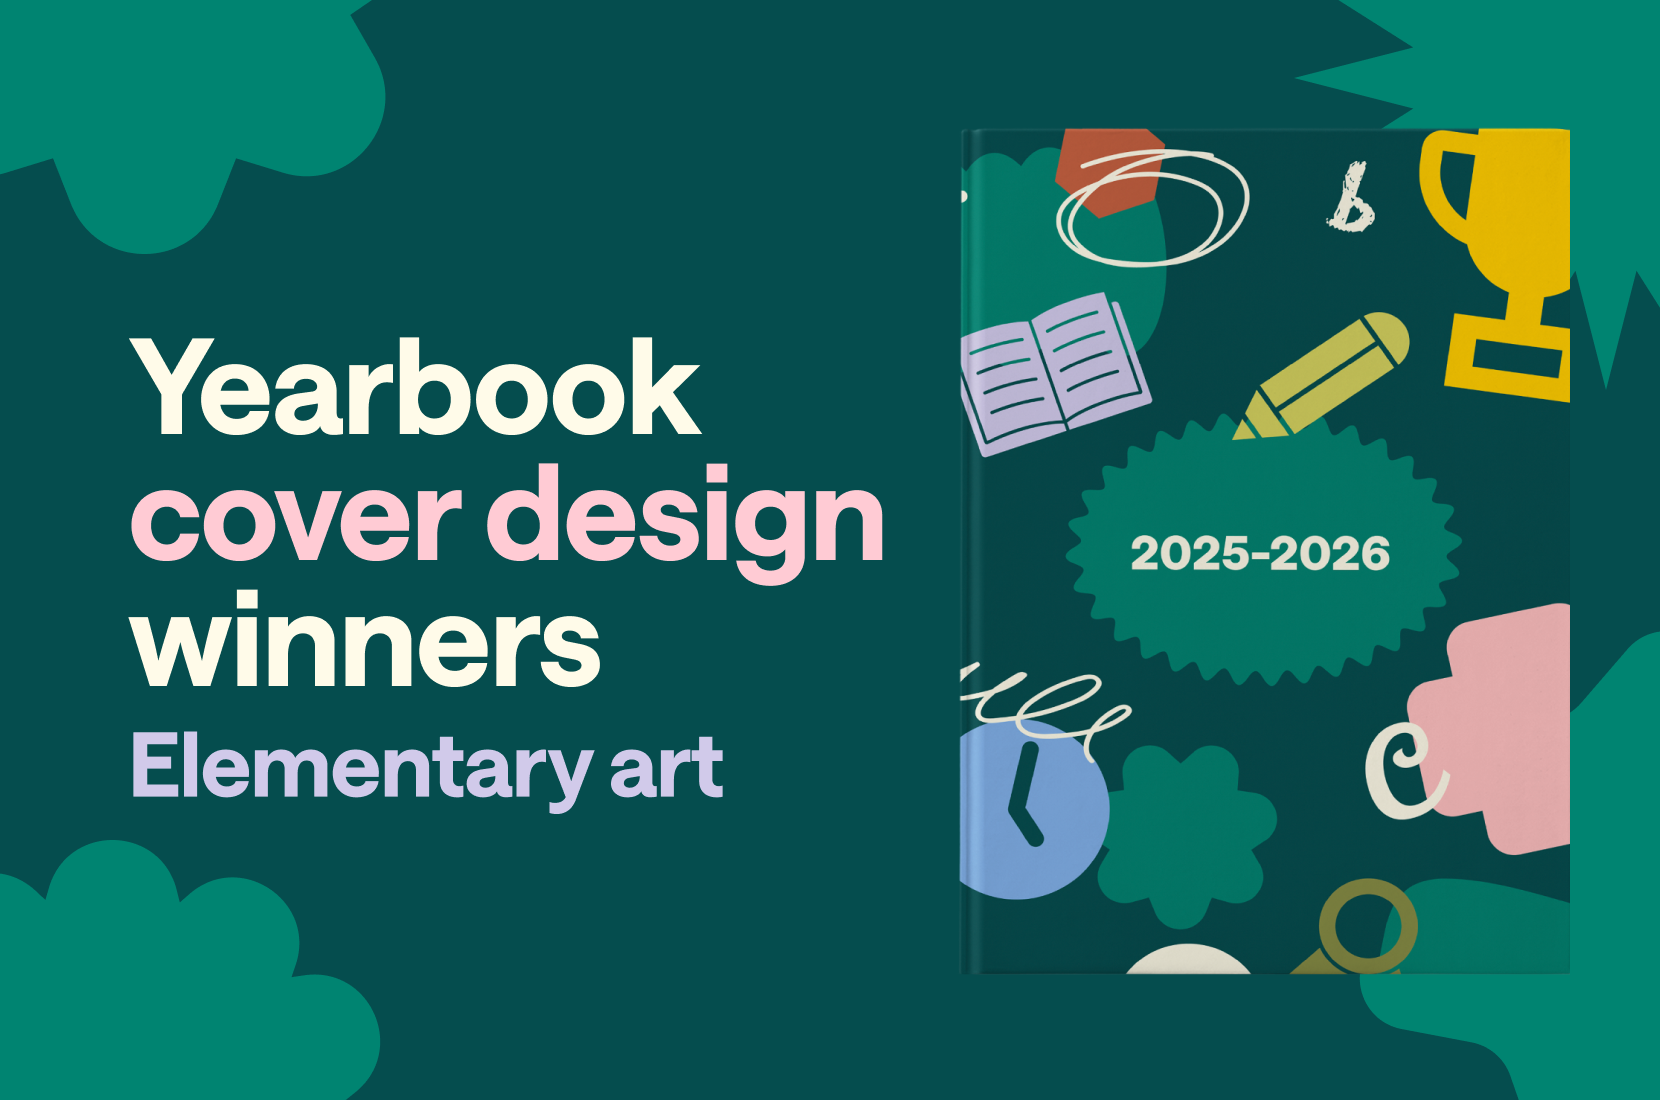
- Cover design contests or, similarly, a title page contest that encompasses theme elements and expresses them in original student artwork reaches a diverse group of students. Some schools create a spread with all the runners up!
- Increase your submissions for club photos while encouraging creativity with a team or group photo contest.
- During an all school event, such as Red Ribbon Week or Book Fair Week, create a scavenger hunt.
Many yearbook committees assign “beats” like professional journalists. There could be a reporter per grade, subject area, or event charged with making contact with event organizers and gathering photos. Set a measurable weekly goal, such as ten photos, per beat to ensure coverage. With a steady stream of photos coming in, editors and page designers will be able to assess which students and grades are missing.
Yearbook collaboration tip #2: go pro
Identify working parents who want to help, and have one-off jobs ready. You may consider trading ad space in your yearbook and some social media shout-outs for their services.
- Work with a professional photographer to be a guest teacher in your yearbook class or run a photo booth at Father-Daughter Dances, Spirit Week, or Teacher Appreciation or even take buddy pics and fashion shoots.
- Join forces with an event planner to create the party of the year for yearbook distribution.
- Petition a local caterer or restaurateur to hold a teacher appreciation/yearbook hustling breakfast during a morning staff meeting, do a Taco’bout Awesome luncheon for students who bought a yearbook, or hold a fundraiser dinner to purchase books for students in need.
- Local journalists, newspapers, or news media may offer tours of their workspace for your journalism students.
- Ask a graphic designer or marketing pro to help create a social strategy for increasing yearbook buzz or to brainstorm ideas for conveying the theme visually.
Yearbook collaboration tip #3: play nice in the sandbox
We all know that mom/teacher/dad/coach who controls every aspect of their program, and is a nightmare to work with. Don’t be that guy!

Collaboration includes delegation
For your own sanity, and that of your loved ones, be like Elsa and “Let it go!” Some of us have a hard time saying no because we want to please others, or because we want to ensure a quality end result. If this is truly a struggle area, select a few small tasks to share with others. Maybe coordinating picture day is not your favorite. Maybe it’s creating the index. Who can you recruit to help with these tasks? Build your dream team!
Also—if your goal is truly big picture—you’ll want to build a lasting program, and continual collaboration with your school community is going to build a tradition that will extend beyond your tenure. It’s important to share responsibilities and knowledge for the future of the yearbook team.
Have jobs ready and set clear expectations
Again, just because a person is involved with the yearbook doesn’t mean it has to be all-consuming—that goes for leadership too! Draft your volunteer roles with specific expectations. And remember to include ideas for working parents.
Some jobs with which parents can help are:
- Parent organization newsletters: get yearbook info in front of parents monthly
- Booster club liaisons: connect weekly with the biggest sports fanatics on campus to gather photos, stats, and scores, especially when sending a yearbook reporter isn’t always possible
- Class/grade reps: these people check in with classroom teachers weekly to coordinate in-class photos of projects, celebrations, and field trips
- Proofreaders and photo editors: clutch teammates who help ensure accuracy monthly
- Page designers: with Treering, you can assign a spread to a certain person or group
- Volunteer appreciation: find a fun parent who builds up others to coordinate social events, such as birthday parties, and an end-of-the-year volunteer celebration. If your school does an awards ceremony, you should ensure your yearbook volunteers are honored.

Campus staff can help with the above and:
- Getting an official roster from the front office to ensure names are correct and all students are in the book
- Sharing yearbook information on school social media and in parent communications
- Keeping the yearbook team abreast with events
- Contributing photos to shared folders
- Identifying students who need financial assistance purchasing a book
Follow up
When someone offers to help, because you have your plan in place, you seamlessly can plug him or her in! Not only is it disrespectful to ignore an offer, it also reflects poorly on your yearbook program. People talk. Let’s have them be your hype persons, gathering even more talent and book sales.
Yearbook collaboration tip #4: when in doubt, feed people
Hosting a round table dessert for student leaders or teachers will elicit information from many “smart cookies” about what key stakeholders would like to see in the yearbook. You may get new ideas for coverage as well as insights on yearbook buying practices.
Yearbook is a team sport. A “thanks a latte” or breakfast bowl letting volunteers know they are “berry helpful” will go a long way to let your teammates know you “donut know success” without each of them.
Bottom line: the best way to collaborate with stakeholders is to get to truly know people and their gifts, and show them deep appreciation for their contribution.

Classroom photo tips
Confession: academics photos used to be my least favorite. There is so much glory in snapping an action shot from a soccer game—those are the photos that bring the likes and shares. Well, what if we approached classroom photos the same way? Using the tips below, your classroom photos can be just as exciting.
Tip #1: Focus on the reaction
Miley was right: it's the climb. When we showcase the day-to-day, it provides meaning. A-ha moments, in-process projects, and brainstorming sessions are just as important as the end results. Have your camera ready for laughter during a monologue or the face of concentration during a science lab.
Tip #2: angles aren’t just for geometry
Of the problems with "work" photos is students' faces tend to be pointed at the desk. My yearbook adviser used to say, "Zoom with your feet." Here are some quick ways to do just that.

Use your environment
Desks provide epic leading lines and a captive crowd adds depth and excitement. Above, the combination of depth of field and a crouched position shows the rapport of classroom teachers during an in-service. Use the crowd the next time you are photographing classroom presentations, calendar time, and open house.


Up, up, up, and away
The birds-eye angle (right) shows the same students and adds the intensity of their work by showing copious notes and study materials. The angle works well for groups studying together as well as individual students drawing or reading.
Tip #3: make a list and check it twice
Because you can’t be everywhere, enlisting the help of your teacher comrades is one way to increase both content and coverage. Share this list of ideas with faculty and staff to give them ideas (or else, you’ll be drowning in group shots).

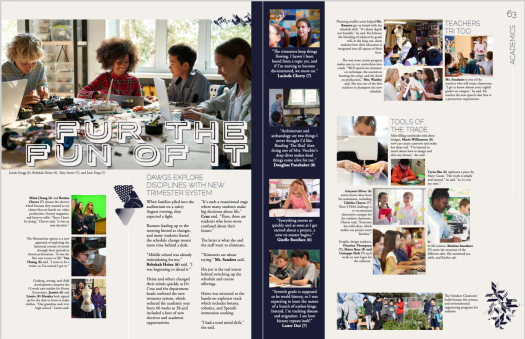
Just like the yearbook represents the entire school community, the academics section highlights the bulk of a student's in-school day. It shows the distinctives of each department. It showcases students’ work. It covers the diverse learners on campus. You can divide coverage by
- Grade
- Subject
- Quarter
Special considerations for including exceptional learners
To paraphrase the Student Press Law Center, yearbooks cannot separate or denote students as members of special education programs because it is a part of their private student record. Always check with your district to see if they have a specific policy.
So, grab your yearbook team and get in the classroom to apply these photo tips. Your academics section will thank you.
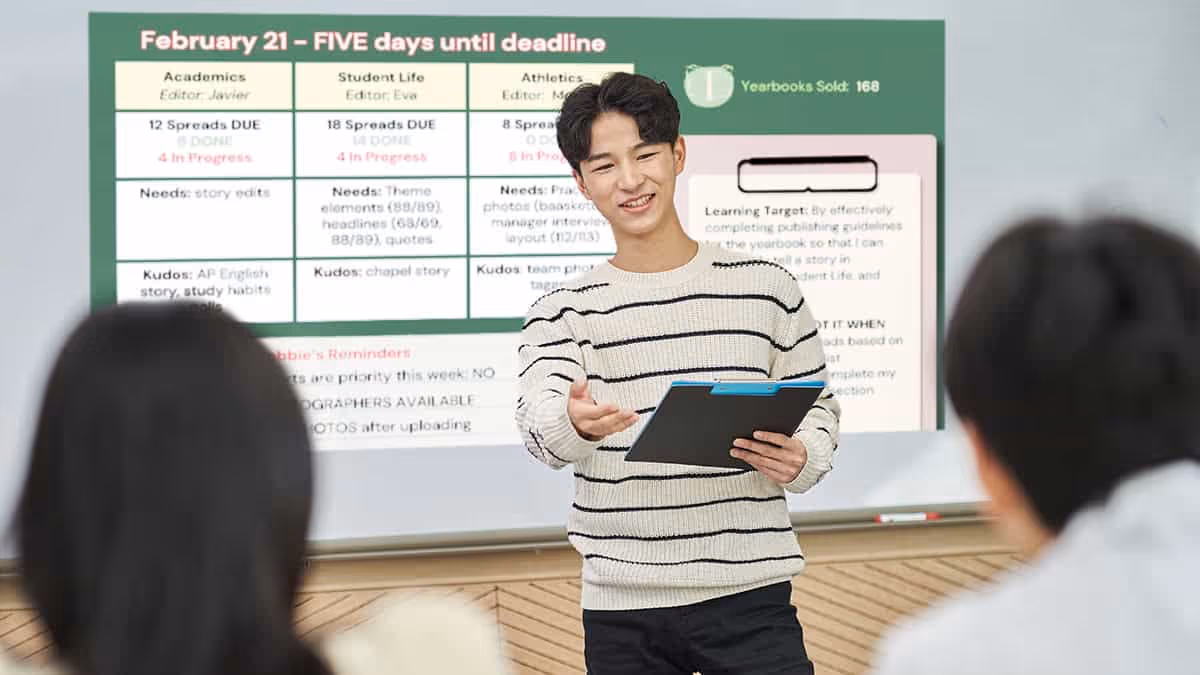
Why you need an agenda slide for yearbook class
An agenda slide is more than an organizational tool: it creates a method to maintain accountability in your yearbook class.
What goes on an agenda slide?
You could write the items below on your whiteboard easy peasy. Many advisers told us they prefer to create their agenda digitally because it provides a record for administration and parents (hello, accreditation year). The following year, it simply needs basic edits to remain current. Give yourself bonus points if you adapt the slides to your yearbook theme and/or color scheme.
Because a structured daily agenda slide helps your yearbook staff understand what to expect during the class or club session, we like to include these five things:
- Date and class information
- Learning objectives or goals for the day's lesson
- Class agenda
- Deliverables
- Announcements and reminders
If your yearbook program is a club, and you do not need CTE or ELA standards, use a brief description of the yearbook club's purpose or mission to keep activities aligned.
Two examples of organization and accountability
Obvious statement: the yearbook is a big project. By creating and posting an agenda, you can chunk the work to make it realistic.

Example 1: project-based agenda
The example above clearly identifies the learning objective and how they complement the broader yearbook project. The stand-up meeting includes deadline setting, content creation, and photo assignments. This method helps all editors and support staff see how their section contributes to the entire yearbook.

Example 2: time-management agenda
Many clubs meet twice a week, so chunking the work time helps the team know the purpose of their time together. That sounds simplistic, and we’ve seen strategies such as Deep Work or the Pomodoro Technique highlight short periods of focus to yield more valuable results. Less is more. Reserved space on the agenda slide also informs about upcoming deadlines, events, and opportunities.
If your campus or district requires documentation, a deck of yearbook agenda slides complements your curriculum map. It ensures both your production and learning outcomes align. (True story: administrators love them.) They also simplify preparing for sub plans and absent students’ catch-up bins: students come to expect your established routine.

Simplify picture day with these 5 tips
Picture day either makes you call out ill or grab disposable combs and a spray bottle for flyaway patrol. With portraits making up 40-60% of a yearbook, anything Treering can do to make it easier on you is a win-win-win. It’s the bulk of most elementary school yearbooks. It’s where there’s the most potential for error. It’s where you’ll prevail this year.
1. Find a yearbook photographer
When interviewing a yearbook photographer, be sure to learn about the photographer's
- Experience: How long have you been in business?
- Security measure: How do you vet employees? What does your background check process entail?
- Training: What does your photographer training look like?
- Dependability: Every school photography company is experiencing staffing issues. Ask if they are prepared.
- Turnaround time: What is the time from picture day to delivery? How do I get my yearbook export?
- Longevity: How long are the photos available?
Consider all factors—quality of work, professionalism, cost, and feedback from local references—in your search.
2. Prep for picture day
As you create a ladder and assign spreads to portrait pages, your photographer prepares by organizing students in their database to produce PSPA-formatted portraits for the yearbook. (PSPA is the fancy abbreviation for the industry-standard way portrait photographers and yearbook software communicate.)

School photographers need accurate information well before they arrive at your school. If you don’t receive a template, ask what specific details they require and their preferred format.
This is so important. For the yearbook, traditionally all photographers would need name, grade, and teacher. Photographers use school data provided to the photographer to create all school services including a PSPA file, such as IDs. The more info the better! This means your picture day photographer may give you a template with room for house names or team names, room numbers, and staff salutations.
3. Go from picture day to yearbook pages
Make sure you know your photographer’s expected turnaround time before scheduling your school picture day. Most need 3 to 4 weeks. Given that time frame, if you schedule picture day in mid-September and hold a retake day in November, you’ll have all the portraits for the yearbook before winter break.
This syncs nicely with winter webinars by Treering’s Yearbook Club to help you flow your portraits. And with Treering’s three-week turnaround, you’ll have time to add any students who join in the second semester.
4. Create your schedule… and share it early
Picture day should be on the school calendar from the beginning so parents and teachers can plan. Work with admin to share the schedule with staff and parents at least a week in advance.
The best scheduling advice we can give is paraphrased from “Toy Story 2.”
At the high school level, getting students and faculty through the queue may feel like you’re on the logistics staff for Major League Baseball or in an air traffic control tower. Breathe deep. You’ve got this.
When creating the picture day schedule, allow the appropriate time for each class. The guidelines below should help.
- Pre-K and Kindergarten: Plan for upwards of one minute per student. (About 25 minutes for a 20-30 student class.)
- Grades 1-5: Plan for 45-55 seconds per student. (About 20 minutes per 20-30 student class.)
- Middle and High School: Plan for 45 seconds per student. (About 18 minutes per 20-30 student class.)
Your photography company should send one photographer for every 250 students.
5. Recruit picture day volunteers
If your school allows it, parents can help prep students for the camera. Remember flyaway mom in the opening paragraph? Chances are, you have a parent on campus who can assist in getting kids ready for their portraits and reduce the time each student spends with the photographer. This also helps reduce the picture day stress on teachers. (By the way, a few boxes of doughnuts by the mailboxes in the office will go a long way.)
Picture day volunteers can also help relieve tensions. PTA mom Abby dresses up each year to help students smile.

Some photo companies offer free or reduced picture packages as a thank you. Remember to negotiate that ahead of time.
When these elements come together, picture day can transform from a hectic event into a smooth operation. You’ll receive great photos and provide a stress-free process.

Yearbook class: what to teach the first six weeks
You thought yearbook class was just putting pictures on pages. Then a roster arrived. Then the expectations to meet state and national standards for ELA, CTE, and 21st Century Learning. Cue migraine.
The yearbook heroes at Treering know the difficulties new advisers face (shameless plug: that’s why we’ve created a contract-free, flexible yearbook solution) and we’ve created six weeks-worth of material for your yearbook class.
If it’s your first year advising, select one or two areas on which to focus. As your program develops, deepen those areas and add a new growth target.
For example, year one, you may want to focus on theme development and photography. Year two, expand those areas and add storytelling captions. Year three, further develop your writers with feature stories. Repeat after me, “I won’t do it all! I won’t do it all!”
Week 1 goal: build a mission-centered yearbook staff
Teambuilding
Every day, do something to help your team grow in familiarity with one another. Start with something simple, such as Birthday Lineup followed by some cake. To reinforce all the new names, Hero-Shambo is a raucous way to inspire team spirit while putting names to the faces.
Spend some time understanding personalities as well. Free online tests can provide discussion start points. Debrief either by grouping students who scored similarly and have them discuss what resonated with them and potential misconceptions. Groups could even create a poster or mood board reflecting their strengths.
Theme development
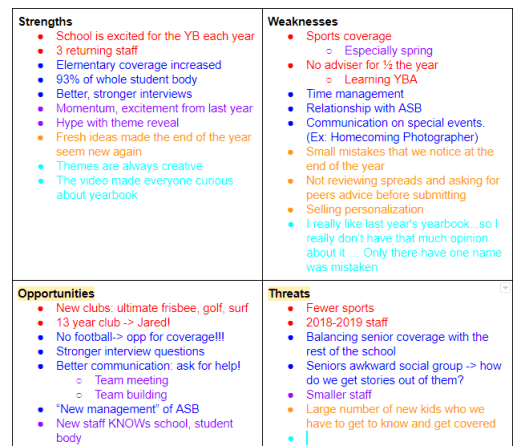
As your year, and your book, should be focused on telling the story, theme development is top priority. Start with a SWOT analysis. Then list all the changes, new initiatives, and differences that make this school year stand out from the last five. Are you doing a building project? Did you add an international program? Is there new leadership? Did you merge with another school? Is this the first senior class that’s gone all the way through from kindergarten?
How can you convey this story this year?
Many times, our students come up with a catch phrase and want it to dictate the content. Your story—whether you have a visually strong, photographic book, or a journalistic yearbook full of features—should lead your look. Our Yearbook Theme Curriculum Module can help.
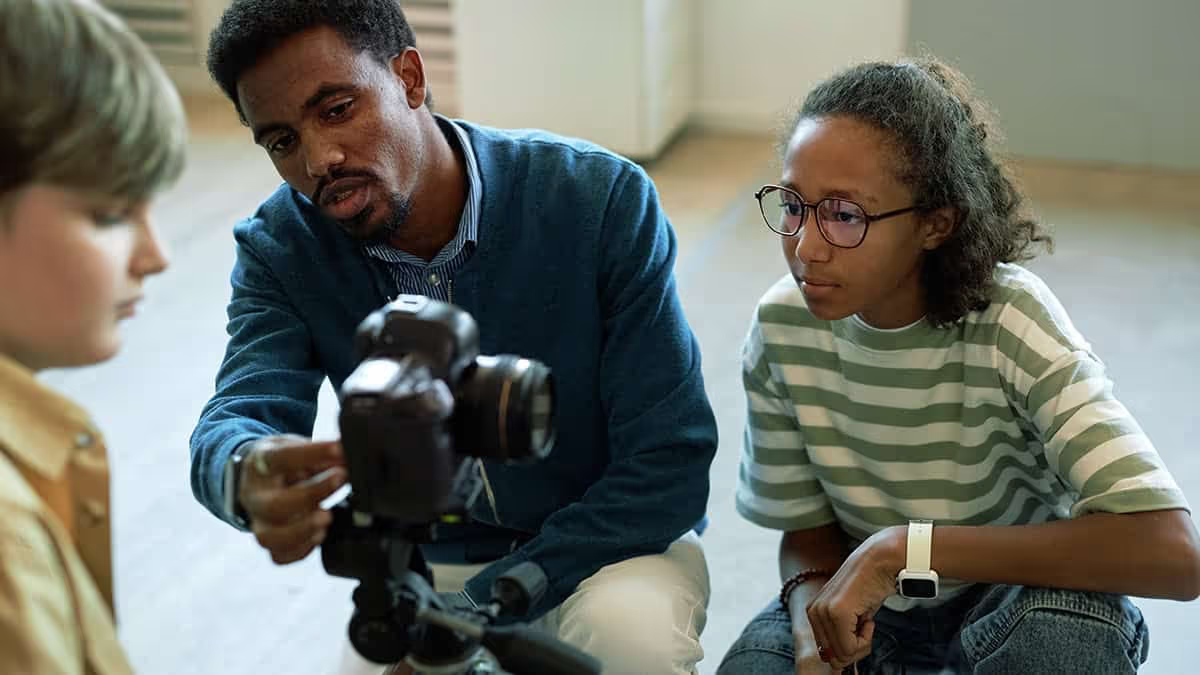
Photography
There are five beginning photo exercises in Treering's blog. Spend some time getting to know your team's cameras before jumping in. This may also be time to involve the editorial staff: assign an exercise for each to learn and facilitate.
Reporting
Start asking your yearbook students a question of the day. (If you have a large class, you may want to poll 3-5 students each period for time.) Before the next class, your yearbook students should ask that same question to three other students (no repeats). If you have 12 yearbook students, that’s 36 student quotes you can include in a sidebar each day, 180 each week! Use a Google form to input responses and track respondents. This not only increases coverage possibilities, but it warms up your student body to be pursued and peppered by your yearbook students!
Week 2 goal: set and slay yearbook goals
Photography and design
Begin the week with a photo scavenger hunt. Use the results to introduce your procedures for file naming conventions, uploading, and tagging. Model how to design a spread with their snaps.
Introduce yearbook vocabulary then grab some magazines to play a grown-up version of show and tell. Reward students who can find eyelines, ledes, and serif vs. san serifs fonts!
Further demonstrate the principles of design and get in your yearbook software to recreate some of the layouts you loved in the magazines. You should be in your design application 2/3 of the week so your staff gets comfortable.
Teambuilding
Since focus this week is on goal-setting, use communication games such as Blind Polygon or adapt Minefield for your classroom. In both scenarios, identify the goal and evaluate what worked and what didn’t when you are finished.
Revisit the personality profiles from week one—what effect did they have on students’ problem-solving and communication?
Theme development
It’s also time to revisit your SWOT and story-of-the-year brainstorm. Think of your senses: how does it feel, sound, smell, and look? (Don't worry, we're not going to encourage tasting your yearbook!)
Determine tangible ways to convey the story of your year. In the Design Module, we talk about color and fonts. Both are two key visuals to harness the essence of your theme.
For example, If your yearbook theme is Move Mountains, you are going to want to use colors and fonts that are bold, signifying strength.
Reporting
Continue your question of the week, and evaluate the process. Where are students struggling?
If fear is a hindrance, watch Jia Jiang: What I learned from 100 days of rejection. If it’s procrastination, watch Tim Urban: Inside the mind of a master procrastinator. In your debrief, develop concrete strategies such as a few scripted lines or a schedule.
Marketing
Make it a point to consistently market your book and your program. It's possible to plant proverbial seeds for next year's staff in September!
Week 3 goal: build your team’s toolbox
Teambuilding
Begin holding weekly staff meetings. In these meetings, discuss event and photo assignments for the week, when your next deadline is, and have every staff member give a 15-second update of their work. A simple, “Here’s what I’m doing, and here’s what I need to do” will keep it focused. You're building a culture of accountability.
Editors can also lead the meeting by using the first 15 minutes of class to develop a skill: photographing in classrooms with fluorescent lights, sharpening images in Photoshop, cropping images, etc.

Reporting
Evaluate the question of the day. Have students put last week's action plan into play? What percentage of the student body has been asked? Discuss with your staff where you will begin incorporating these quotes and what questions you can ask to tie-in with your yearbook theme.
Start a word graveyard: on a prominent bulletin board, list “dead” words and phrases. Have a reason why you’re dumping one: for example, many athletes will say their team is a “family” as will ASB, the dance company, the math department, etc. Teach interview skills to develop this: what drives your bond? Tell me a way a teammate was dependable. What traditions do you have that make you like a family? Get the story.
Design
Develop your style guide and decide which elements (e.g. bleed, color overlays) will enhance the story you are telling this year. Your editorial staff should begin building templates in your design software. By the end of the third week, your entire team should be comfortable doing basic tasks in your design platform.
Week 4 goal: progress!
Teambuilding
Using comics or stock photos, create Comic Creations. Then, with a partner, students should list three questions they could have asked to get the quote. Use your word graveyard and our Five Common Topics as needed to build stronger questions.
Teach the expanded caption using the Comic Creations quotes. You may want to first show NSPA’s Terrible Leads as a non-example before modeling your own yearbook gold.
Theme development and design
Evaluate your style guide and templates using NSPA’s design checklist; adjust as necessary. This is a good time to pause and remember our mantra: “I won’t do it all! I won’t do it all!”
Use an idiom dictionary to create spin-offs for your theme. Let’s return to our Move Mountains theme. For recurring modules, you could use:
Photography
By now, your students should be photographing class activities, school events, and sports practices and competitions regularly. Have your editorial team select some photos of the month to show on a projector. Discuss, as a group, what made the photographs standout in their composition and storytelling. Elicit advice from the photographer. Share top photos on social media with a call to action: “Want to see more? Buy a Yearbook!
A post shared by Treering (@treeringcorp)
Social media serves a double purpose: market your program and your yearbook!
Marketing
Create a social media calendar and assign posts to students. Each post should be approved, in writing, by an editor and another student before going live. You may want to utilize a group messaging system or a shared document to track approval and content.
Week 5 goal: momentum
Teambuilding
Before this week’s staff meeting, ask an editor and a staff member to each select a Yearbook Hero to celebrate. Share the love on social.
Introduce peer evaluation by partnering two students, equipping them with a rubric, and asking them to evaluate a strong example of design. Because it’s “easy” to critique something weak, this forces students to understand why a layout works.
Allow students to sign up for one-on-one sessions with you, and possibly your editor in chief, during class where they can have undivided coaching.
Theme
During your next editorial meeting, ask the team to brainstorm theme-related
Photography, design, and reporting
After your weekly staff meetings, you should have a good idea of the the page statuses for the yearbook. Your team will continuously be in a cycle of photographing-reporting-designing. Monitor progress by continuing to set and track goals. Break up the monotony by adding in relevant skill-building lessons and—dare I say it—nothing. Sometimes, a study hall so your students can catch up is a great way to show you value their time and commitment to all things yearbook.
Week 6 goal: establish routine
Rest assured you created consistency and accountability with a weekly team meeting. Because of this, students know their weekly assignments such as social media posts and photo shoots. All of your yearbook team is trained on your software, and with peer editing, a safe dialogue and pre-disclosed standards will refine areas of growth. Is it perfect? No. Will it ever be? No. And that’s OK!
Remember your role: advise. Here's a checklist to help.

QR Code is a registered trademark of DENSO WAVE INCORPORATED.
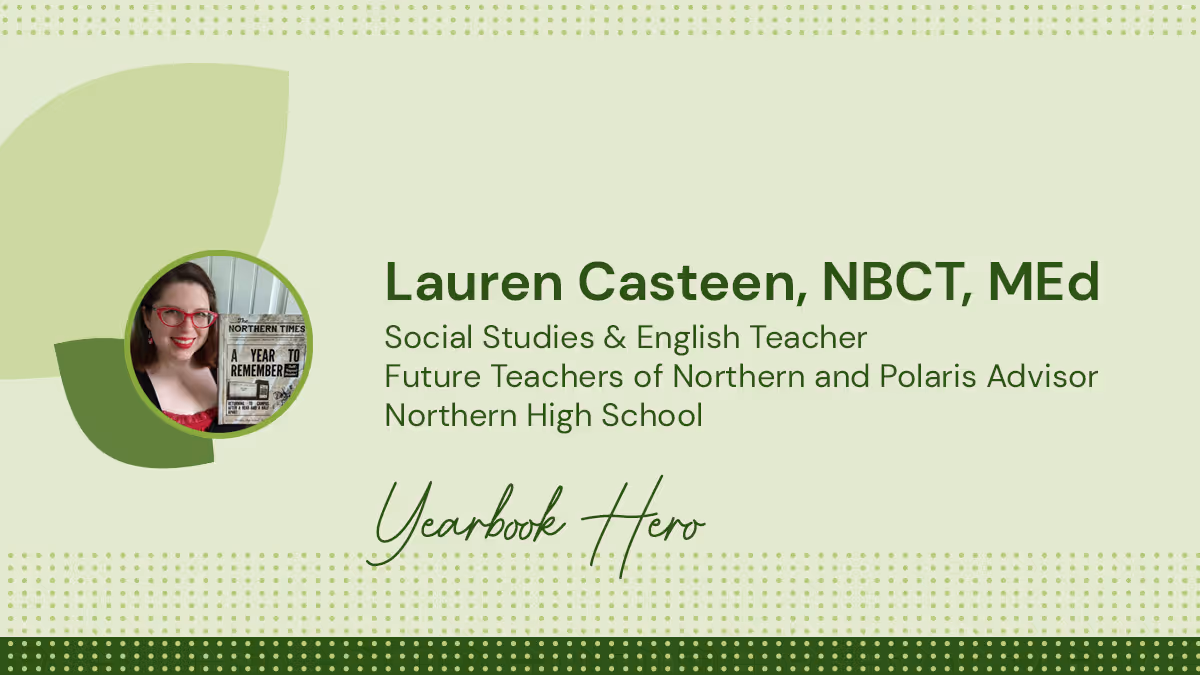
Yearbook hero Lauren Casteen focuses on equity
Treering Yearbook Heroes is a monthly feature focusing on yearbook tips and tricks.
Yearbook Hero Lauren Casteen decided in kindergarten if she were a teacher, she could go to school every day. Her passion for diversity, equity, and inclusion transformed her approach to teaching yearbook class: instead of recruiting the top 20 students to create a book about their friends, she built a team that reflects the students whose stories they tell. In 2022, Lauren earned an M.Ed. in Urban Education with a certificate in Anti-Racism. Her pedagogical approach is to lead the yearbook class as a public history course where the goal is to accurately and thoughtfully record the history of Northern High School.
Why should someone buy a yearbook in 2022?
As a historian, I like knowing that there is an artifact. Our yearbook students are telling future generations, “We were here!” It is something future scholars will study. Furthermore, our yearbook students have written and published something. It matters.
So much of our memory-keeping has become digital. I have 500 pictures on my Instagram, but it doesn’t compare to having something to physically go through. Digital doesn’t create a reverence for your memories.

How do you address issues of equity with the yearbook?
When I inherited the yearbook program, it required a written application with teacher references. It limited the type of students who could apply. Now, any student can sign up regardless of grade or ability level. I run a discipline report prior to scheduling anyone in my class and have one-off conversations with students [e.g. history of truancy] as needed.
With yearbook, there are many places where different kinds of students can be successful, and I want a committed staff that is representative of the student body. We are a majority non-white, Title 1, semi-urban school. Students of all educational abilities and language backgrounds roam the halls. The yearbook class should reflect that.

And you sold out three times.
Yes! I had to do a second order and had to open up sales to with the ship-to-home option.
What made the Knights want the yearbook?
The yearbook staff evaluated last year’s yearbook: we found out it covered mainly the juniors and seniors. It was also very white, when the school is very diverse. We resolved to make it look like our school.
As a school that is committed to equity, we can’t do that if we don’t know who is in the book. Since the yearbook is a historical document in the most faithful way possible, our team tagged and tracked coverage. And since my staff cannot be everywhere all the time, it is important for other people to send us things.

How did you crowdsource content?
I started with the teachers. I recorded a tutorial and emailed it, asking them to send us photos for the yearbook. The chorus and outdoor ed faculty were early adopters. I even taught the lacrosse team how to share photos via the app when they were headed to Wilmington for a game.
On our yearbook Instagram, we post sneak peeks. Someone commented that the outdoor ed page looked good. We responded, giving credit to the teacher. This created a buzz and now some teachers have a student classroom photographer to put ownership and responsibility on the kids. It also makes them want to join the yearbook staff.
Students like that the app talks to their Instagram; teachers like that it connects to their Drive.
What does the fall look like for the team at Northern?
I have 70 students signed up for the yearbook class for the 2022-23 school year. We are excited about this year’s book, as it will be the last book we’ll produce in our current building—we’re moving to a new home next year!
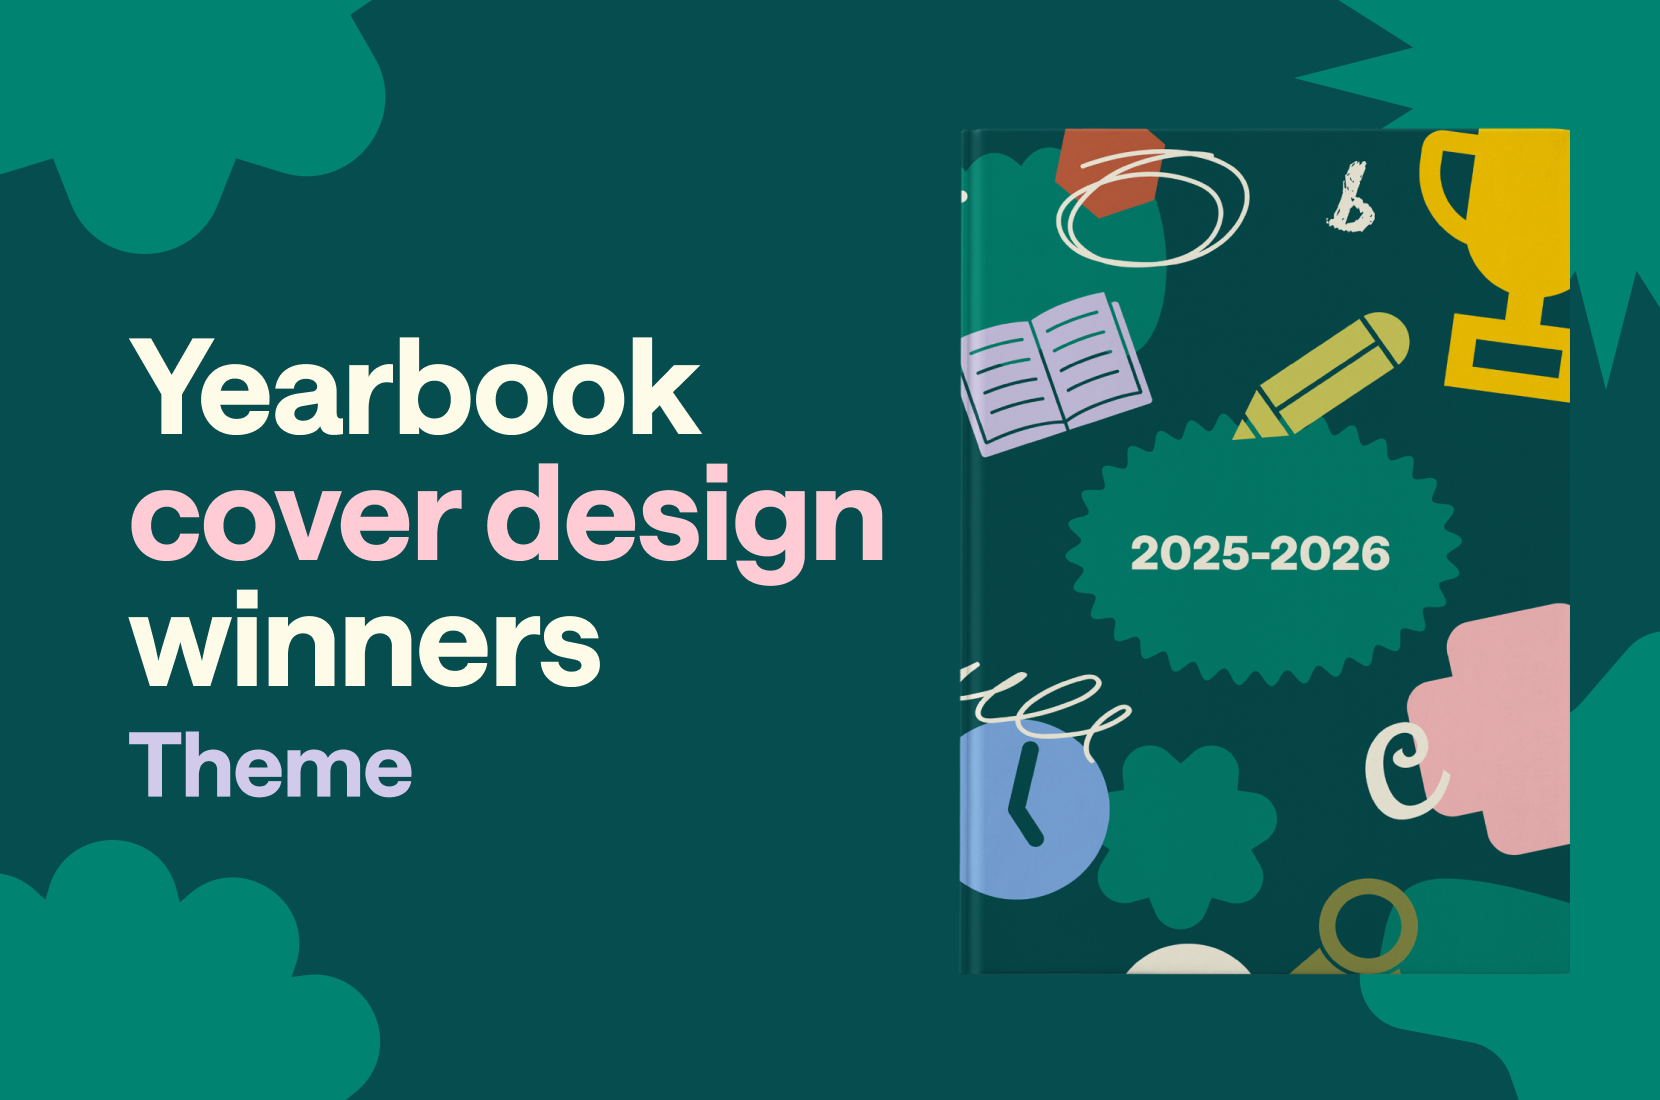
5 tips to help you find your yearbook theme
Whether you're scrambling at the end of the year, or trying to decide at the beginning of the year, coming up with a yearbook theme is tough. How do you come up with the title of a book that hasn’t been written? You can play it safe and gather everyone’s feedback to eventually land on a yearbook theme that everyone hates the least, or you can choose for the group, and face criticism--but no help--for your idea. Let’s be real, neither option sounds fun. I interviewed different yearbook editors to try and gather some advice to help you get started.
Here are 5 questions to ask yourself, followed by 5 thought-provoking theme ideas to inspire creativity.
5 questions:
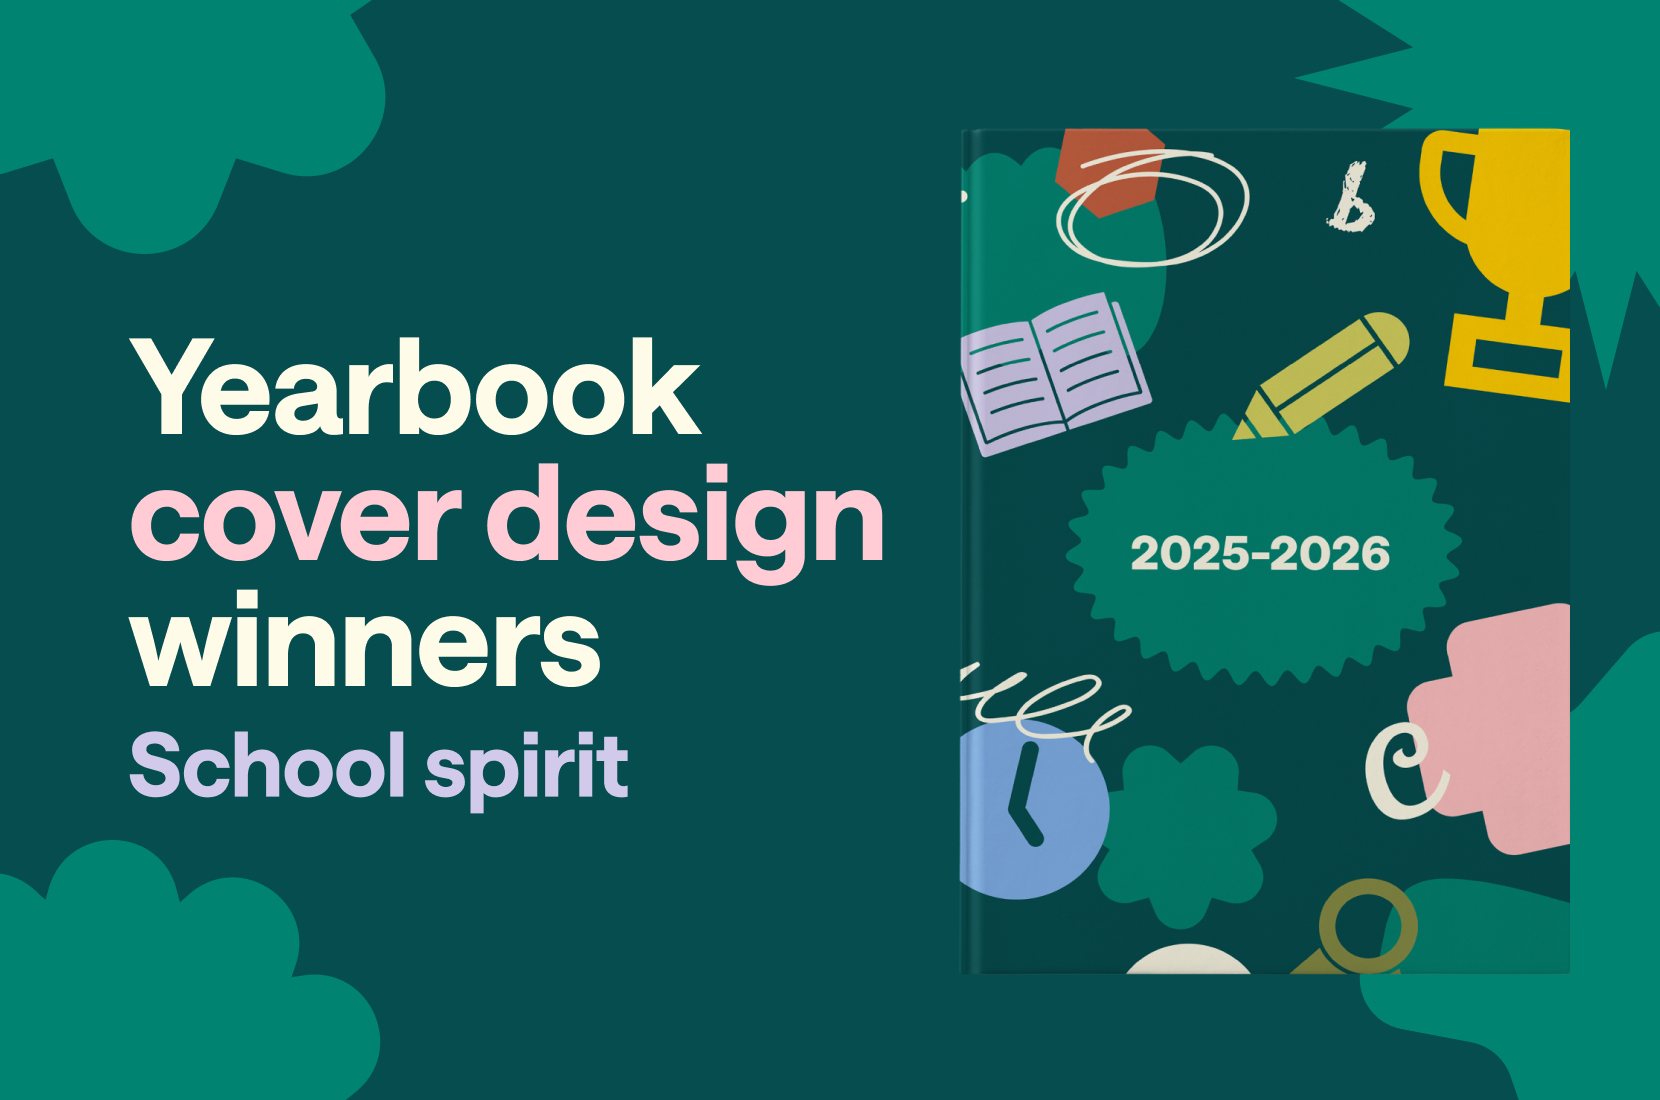
Why should you run a yearbook cover contest?
Academic goals are of course the primary focus at school, but consider asking the students to layout SMART (specific, measurable, action, reasonable, time) goals at the beginning of the year. Come the end of the year they can go through a self evaluation that will lend itself nicely to the story of your yearbook. Goals could be long or short term. I remember having goals to read a certain number of books throughout the school year as well as trying to make it through a day without doodling on my hands/arms/legs.
What’s popular with your students this year?
From movies to music, snacks to snapchat, pop-culture can be a great way to get some inspiration for your theme. The benefit to using a theme centered on pop culture is it adds an extra layer of nostalgia beyond your photo and story memories. The down-side, well as a child of the ‘80’s I can honestly say the photo of me with 5 foot tall bangs and fanny pack was embarrassing enough, not sure I need to be reminded of the countless hours lost to New Kids and Nintendo.
How are your student’s different from others?
This might seem like a difficult question, but ask your students. They will typically know what makes their school “better” than the rival neighboring school. Growing up most of my classmates lived on a lake, because of this we were all about the water sports. We knew how to waterski off the dock, build pyramids, and wakeboard. We would have loved to see this represented in the theme of our yearbook, as it was unique to our school. You don’t need to limit yourself by the schools colors, the yearbook should tell the story of one moment in time and school colors are not unique to one year.
What issues are student’s passionate about?
Pop culture changes year-over-year and with that children become passionate about different issues facing the world today. Similar to Michael Jackson and Free Willy raising awareness on preserving and protecting the ocean and its inhabitants, today children are talking about climate change and fact checking. Lucky for them they will never understand the frustrations of the card catalog now that Alexa can answer just about all their questions. Consider what issues students are talking about in class and how they are learning to make a positive impact in our future.
Who are your student’s role models?
You might be surprised; kids today are #woke. Gone are the days where Micheal Jordan and Madonna served as the role models of youth. Kids today are looking up to people like Elon Musk and Ruth Bader Ginsberg. They are not just aware of what’s happening in the world, but they are choosing their role models wisely.
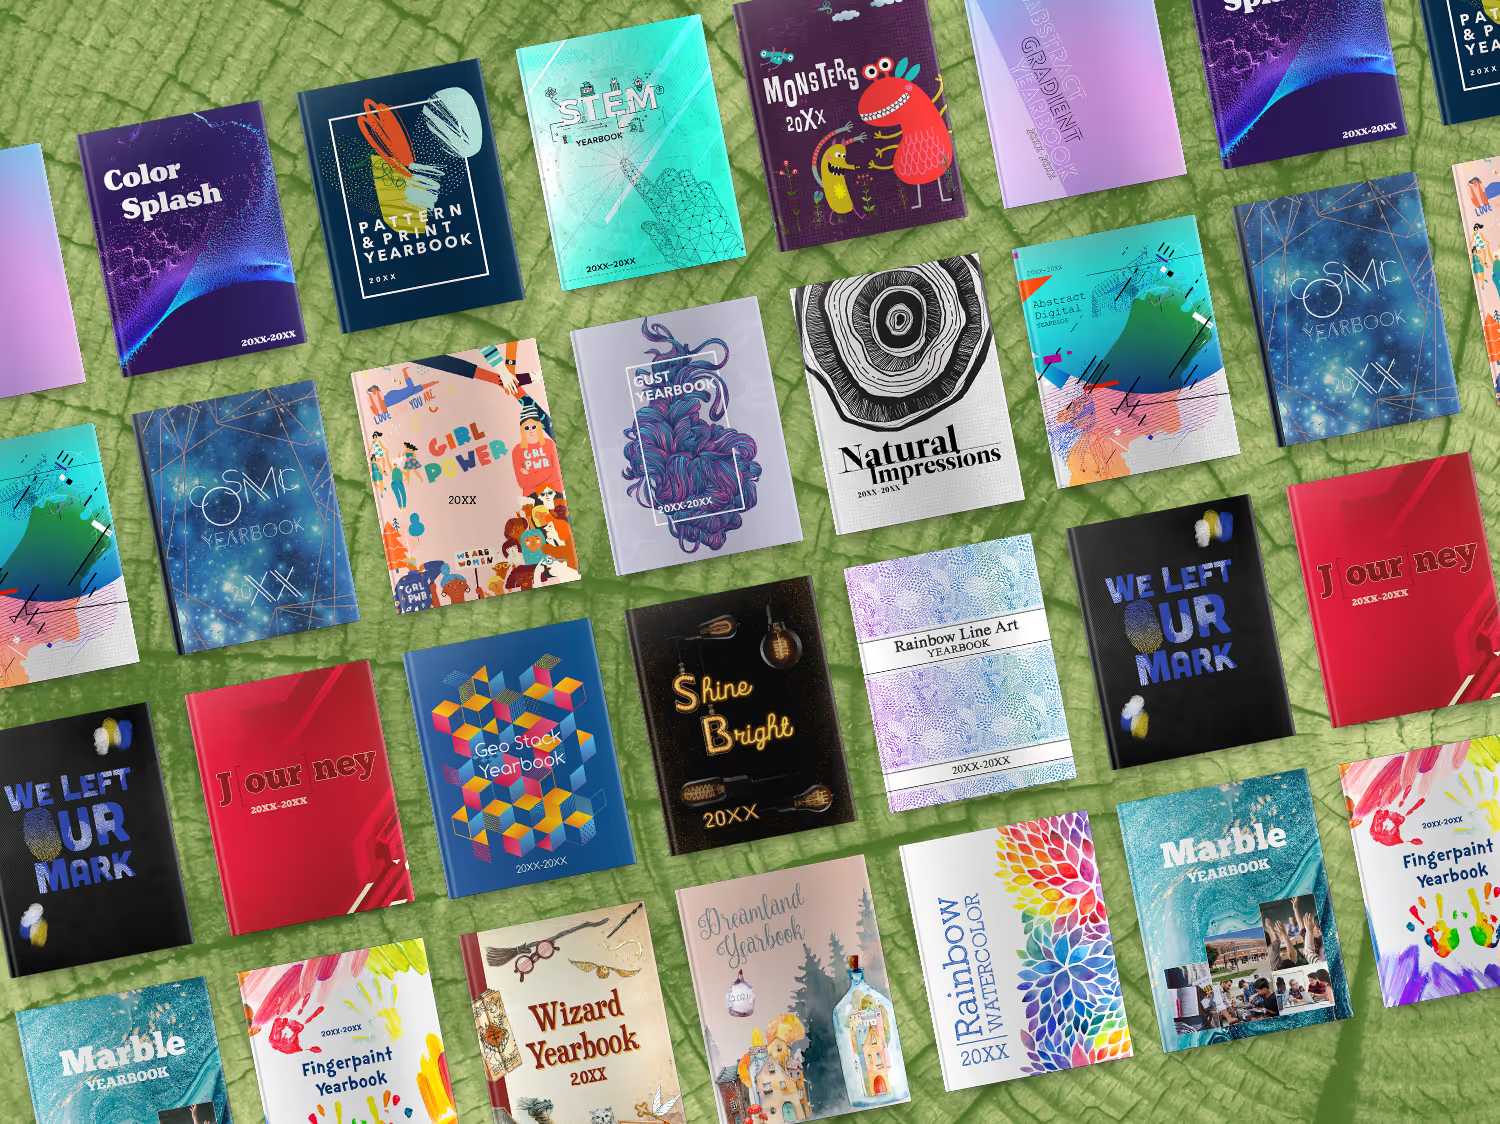
Now that you’ve asked yourself a few questions, I thought I’d share some brand new themes that might get you on the road to something truly unique for your yearbook. Below are 5 fresh themes for you to consider for your tribe.
5 theme ideas:
Fingerpaint
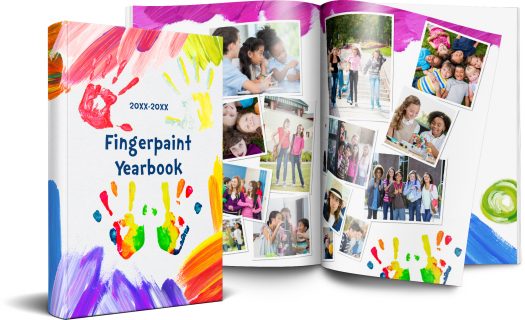
This theme captures the spirit of imagination, similar to Harold and his purple crayon, each student has the ability to draw whatever they might need, leaving their unique handprints behind as a reminder of what they have achieved.
STEM
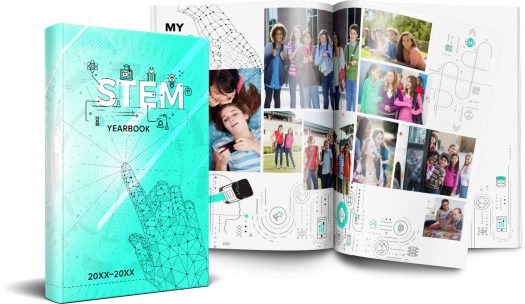
Early learning experiences in Science, Technology, Engineering and Mathematics (STEM) are critical in preparing elementary school students for STEM learning in middle and high school, as well as for future careers in STEM-related fields. This theme talks to more than just the tech culture our children live in, but how schools are more focused now than ever in bringing STEM to the forefront of learning.
J[our]ney

With multiple different color options, this is a classic, bold, choice for a yearbook tribe wanting to add some graphic texture to their book. It’s sentimental in begging the question, “What does the school care about for the year?” There are many ways to play with this theme. Consider some wordplay:
- Y[our] goals
- Enc[our]agement
- N[our]ishment
- Study h[our]
- Y[our] story
Color splash

It’s subtle yet elegant in the movement of the dots first flowing together then breaking off to find their own individual path, but not before first making a splash. This yearbook theme would be best for books that are text heavy, given the words will pop on the purple background, and there isn’t a lot of distracting artwork.
Cosmic
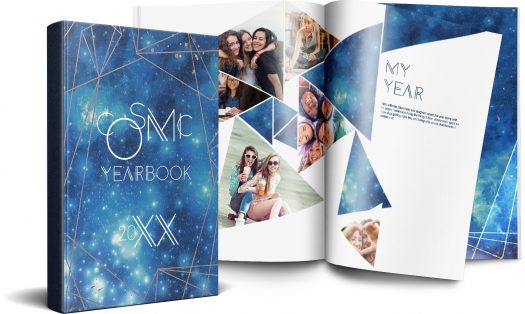
The applications of this theme reach to infinity and beyond. From the single star that shines bright to the entire constellation of stars, our students are pushing the boundaries of learning to their outer limits.Each yearbook tells the story of just one year, whether your theme is how power corrupts, as in J.R.R. Tolkien’s Lord of the Rings, or love and loss as in Nicholas Sparks’ The Notebook, (I genuinely hope those aren’t actually your themes) these ideas should help you get started. If you are looking for more inspiration, check out this handy theme generator, it might get you and your yearbook tribe a bit further on your journey.

Introducing Treering's heritage collection
If there is one thing we’ve learned in our 15 years, it’s that memories are important. And just like our software, we’re continuously upgrading how we preserve them for you. We spent our summer vacation designing new archival cover options. The Treering Heritage Collection is comprised of six new bespoke designs to enclose your memories from cover to cover.
What’s in a name?
Often associated with strength, longevity, and wisdom, the mighty oak became the symbol of these studio designs. Like your stories, they are treasured.
Heritage oaks are highly resilient trees that can withstand harsh weather conditions—including droughts and storms—due to their deep root systems and sturdiness. Like your memories, they stand the test of time.
We find these oaks in urban, rural, and suburban areas alike. And because of their age and size, they process more carbon while serving as a home base for many animals. Like your school community, they affect their surroundings.
Heritage Collection designs
The Heritage Collection is available in 8.5 x 11 hard- and softcovers.

From the Treering design studio to your school
It’s a cliche for a reason: we truly judge books by their covers. That’s why Treering answered the question, “What if I could have a professional designer create my yearbook cover?” Eliminate the what-ifs: you can.
Each Heritage Cover is 3D in texture and covered in our signature gloss. This raised polymer coat acts as a shield, protecting your yearbook from scratches, tears, and fingerprints. Because of it, the ink colors are more vibrant, and your school story is more tangible. Pair your heirloom cover with our fully editable layouts to create a truly unique and long-lasting school treasure. It’s as easy as click, drag, drop, and done!
Kinesthetic memories
Yerd alert: we’re going to get deep on the science of touch.
Tactile experiences influence memories due to the intricate ways our sensory experiences are woven into the fabric of our memories and emotions, shaping our perception of the world around us and our sense of self. Handshakes and hugs readily come to mind. What about yearbooks?
The short answer: yes!
The scientific one: yes, mechanoreceptors (aka the specialized nerve endings in our skin) respond to specific touch sensations such as pressure, temperature, and texture. They send electrical signals through nerve fibers to the brain, particularly to the somatosensory cortex, which processes tactile information.
How to use a Heritage Cover in your yearbook
It's easy: from the Book Settings editor on your Dashboard, change your cover finish to Heritage. The full instructions are in the Help Center.
Remember, when we touch something, our brain keeps an imprint of it. The raised texture of a Heritage Yearbook Cover can sustain its impact.

Teaching yearbook: 11 resources to bookmark
We created a master list for practical, tested strategies that work in a real yearbook classroom. If you didn’t volunteer to take on yearbook class (we are few, but mighty), you either showed up late to the meeting, or you’re a new teacher. Then what? Traditional teacher prep programs trained us for classroom management and subject-specific pedagogy. Teaching yearbook is a hybrid of design, photography, marketing, and event planning. It’s a prep that requires skills from multiple careers, and most of us learn them as we go, under deadline pressure, and with a room full of students watching. Major aura points loading.
Professional development resources
A stronger you means a stronger program. Here are some resources to help you take a recess from yearbook stress.
Webinars
Tuesday “Lunch and Learn” sessions are twenty minutes of focus to equip you and your team throughout the year. Just pick your time zone, log in, and leave with something you can use today.
Thursday sessions are one-hour overviews to help you plan, design, and publish with purpose. These synchronous training series start with the same line, “Hi, we’re Cassie and Erika, and we are here to join your yearbook team.”
They mean it.
Dealing with complaints
Two customer care experts, Treering’s Abby Oxendine and Chris Frost, a former Disney guest services agent, shared their proactive approach to working with teachers, parents, and students with yearbook complaints.
- Listen to the complaint
- Ask for specific details
- Offer a solution
- Follow up, follow up, follow up

Adviser burnout
We’d rather you have this one and not need it.
Some preventative burnout measures include workflow adjustments, such as
- Reusing layouts from previous years as templates
- Creating repeatable workflows, such as setting up photo and text styles
- Taking advantage of built-in design automations, such as portrait autoflow
If you’re already there and need a yearbook mindshift, build gratitude and celebration into your program… then call your publisher!
Planning resources for yearbook
Start the year with a clear plan so you run the yearbook, not the other way around.
Job descriptions
Clear expectations help guide student and volunteer yearbook teams. When the proverbial ball gets dropped, it’s easy to point the finger; being proactive with your yearbook team early in the school year will improve your workflow. It will develop ownership. It will reveal leaders.
Staff manual template
Another way to develop proactive communication is through a staff manual. A yearbook staff manual outlines policies and procedures for class time and crisis time. It includes how you will handle:
- Confidentiality
- Photos
- Superlatives and senior quotes
- Journalistic integrity
- Grading
- Style guide
- Content approval
- Equipment
- Complaints and refunds
Agenda slides for yearbook class
Agenda slides provide accountability for your yearbook team. They can be project-based or have a time-management focus. Either way, you should include these five things on your agenda slide:
- Date and class information
- Learning objectives or goals for the day's lesson
- Class agenda
- Deliverables
- Announcements and reminders
Grading checklists
Use checklists to help students prep for submission and grading.
Younger students and emerging designers use checklists to have a structured framework, to help them remember the essential elements of a spread. Returning yearbook students use checklists as a tool for quality control and peer review.
The checklist becomes an educational resource in itself. As students engage with it, they absorb design principles and develop a keen eye for what works in terms of design and theme development.
Instructional resources to build out your curriculum
Give students the tools, skills, and confidence to create their best work without you having to reinvent the wheel.
Free yearbook curriculum
When you have classroom teachers create the curriculum and classroom teachers vet the curriculum, it’s A+ material. The eight modules each include five days of instruction:
- Daily learning target
- Bell ringer
- Interactive lesson with guided student practice
- Exit ticket
Clubs with limited instructional time can scale using the first day’s lesson from each module. These standalone lessons are designed to give yearbook club sponsors the foundation for teambuilding, theme, design, writing, photography, marketing, and proofing.
5 Photo mini lessons
Mini means focused. (No pun intended.) Each of the five lessons works on one area of photojournalism to help students capture action and reaction. These lessons include ideas to strengthen students’ understanding of
- Rule of thirds
- Photo angles
- Cell phone photography
- Depth of field
The final lesson is a cumulative assessment in the form of photography bingo.
Bell ringers
Start each meeting or class period with the yearbook top of mind by using one of the 60 curated bell ringers. Focusing on design, photography, theme, and yearbook critiques, these five-minute warm-ups provide a launch point for instruction, work sessions, or discussion.
Proofing tools
Last on the list, but not last priority, proofing your yearbook should be accomplished weekly and monthly plus a cumulative review. Treering's proofing tools include 99 PDF proofs plus a complete copy of your printed book (workd in progress welcome).
When including proofing in your teaching routine, yearbook advisers may want to involve campus personnel outside of the yearbook team: the school secretary, PTO/PTA leaders, and maybe an English teacher.
While teaching yearbook may not have come with a roadmap, you don’t have to figure it out alone. Using professional development resources, planning tools, and instructional, you can create a structure that makes the work manageable and meaningful for you and your students. Choose one of the above to put into practice this week, and use it as the starting point for building a program that grows stronger each school year.
5 things to do to sell more yearbooks… in the fall!
Back to school means back in business. Selling your yearbooks should start as soon as you do! Here are five easy ideas to immediately implement to gain sales momentum at the start of the school year. Plus, we're giving you a social calendar and slew of sales flyers you can customize, then share.
1. Stick it to them
K-12 yearbook adviser Erika from California goes sticker crazy: “Our class meets 7th period, and with end times being staggered, my students run to the lobby and place a sticker on each [elementary] student as they head to the pick up lines.” The stickers have purchasing info on them.
In Georgia, adviser Dara does the same, then takes it one step further by sending a humorous follow up email:
We didn’t want you to get stuck without a yearbook, but if you accidentally ran the reminder sticker through the wash, here’re some handy tips to take care of it.
Consider designing your stickers to match the yearbook theme for a branding tie-in.
2. Plan posts
We all know the cliché: failure to plan is a plan to fail. Use a promotions calendar to diversify your posts and make sure your yearbook sales and marketing strategy match your audience.
We’ve created a free social media calendar to promote your yearbook and your program.
Bottom line: parents buy the books. They’re mostly on Facebook and Twitter, so angle your yearbook sales posts to them. Unless you’re a huge *NSYNC fan, reading buy, buy, buy is not going to get the job done alone:
- Use #throwbackThursday as a feature for campus leaders and parent volunteers to pose with an old yearbook
- Ask parents to share their advice to seniors
- Do a guess the teacher feature with senior photos
Social proof is one way you can positively encourage others to support your program by buying a yearbook.
We trust our mom friends, so let’s give them a social badge to share.
We want students to want the book. Mix in student-centered messaging on Facebook and Twitter, such as reasons to buy a yearbook or highlight yearbook photos from a recent event that showcase non-buyers. Also, focus social media efforts on TikTok and Instagram to:
- Play up a trending sound or duet with a popular video
- Post a variety of messages to increase engagement
- Partner with campus influencers (ASB, PTA/PTO accounts, athletics) to hype your yearbook or upcoming event
3. Sell your program
One step beyond using social media to post links of how parents can buy yearbooks or recognition ads, is to show people the value of your yearbook program. The people who help make the book are just as important as your product.
- Show behind the scenes work: time lapse Photoshop work, someone hand drawing a layout, the yearbook committee meeting up for lattes and layouts
- Have the student body vote on a dominant image for a spread
- Reveal sneak peeks of the book
- Share your goals (e.g. 200 new followers, 60 books sold by December, 10 photos submitted) and, more importantly, how you celebrate
- Thank the yearbook heroes publicly on a #thankfulnessThursday
4. Simplify your yearbook sales processes
When someone says, “I need to buy a yearbook,” then you should be ready to sell it, not hand them a flyer. Repeat after me, “Sell the book.”
Evaluate your yearbook sales platform
Your yearbook program is a business whether you have a multi-year contract with book minimum orders or not. Therefore, one way you can serve your customers aka mom and dad is to make it easy for them to buy your product!
- How many clicks does it take to go from home to checkout?
- Do you have to scroll for days?
- When you share an ordering link, it is two miles long?
- Can you link directly to your school’s store or do families have to search?
- Are the sales reports easy to find and read?
Crowdsource efficiently
Parents want to buy your yearbook because they know their child will be in it. Make it easy to contribute:
- Add a specific, bi-weekly call-to-upload to your social calendar
- Pass out cards at games and events with your yearbook email to that mom with the camera
- Give shout outs to people who send you photos
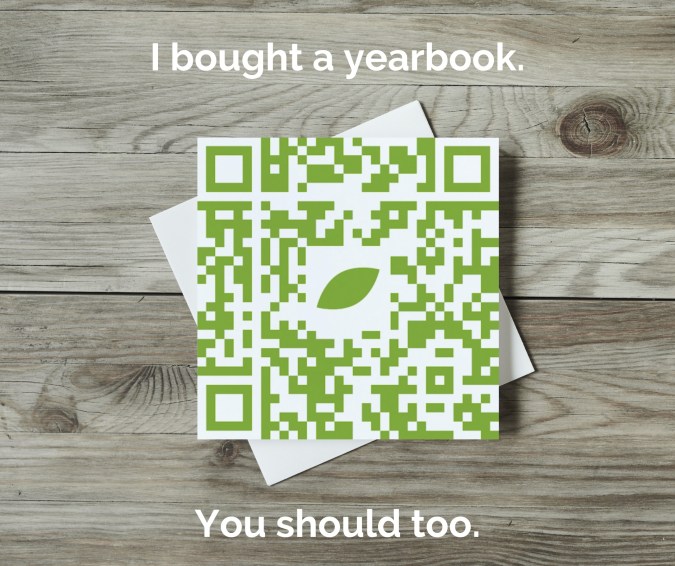
- Use QR codes

Use QR codes on all. the. things.
5. ReMEMEber the posters
Texas PTA mom Rachael said she drives past her children’s school every week. When there’s a big announcement, such as yearbook sales, her school puts a banner on the fence or a series of yard signs. Because it happens intermittently, she knows it’s valuable.
Old school paper posters can be effective (just don't be wasteful!) if the messaging is correct and the location is on point. While we love a good yearbook meme, keep it clean, positive, and fun—just like your yearbook!
QR Code is a registered trademark of DENSO WAVE INCORPORATED.
Pages to put in the yearbook
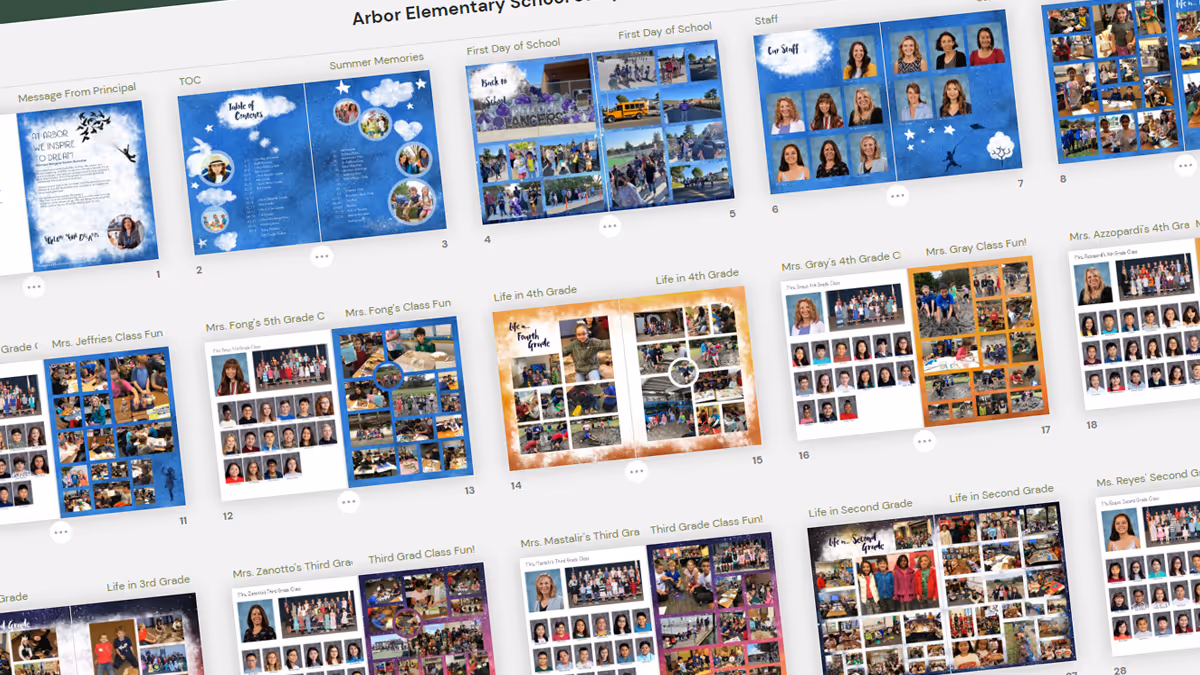
It’s go time: a blank yearbook ladder is in front of you and you need to know which pages to put in the yearbook. Do you take a chronological approach and cover events as they happen? Or should you create a sectional yearbook and handle coverage topically? Did you even know there were options beyond this is what we’ve always done? Below are samples of how other schools have done it and their rationale.
Put your yearbook pages chronologically
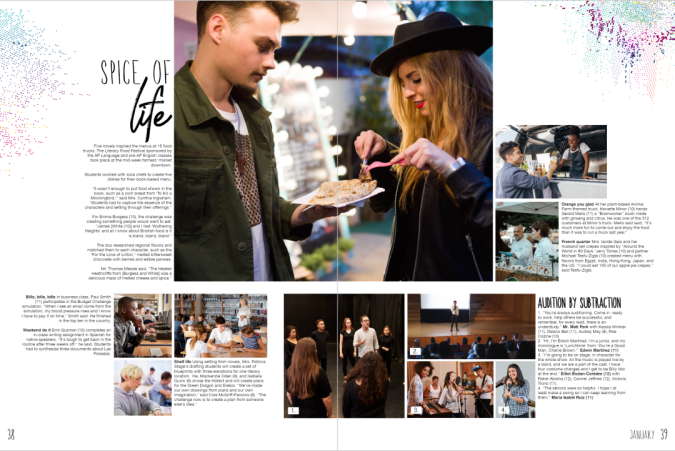
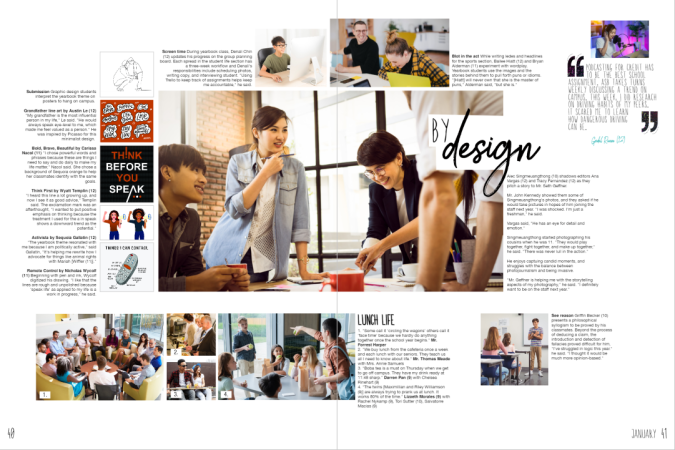
Sequoia high school’s yearbook uses 50 of its 148 pages to cover academics, student life, and special events on spreads. The two spreads below show what happened in the month of January and cover the literary food festival, spring musical auditions, lunchtime candids, as well as coursework from economics, Spanish, drafting, logic, yearbook, and graphic design classes. These spreads feature over 40 students and five faculty members.
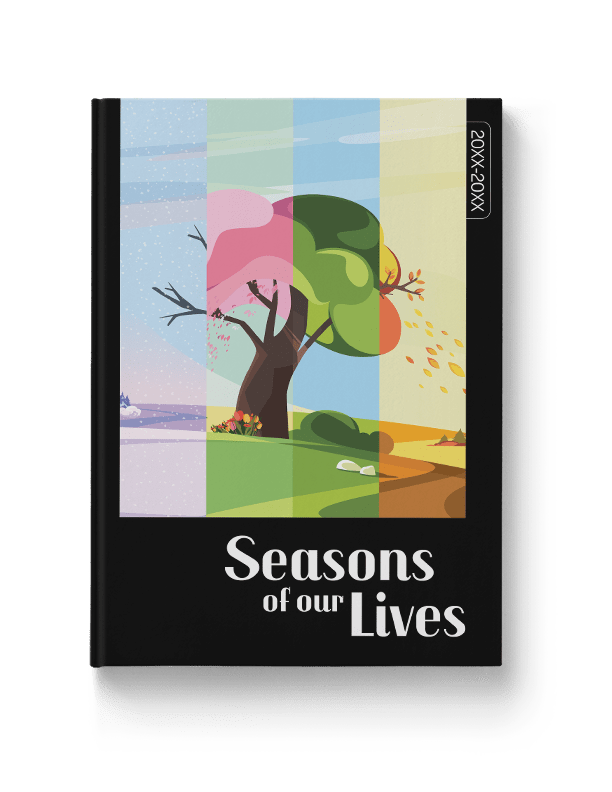
There’s no rule on how to put pages in your yearbook chronologically: we’ve seen schools organize their yearbooks monthly, quarterly, and seasonally. Treering's Seasons of Our Lives yearbook theme makes it easy to put pages chronologically in your yearbook.
Feeling ambitious? Weekly chronological coverage can be of value to larger or K-12 schools within modules dedicated to academics, club activities and meetings, plus a sporting event of the week.
Chronological cover yearbook coverage helps keep you organized by:
- Structuring your coverage: you can’t cover an event after it’s passed
- Building in mini-deadlines: because you have a structure, you can build due dates and workflows
- Telling the story of the year as it unfolds
Use traditional yearbook sections
Tradition works for a reason. Done right, yearbooks show the complete picture (pun intended) of how students contribute to their communities. It’s a visual reminder of how each story weaves together to become a group narrative. Yearbooks are definitely worth bonding over.
By using sectional, or traditional, coverage to put together your yearbook, pages are placed in topical categories. We know to find Start with Hello in the club section and volleyball in sports.
Traditional sections to put in your yearbook include
People
Student portraits (organized by class, homeroom, or grade), staff, and personality profiles tend to dominate yearbooks. Consider breaking up coverage by adding in siblings, outside-of-school hobbies, and international students.
Student life
All the big, schoolwide moments plus the small distinctive ones (think homecoming, Read Across America, hot cocoa in Mrs. Cruz’s classroom, Dot Day, lawn chair lunches, etc.) make their home in the student life section.

Organizations
Clubs and committees that comprise a large portion of student life may warrant their own section. If most of your clubs are inactive beyond a monthly lunch, consider keeping club activities in the student life portion or feature the group photos in the reference section.
Sports
Remember, action shots have a place, as do club sports, pre-game rituals, and scoreboards.
Academics
If you’re not putting a “Life in…” page, consider grouping academics coverage by grade or subject. Ensure daily classroom activities, as well as holiday parties, are included in the coverage.
Reference
Put pages devoted to the index, group photos (club and team), and ads in the reference section of the yearbook.
If you need additional inspiration for which pages to put in your yearbook, check out these sample ladders from other schools and adapt them to fit yours.