Most popular


Subscribe to our blog
Most recent

Yearbook signing tips
On the way home in the carpool, yearbook mom Kristie overheard her daughter and three friends talking about their yearbooks staying overnight at school so their teacher could look them over and cover up things like “stinky skunk” and “Chungus.” There were hurt feelings and students who felt uncomfortable through the yearbook signing process.
Kristie said, "The kids are constantly being talked to about kindness and all that jazz, and I think much of what happened today was one kid thinking they’re hilarious and the other thinking they smell like a skunk."
Bottom line: we haven't taught our kids how to sign a yearbook.
[Old lady voice] When I was in high school, I had already combed my parents' yearbooks and learned their deep secrets. I knew the art of reserving a page in my BFF's yearbook so I could fill it with Spice Girls' lyrics, inside jokes, and the obligatory, "Thanks for always being there for me." I wasn't commenting on her posts daily and DM'ing her. Her yearbook was the one-stop shop to confess my deep admiration and devotion.
For those who weren't in my circle in the quad, a shorter message strategically squeezed between longer passages made it look as though I ran out of room. (The winning formula is below.)
How do you sign a yearbook for someone you don't really know?
- Spell names correctly
- Choose something specific to call out
- Say thank you for being you: Gen, I love your smile. Thanks for sharing it with the world.
- Sign your first and last name
How do you sign a yearbook for someone who's not your bff?
- Spell names correctly
- Find something positive to say
- Say thank you for being you: Paulo, You are confident in your abilities. Thanks for sharing your interest in horses with us.
- Sign your first and last name
Yearbook signing for the besties
Add yearbook lingo
Some things never change; we bet every 90s mom has two or three of these acronyms in her yearbook.
- BF Boyfriend
- BFF Best friend forever
- GF Girlfriend
- HAGS Have a Great Summer
- KIT Keep in Touch
- LYLAS Love you like a sister
- TTFN Ta-ta for now
Add variety
Creative yearbook signing ideas, such as adding in song lyrics or writing messages in a more artistic form, break up the passages from others.
Remember, your signature will last as long as that book. Make it count.
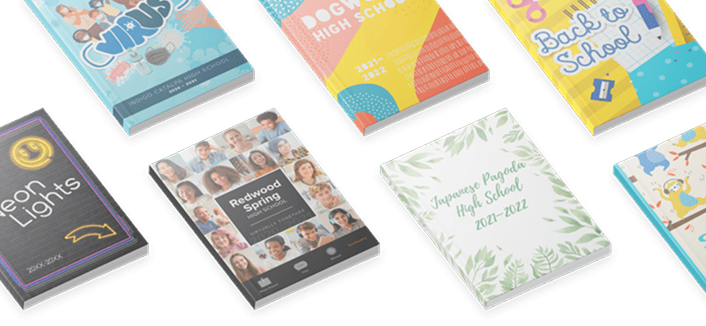
Treering yearbook printing: it lasts a lifetime
Stunning, sturdy, scuff-resistant covers
Hardcover? Check. Softcover? Yup. Soft-touch matte finish? Mais Oui! Glossy finish? For sure! Want to give your cover something a bit extra? We've got silver and gold foil to add a little more sparkle, and embossing options to add a little more lift. Whatever you and your students can dream up, we create using a superior quality laminate to protect your cover.
And they are all printed in the USA.
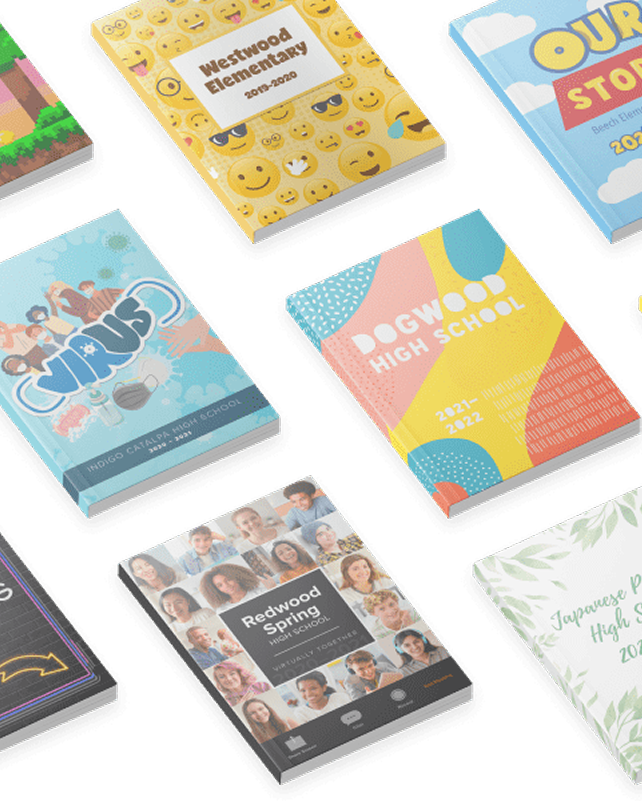
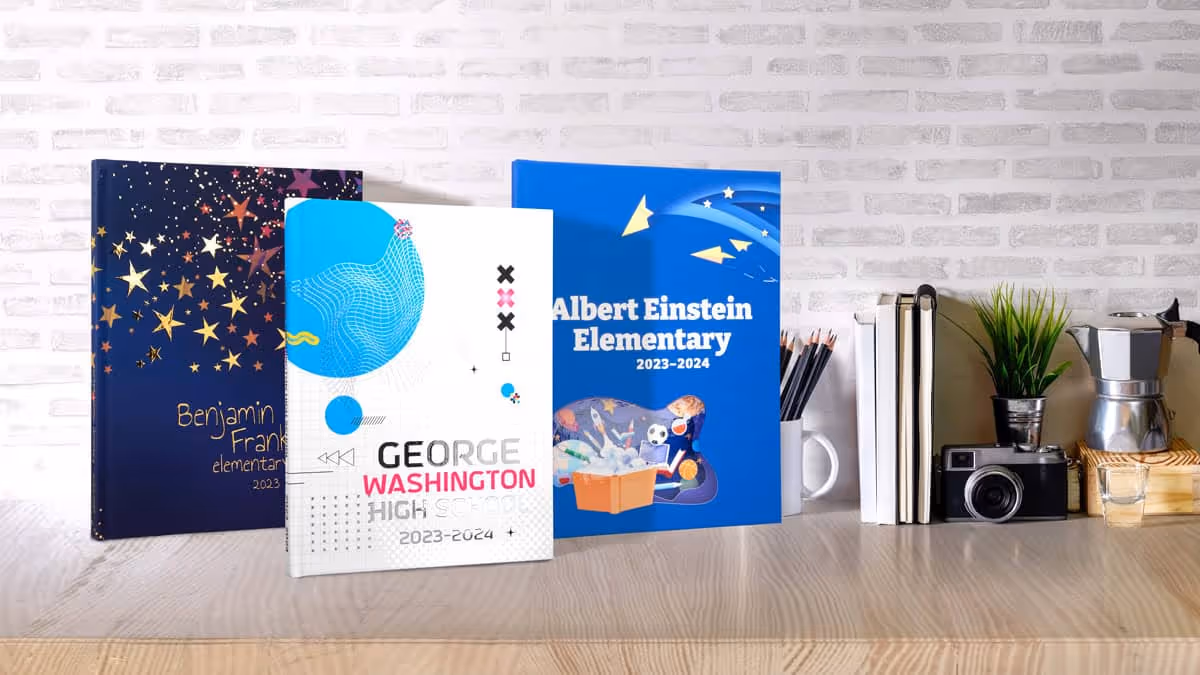
Completely customizable covers
Your cover can be as unique as your students. With the option of an 8.5x11 and 9x12 size book, you can have the flexibility to get your yearbook to look precisely how you want.
Though we have hundreds of professionally designed themes at your disposal, including our Heritage Collection, we won't limit your creativity. Hold a yearbook cover contest with your community; let your students decide what it should be. Ask your art class to come up with something representative of your year.
Sustainable memories
In today's digital age, where everything happens on screens, it's amazing how a high-quality yearbook can seem so... special. We print better than HD quality photos on our 100 lb, sustainably sourced paper stock. Because we care about both the quality and global impact of the yearbooks we create.
Bound to hold your memories together for lifetimes
All our yearbooks are bound with PUR Perfect adhesive to hold each page safely in place for a lifetime. Both hardcover and softcover books will stand the test of time. What's more, our softcover binding doesn't crack when you open it, meaning you can add your school name to the spine to make it look great on the shelf.
Moments are over in seconds, but memories—and your Treering yearbook—will last forever.

Treering's easy, yet powerful yearbook design software
Making a yearbook is a lot of work, but it can be fun too. We built our yearbook software to take away as much of the hard work as possible, so you and your yearbook staff can focus on the fun stuff. No more fighting with changes in portraits or keeping track of yearbook purchases; whether it's making your yearbook, managing your yearbook staff, or collaborating with your community, we eliminate the pain so you can focus on capturing your school's year in a beautiful yearbook.
Manage your yearbook program like a pro
Call it your very own mission control. Right from your dashboard, you can see who has purchased and who hasn't. See a running total of how much money you have raised for your school throughout the year.

Work from anywhere
For the parents in your community who are on the go, they can do everything from their mobile devices. They can add photos to your community's shared folders, design their student's custom pages, and purchase their student's yearbook while waiting in the pickup line.
Assign roles and permissions to your yearbook staff
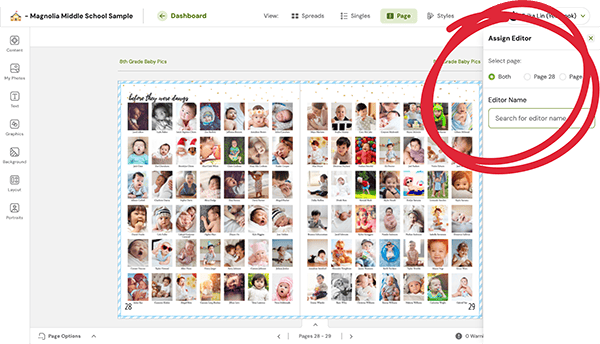
Grant some users an all-access pass to your yearbook by making them the Chief Editor, or limit their responsibilities by making them a Staff Editor or Restricted Staff Editor. Some people on your yearbook team may only need to add photos or edit text, while others need more responsibility. The choice is yours!
Your entire yearbook staff will be able to edit only those pages you have assigned them, making it clear for the editors to understand their responsibilities and easy for you to manage in one place.
Make suggestions and share ideas on each page within the book. Get notified each time you go in to edit the book if there are new notes, comments, or questions to read.
Once a page is finished, the editors of that page can mark it complete. Now you know their progress (and the big picture). Your finished pages are safe from unintended edits.
Keep track of all your students
Treering's yearbook software will automatically build an index for your yearbook. Never again worry about making sure each student gets equal coverage in the yearbook, or trying to make the index yourself.
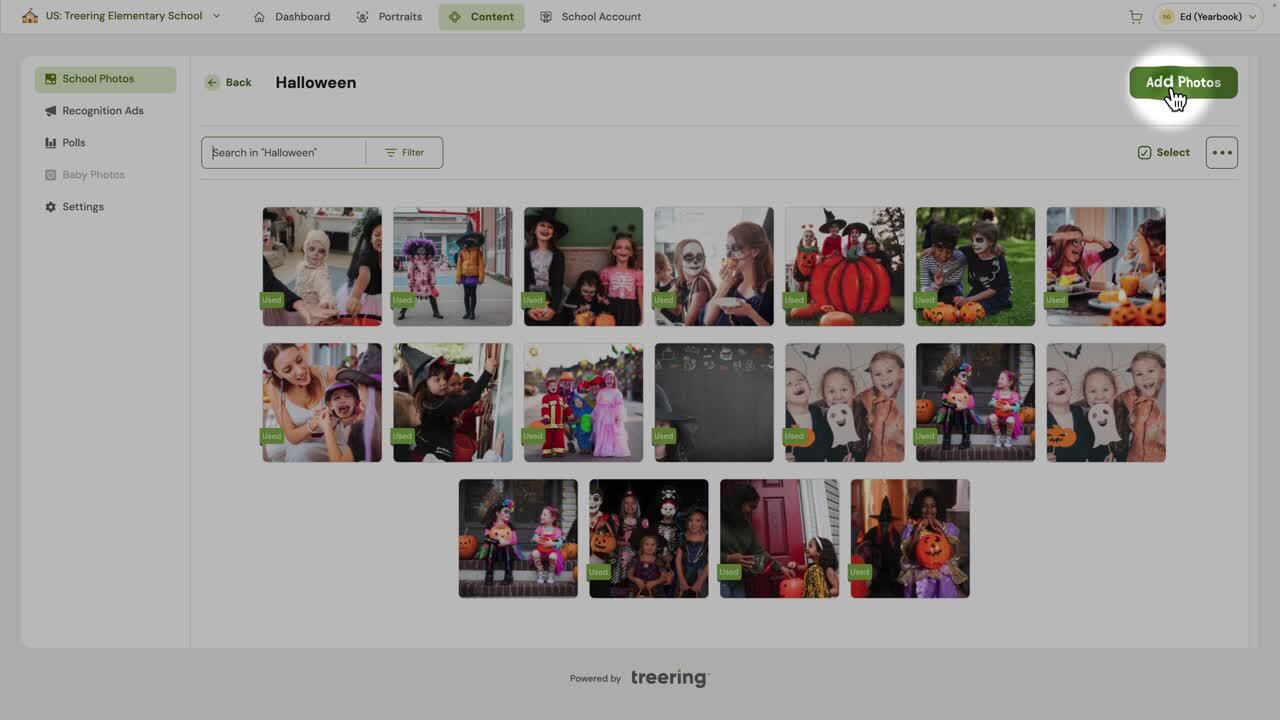
Never again worry if a photo has been used on a previous page. Or how many times each student is in the yearbook. With Treering you can tag students in each of your photos, and easily see which photos have and have not already been used.
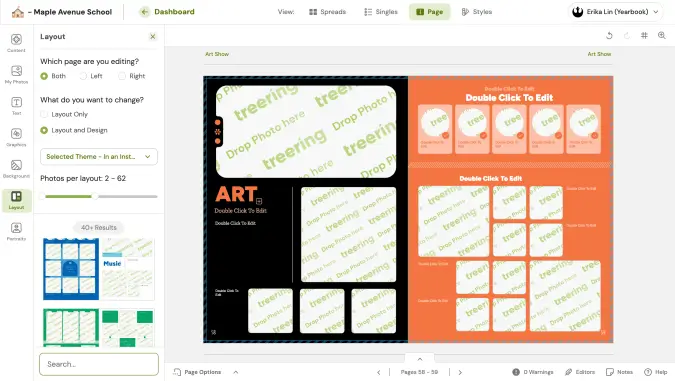
Easy layout creation
Save time and easily create your yearbook with theme-driven, drag-and-drop templates. Powerful tools and an intuitive interface give you the easiest yearbook software you'll ever use.
Auto layout
Organizing photos perfectly on a page can be tedious, but it shouldn't be. With Treering, just select the photos you want on a page and our yearbook software will automatically drop them into a beautifully designed layou

If InDesign is more your thing, no problem, you can upload all the designs you'd like.
Portrait auto flow
Point, click, grab some coffee. Yearbook portrait pages are no longer painful. Automatically arrange yearbook portraits. Customize the page layout. Make changes easily. Boom. Between 40-60% of your book is complete, and if you want to add more content to your portrait pages, you can.
Perfectly aligned photos in a snap
It is nearly impossible to manually ensure each photo is centered and aligned on a page perfectly. We've made it possible by adding gridlines that don't get printed, but make book-building a breeze. If you'd like to make it even easier, you can have all your photos snap to the grid. Oh snap! With this kind of precision, you'll feel confident knowing your book will look perfect.
E-commerce
Raise Money with recognition ads
Set your price per size, and let our yearbook software do the rest. When parents log in to buy the book, they will be given the opportunity to purchase one or donate one. Parents get to celebrate their children, and you get to provide your school some extra money to cover the cost of new cameras, field trips, or whatever you might need.
Online marketing and photo-sourcing
School community involvement in the yearbook is crucial, whether that's making them aware of how to buy the book, help contribute photos, or participate in the annual yearbook signing party, you need your community to be involved. We've got you covered from yearbook sales and online purchases to digital signature capabilities.
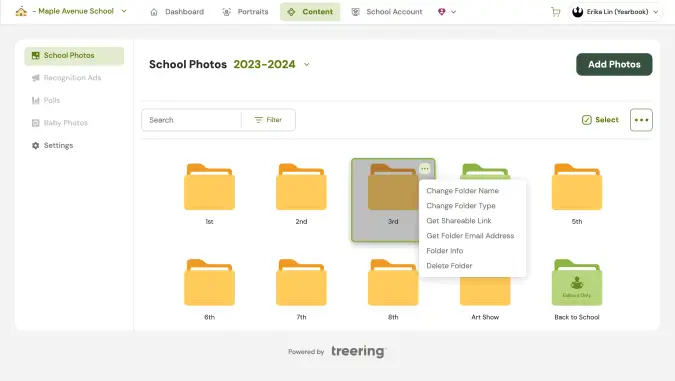
Crowdsource yearbook photos
Get more photos for your yearbook by sourcing them from your parents, students, and teachers. With Treering's yearbook software you can create shared photo folders to which your entire community can add photos.
Build your own shared folders for your yearbook staff to use for everything from retakes and doubles to sports and clubs. You can also create a private spot for just you and your yearbook editors rather than the entire community.
Upload photos from anywhere
We understand that all communities store school photos in different places, so we've made sure that our yearbook software will easily allow you to upload from anywhere. Facebook, Instagram? Yup. Google Drive, Google Photos? Got it. Or if you've got photos on your mobile phone or desktop, we can upload them from there too, whatever is best for you.

Yearbook sales made simple
Treering doesn't make your school commit to minimum orders meaning no financial pressure, but it's still something you'll want to do, so we wanted to make it easy. You can add links to your community's Facebook page. You can send emails directly to just those parents who haven't yet purchased. On top of all this, we have a bunch of professionally designed flyers for you to use. If you'd like to have some printed, no problem, we'll do that for free, cause fees just aren't our thing.
Keep your yearbook community accurate
Sometimes students change schools, or a parent accidentally creates two accounts. Our yearbook software helps you keep your community organized. You can quickly merge or separate student accounts, and add or remove students throughout the year as things change.
Even more to love
E-signatures
Technology has changed the way students socialize. With Treering's software, students can e-sign their friends' yearbooks with photos and stickers which can be printed on their free custom pages just in their yearbook.
Ensure consistent design throughout the yearbook
Set the theme, photo styles, text styles, and more in one place for your entire yearbook. Define all of it, none of it, or just some of it—whatever fits your yearbook style.
Favorites
With so many professionally designed templates, it could be easy to forget where you and your yearbook staffs' favorite ones are. Simply click the stars on the ones you like and they will all be in one spot moving forward.
Yearbook debriefing: a summer reflection
Now that your yearbook is a wrap and there’s nothing but sunshine ahead, it’s nice to take some time to reflect on your achievement. You may not want to spend all summer analyzing your yearbook (and who does?), but here are some quick "yearbook debriefing" tasks to help set yourself up for the new school year:
Bask in your success.
You did it! We hope you feel accomplished, proud, and gratified. First and foremost, this is the perfect time to round up your team to celebrate a job well done. Whether it’s a picnic in the park, a backyard super soaker battle, a trip to a local amusement park, or a pizza party at the pool, gathering everyone together is a great way to close this chapter (pun intended!).
A shared celebration is a morale boost, a “thank you,” and a fantastic way to show everyone how fun yearbooking is as you ride that wave of camaraderie into the upcoming year.
Solicit and evaluate feedback.
Whether utilizing an informal compilation of comments or a more formal survey or meeting, it’s helpful to evaluate the yearbook from the experience of your school community. This process can include everything from design and content to distribution and will be invaluable during your yearbook debriefing.
While we all would prefer kudos to criticism (here are some tips for dealing with complaints), your audience's honest feedback is crucial to improving and enhancing your yearbook program. Additionally, considering suggestions and allowing people to feel heard goes a long way toward creating a solid yearbook culture.
Analyze growth opportunities.
When doing your yearbook debriefing, looking for ways to refine your process is essential. Did you and your team encounter any challenges building or marketing your book? Can you enhance your collaboration process? Is there room for improvement in your workflow or organization? If your timeline proved challenging, have you considered a company that allows you to control your deadline?
Lay the fall foundation.
Remember to take a few minutes to set yourself up for fall success by verifying details with your publisher (e.g., logging in to confirm your account for next school year). And if you would like to spend some time planning for your next yearbook over the summer, here are three steps to kick off another fantastic year of capturing your school’s spirit. Here’s hoping you can do all your prep work poolside!

4 ways to simplify yearbook creation
At a recent PTO event, we handed out eye masks that said, "No more yearbook headaches." Yes, it was the hottest piece of swag there, and more than that, it was a promise: Treering exists to simplify the yearbook process by leveraging technology.

1. Use templates
Templates are drag-and-drop designs for yearbooks. Generally, they have frames for photos and may contain text boxes and other design elements. Yearbook staff, often parents and students with varying degrees of design experience, can quickly learn to use templates. Not only does this speed up the yearbook creation process, it also keeps the books looking unified.
Theme packages contain coordinating fonts, art, and page layouts. You can easily build a book using page templates for sports, events, and classroom activities.
Select a theme for a whole book look. Templates can often be matched to school themes, colors, and mascots with a few clicks, ensuring the yearbook reflects the school’s identity without extensive custom design work.
Eliminate decisions on bleed, spacing, and typography with professional designs built into your yearbook software. With these design elements already decided, the yearbook team can focus on gathering content.
2. Shared photo folders
Crowdsourcing allows individuals to submit photos from events, activities, and everyday school life. It’s the POV for which we all clamor on social media. When students and staff contribute their photos, they also feel a sense of ownership and pride in the yearbook, making them more likely to purchase the yearbook.
By opening up submissions to the greater school community, you also create a broader representation in the yearbook. Allow continuous contributions throughout the year to keep the yearbook team updated with recent events and activities. For best results, do a timely, specific ask to fill your shared folders. If the field trip is Friday in September, get the word out before October.

3. Choose digital
Digital printing helps streamline yearbook production. With a fast turnaround, it grants more time for design. Additionally, print-on-demand offers the flexibility to accommodate last-minute orders. (We busy parents thank you!)
Print-on-demand also simplifies things by eliminating inventory management. No extra books means no summer flash sales or hitting up the alumni association years later. This method is cost-efficient for smaller schools as well. No minimums mean no set-up charges.
The best part: digital printing makes it easier to create one-of-a-kind yearbooks with custom pages.
4. Offer personalization
With Treering Yearbooks, parents can add two pages full of their memories—like vacations, milestones, or hobbies—to their child’s copy of the yearbook. When students look through their yearbooks, they will find their memories and their photos alongside traditional yearbook pages. Each copy is unique.


Parents can add those personal touches using integrated online design options for recognition ads and custom pages. (That’s one less thing for the yearbook adviser to do!)
Like crowdsourcing, customization creates coverage. It celebrates each child’s involvement in school and out.
Templates, crowdsourcing, digital printing, and personalization relieve many of the challenges associated with traditional yearbook production. These innovations reduce costs and save time. The result: a high-quality, personalized, and inclusive yearbook that accurately captures your school’s experience.

8 things to include in your yearbook
Scroll through your yearbook ladder and try not to panic at page after page of emptiness. To help with planning, we compiled this list with the understanding that you would have the meat and potatoes of a yearbook:
New at this? Pick one or two to include in this year’s yearbook. As your tenure as an adviser grows, so can your repertoire of things to include.
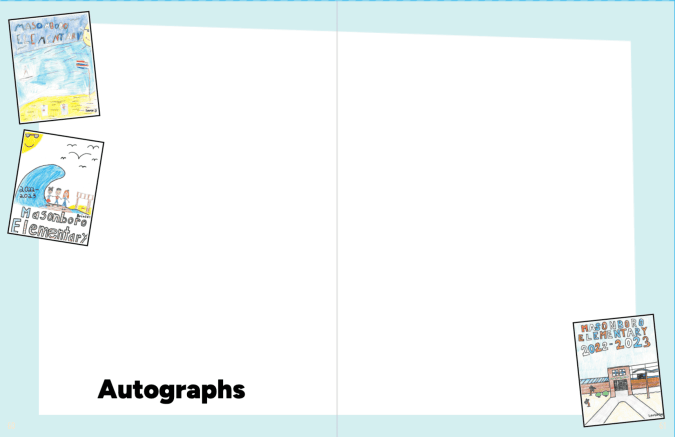
1. Autograph space
This is why we throw yearbook distribution parties. It’s why we wait until the last vote is counted in the ASB election and last ribbon is awarded at field day. Three weeks after clicking “I’m Ready to Print,” boxes of books magically show up.
Autograph pages are easy to include in your yearbook: you use a pre-made template or design your own. It doesn’t have to be fancy.
2. Table of contents
This is the most underrated spread in the book, a table of contents is the must-have launch pad for the reference book that is your school annual. It’s also something that can take a few clicks to create, if you’re using a Treering theme.
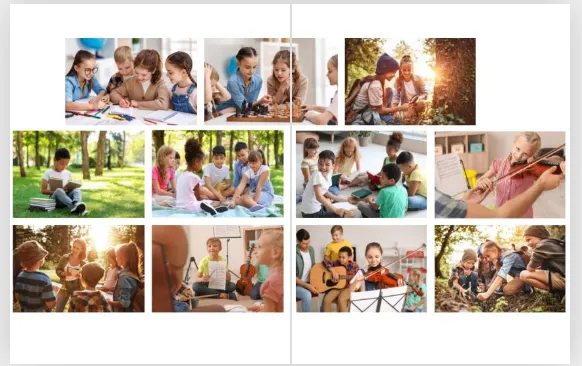
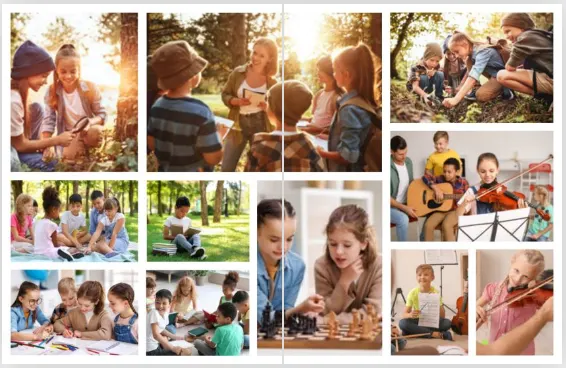
3. Collage layouts
Many times, we see upwards of 60 photos slapped on a spread with no layout structure. The number of students covered is overshadowed by a chaotic layout.
PSA: Just because Treering offers layouts with up to 65 photos, doesn’t mean you should use them. Every student should be recognizable. Aim for their faces to be the size of a dime.
4. Superlatives
Superlatives—is Greg Heffley the only one who calls them “class favorites?”—are yearbook awards based on student surveys. These “Most Likely to…” awards highlight standouts.
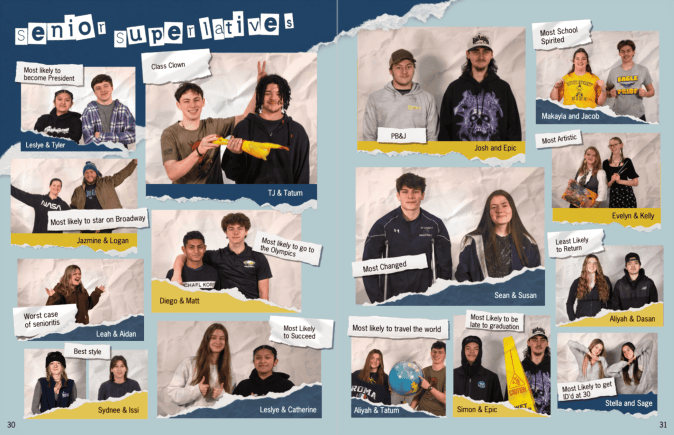
Check out our list of 100 superlatives focused on creativity, character, and community contributions.
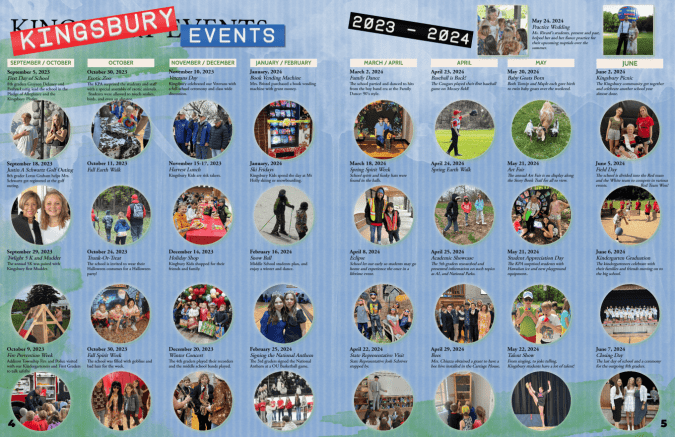
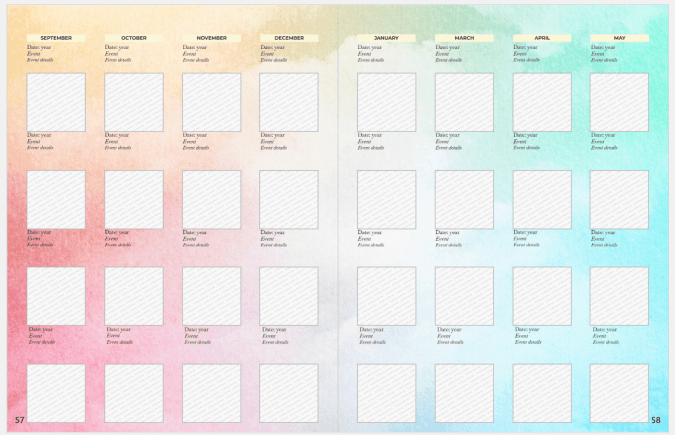
5. Year-in-review spread
Unless your yearbook is chronological, including a year-in-review spread is a way to increase storytelling. It gives a holistic overview of the year, both in and out of school.
School-level
A designated school year-in-review spread can feature images from events throughout the year, giving an overview of the activities and achievements across campus. Many yearbook creators love to use them for photos that may not have “fit” anywhere else or as a way to cover different students from saturated events pages.
We adapted it. Search "calendar" under "all page templates" to include this in your yearbook.
World-level
Some schools include what happens beyond school walls on a year-in-review spread. To do this quickly, use Treering’s pre-designed one.
Yearbook classes and clubs that want to create their own should
Keep in mind: if your year-in-review pages include celebrities, logos, photos someone on your staff did not capture, even in educational yearbooks, you may run the risk of copyright. The Student Press Law Center has a digestible guide on fair use for student media.
6. Storytelling photos
Both classroom moments and hallway hangouts show student life on campus. It’s important to include candids, academic photos, and even lunchtime snaps to balance posed portraits.
7. Content on portrait pages
Another way to break up posed portraits is to include content on portrait pages.
Shrinking your portraits to free up space for storytelling photos or even feature coverage, deepens your coverage and adds value to class pages.
8. Stories and captions
This is last on the list, not least on the list. Regulars to the blog have seen this charge before: If there is no writing in your yearbook, add captions.
Master them. Then, include expanded captions. Then, body copy.
No matter your team size, you can include extras in the yearbook that elevate it beyond a photo album and make the difference between a book that gets browsed and one that’s cherished.

Artificial intelligence (ai): assuring safe memories
As Artificial Intelligence (AI) inspires nearly all facets of daily life, today’s news focuses heavily on buzzy AI tech like the ubiquitous ChatGPT. From improving the travel, automotive, and healthcare industries to monitoring coral reefs, the benefits of AI seem limitless. (You can even ask for curated movie recommendations!) The yearbook world, of course, is no exception.
Treering’s in-house engineers constantly strive for ways to improve and innovate the yearbook experience for everyone involved, and our AI-driven content review process is doing just that. Here are some ways employing this exclusive technology has helped protect cherished memories for the past several years and counting:
Streamlining the review process
One yearbook challenge editors are all-too-familiar with is ensuring that inappropriate content doesn’t make its way onto pages (or worse, the news).
To solve this, Treering implements our automated AI review pipeline before going to print. This process efficiently moderates a book’s content across a network of computers that wield industry-leading and constantly evolving computer vision.
Free time for editors
Treering’s AI can swiftly and accurately analyze vast volumes of data (1,430,921 pages year to date, in fact!), flagging them as necessary for review and follow-up. This process allows teams to focus more time and attention on tasks that can’t be automated, like matching students with a stellar list of yearbook superlatives.
Offering the best of both worlds
Of course, the human component remains a vital part of the yearbook review. (Treering loves a good collaboration!) In addition to utilizing AI, we employ staff dedicated to this process.
When teams combine Treering’s content review procedure with other proofing tools, such as our free printed proof, schools can relax, knowing they’ll immortalize the best possible yearbook version.
The applications of artificial intelligence are plenty, and Treering is proud to pioneer its use to proactively benefit schools by making it easier and safer for students and families to capture life’s memories.

How to bid a yearbook
School finances are tough. Compound that with murky yearbook invoices, and you’re left repeating, “I don’t know,” when meeting with the school finance clerk. Between boxes of “extra” yearbooks that will sit in a storage closet instead of a student’s shelf and a final invoice amount that differs from the initial bid, it’s a pain.

Many yearbook creators tolerate vague yearbook pricing because the thought of going publisher shopping is a worse evil. It’s not until we hit our breaking point with one of these:
Yes, it’s a memory book, and it gives all the feels. One of those feels shouldn’t be a burden.
Understanding itemized bids
Shipping, art fees, camp costs, and proof charges may appear as line items on a final invoice. They don’t always appear on yearbook pricing proposals. That’s why you must be proactive when soliciting different yearbook publishers for a bid.
Pro tip: include your current publisher in the bidding process.
The timeline: when to look for a new yearbook publisher
It will take about a month or two to complete the bidding process. Beginning is simple: define your needs and non-negotiables to share with each publisher:
Allow two to three weeks to evaluate the bids, ask clarifying questions, and get everything in writing. Align this with your school’s budget process for best results.
The bid: what to expect when you’re expecting
The scope of your bidding process differs if you are shopping for a single school vs. a district. (More on district bids below.)
Schools should consider specs, staff needs, and budget when soliciting bids. Your bid should include
Add it all up and divide by your contracted minimum for the per-book price. Oftentimes, these costs of doing business increase your core book price by $2-12 each. And if yearbook math wasn’t your college minor, there is another way.
The Treering difference
When yearbook creators receive a bid from Treering Yearbooks, it includes a per-book price with no minimum order. The core book price is based on cover finish and page count. It includes:
That’s it.
How to evaluate yearbook bids
It’s safe to say most yearbook companies will look fab on paper (or spreadsheet). Resist the temptation to choose on price alone. By personalizing the process, you position your yearbook team as the leader. Your publisher should work for your program.
1. Talk to other users. Each company should provide you with three users from a similar situation. Consider size, quantity of yearbooks ordered, and staff structure. Not only will you hear individual experiences, but the synergy of the reference will show whether or not the publisher understands your situation.
2. Do a trial of the software. Spend an hour playing with any proprietary software tools. Are you able to create a sample page? Do you know how to find self-service help?
3. Define your publisher support team: who helps with technical questions, how you find design inspiration, and who is training your team. If you have an individual servicing your account, define the role your rep will play and how you expect the rep to support your yearbook creation process, including expected response time.
Finding the right fit for your campus will take time. Trust us: it will be worth it when you have your Cinderella moment.
Navigating an RFP
Those who represent a larger group have purchasing and negotiating power. Learn the requirements in your district or state before you solicit bids. You may not even need to bid because your school may have more flexibility than you thought. Or, if there is a purchasing cooperative in your region, your school may be able to piggyback on a neighboring contract.
If you are managing a bid for multiple schools, create an itemized list for each site's individual needs. For example, a high school may want a hardcover 9x12 book, and an elementary school may want to offer hardcover and softcover 8x10s.
Treering works with each district’s process, whether it’s co-ops, POs, invoicing, or vendor approvals. Each RFP is customized to the needs of the schools within the district. (We’ll leave the templates for easy yearbooking design.)

Yearbook Heroes Lisa and Eden remind us what matters most
Treering Yearbook Heroes is a monthly feature focusing on yearbook tips and tricks.
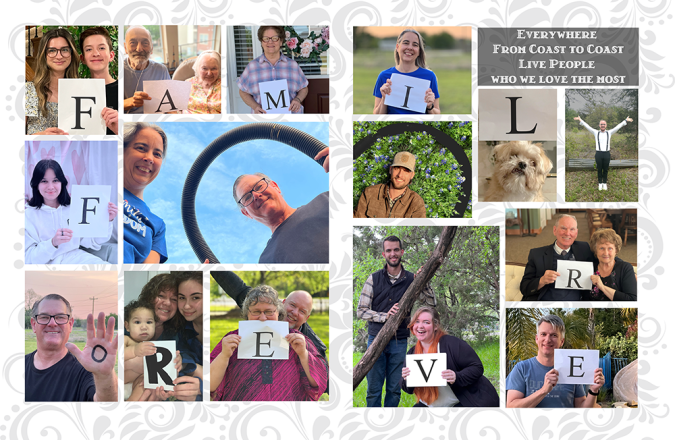
As a staff member at Sycamore Academy, an online school, Yearbook Hero Lisa Ward had yearbook experience. She’s a self-proclaimed pro at the literal cut-and-paste, handcrafted memory books. As a first-year Treering user, she was excited to see students come together virtually to craft and sign each other’s books. With her daughter, Eden, she spent hours looking through templates and art in the Treering library to spark an idea for her own custom pages. The end result was the winning combination of mother-daughter talent, as Eden Will (“She’s the artist,” said Lisa) stepped in to help her mom create an entry for the People's Choice Custom Pages Design Contest.
Traditionally, custom pages put an additional spotlight on one child. Tell me about putting the spotlight on your support system.
Eden: Mom asked for help.
Lisa: Eden drew out the layout.
Eden: It was a snapshot of the family for the year since we don’t have albums. My cousin just had a baby and now we have a record of this moment in our lives. We have family from CA, to MI, NC, different parts of TX, and OK. After it was finished, we ended up editing it for the participants to include their families so they had their own version. They’ll print for their families.
Why do you think the message of “Family Forever” resonated with hundreds of people on social media?
Eden: That was pretty awesome. The resonating thing is that we reached out to family we don’t always get to see. And they were all interested in being a part of this. It is so hard to get everyone together. The last time I saw everyone together was at my wedding. It was cool to collaborate virtually and make something that will last. Other people found that touching. We live in such a spread-out world.
Lisa: You get the occasional family settled in one place. Technology brings us together.
Eden: We participated in it, even though we weren’t physically together. It’s like we worked together to be together.
What value do custom pages give you?
Lisa: It’s especially helpful for our school. As an online school, we try to get pictures of people during spirit week wearing hats or different colors. We don’t have pictures of kids interacting because we are online. The custom pages help each parent take each and make it their own.
Eden: Even though she’s not a parent of a student, she was able to make it a memorable for this moment in time to make it personal for her.

The one-stop yearbook rubric shop: grading tools for design & copywriting
A yearbook grading rubric is the perfect way for teachers to give students the grades they deserve and the feedback they need to make a better yearbook.
Heck, even if you’re working with a bunch of volunteers and want to formalize your process around feedback, a yearbook grading rubric is pretty much the way to go: it’s the most holistic way for you, the adviser, to provide critical feedback to your staff. For the younger students you’re working with, this will lead to growth; by their senior year, these kids will be ready to skip right over college and head straight to Sterling Cooper.
To help give your grading and feedback game a jump start, we’ve developed two free yearbook grading rubric templates that you can use for your class or club. One’s focused on yearbook copy, the other’s focused on yearbook design.
Before we jump into the templates themselves, though, we’ll break down why we’ve structured the rubrics the way we did and what you can gain from using them. So, read on.
Anatomy of a yearbook rubric
If you’re a teacher, you’re probably familiar with rubrics. (In fact, if you’re a teacher who uses rubrics, you’re probably more familiar with them than we are; you’re also probably able to skip this section.)
If you don’t know rubrics, though, this section here is a short crash-course for you. I’ll be helpful for understanding the templates we’ve put together for you.
Generally speaking (and specifically speaking in terms of our yearbook rubric templates), a rubric consists of three core areas: Scale, criterion, and performance level descriptions. Let’s break each of them down.
Scale
The scale represents the total number of points available in each category as well as the aggregated total (the final grade). Instead of just applying numerical values to each level of performance, pair each possible point on the scale with a narrative equivalent. For example, if the maximum number of points that can be earned in a given criterion is 4, then 4 = Exceeds Expectations. Conversely, in the same scenario, a 1 would be equivalent to “Does Not Meet Expectations.” You can play around with the actual wording in the scale you choose.
Criterion
Where the scale represents the number of points, criterion are the categories by which a piece of student work is assessed. They can be altered , as long as you can clearly distinguish between the levels of accomplishment on your chosen scale. For example, if we’re assessing a student’s ability to write a headline for a page, there should be a way to objectively measure what an “A” headline looks like versus what a “C” headline looks like. If there isn’t, reconsider including it as a criterion (perhaps it can be combined with one or more other facets of the page instead).
Performance Level Descriptions
A rubric is broken into quadrants. In the examples we’ve provided, the vertical headers represent the criterion and the horizontal headers represent the scale. The points of intersection are the Performance Level Descriptions, or PLDs. These are the characteristics that make up a grade. Try to use highly-specific language so that students are clear on what separates good work from work that will truly blow you away.
If your PLDs are fully fleshed out, we suggest giving your students your yearbook rubrics in advance. This gives them an idea of what they need to do in order to earn the grade of their choosing, which can positively impact the quality of their work.
Miscellany
Don’t forget to include:
- The student’s name
- Page numbers, or spread, being assessed
- Total points
With that quick review out of the way, let’s dive into the actual yearbook rubrics.
Yearbook rubric for grading copywriting
When it comes to yearbook copy, striking a balance between originality and uniformity is key: Too rigid and your yearbook won’t engage. Too much creativity expression, and it could end up looking like an anthology of erasure poems.
In the downloadable template we’ve created, the categories for assessing yearbook writing are: headlines and subheads, body copy, captions, adherence to style guide, and originality. Let’s take a closer look:
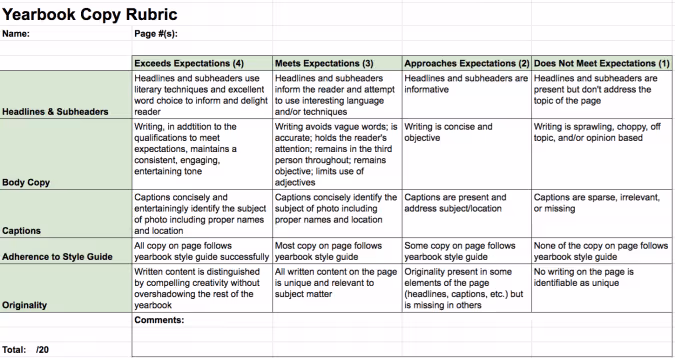
Get the Treering Yearbook Copy Grading Rubric here.
By assessing the writing on each page, you achieve two things. First, you give your students a tangible grade for their hard work. Second, you can vet the copy on every page of the book, which gives you an idea as to how everything fits together tonally and whether the book as a whole adheres to your established style guide.
Yearbook Rubric For Grading Design
While assessing writing is straightforward, design can feel subjective; we can’t all be trained art critics, creative directors or teachers, after all.
In the downloadable template we’ve created, the categories for assessing yearbook page design elements are: typography, color, photographs, adherence to style guide, and cohesiveness. Let’s take a closer look:
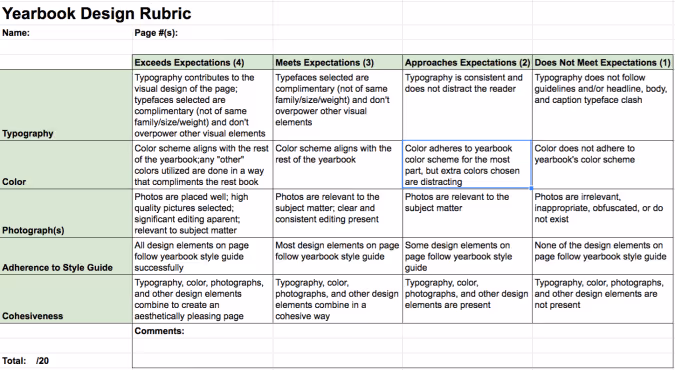
Get the Treering Yearbook Design Grading Rubric here.
As a result, you might be tempted to break the elements of design into a handful of granular rubrics (one for photography, another for layout: you get the picture). While there’s nothing wrong with doing this, developing a rubric that takes everything into account is a better approach.
Here’s why:
Ensuring that the individual elements work in concert is as important as the quality of those elements in their own right. For those for those classes where the principles of design are just beginning to be explored, this is important. Focus on the whole first, then the specifics later.
If you’re teaching a yearbook course and need to grade your staff on their work, rubrics are the perfect way to do it. If your staff is composed of after-school volunteers who won’t be graded on their work, rubrics like the one’s we’ve included above can be a fantastic way to provide actionable feedback and ensure high quality design and copy on every page.

6 threats to productivity for yearbook teams
Certain activities and behaviors drain time and diminish returns. If the goal is to do your best book yet, and you struggle through the process, check out the advice below from current advisers on being more productive. Select one or two areas to tackle immediately and watch your yearbook program become more organized and your team more aligned.
1. Lack of clear deadlines
Without clear deadlines, yearbook tasks can drag on indefinitely. This lack of structure can lead to procrastination and missed milestones, ultimately delaying the entire yearbook project.
It’s essential to make a plan for success based on/around your school's calendar. Find out when significant events will happen and assign someone to them to ensure you'll get great coverage (photos and interviews).
Party
OK, party may be a misnomer.
Celebrate milestones to keep students motivated. Whether completing the first draft of a section or reaching a major deadline, acknowledging these achievements can boost morale and keep the momentum going.
Full disclosure: I used to think when I wrote on the board something like, “All fall sports due 10/18,” students would break that down and create their own copy, interview, and game photo mini-deadlines. I didn’t realize I had to teach project management as well.
By determining productivity milestones such as mini-deadlines for setting up photo folders, getting layouts on pages, and finalizing spreads, students knew the necessary steps. We celebrated every 15 books sold, 10 spreads completed, and when there was a yearbook presence at all-school activities.
2. Inefficient meetings
Meetings without a clear agenda or purpose can consume a lot of time without yielding productive outcomes. Long, unstructured meetings can drain energy and focus. Short, pointless ones detract from a purposeful project.
“Acknowledge and accept conversations that should be held ‘offline,’” Yearbook Artist Tevis D. said. She also advocates for shorter, more efficient work sessions with a time at the beginning to identify areas of focus.
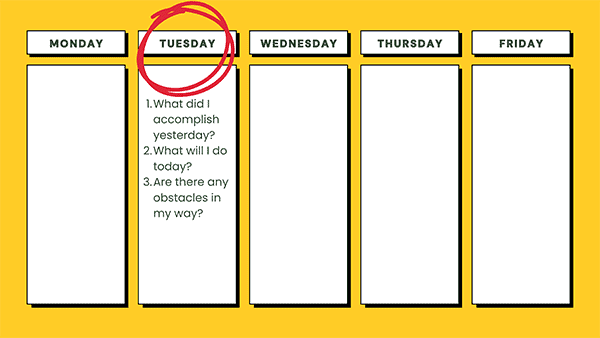
Stand up meetings
Before the thought of another meeting makes you scroll away, consider why some meetings are time sucks: ill planning, no agenda, better off as emails… Now consider an alternative.
Stand-up meetings are brief, daily meetings where team members share their progress and challenges. Their effectiveness comes from actually standing. No one is overly comfortable, so dismissing and getting to work is easy.
Here’s how to make them worth your time: set a timer for 15 minutes and have everyone answer the three key questions:
- What did I accomplish [since the last meeting]?
- What will I do today?
- Are there any obstacles in my way?
Tips for teachers leading Sstudents
Teachers can use stand-up meetings with students for accountability and track progress. It helps students develop a routine and stay focused on their tasks because they will each take a turn verbally stating their goals and accomplishments.
Application by parent volunteers
For parent volunteers, stand-up meetings can be conducted at the start or end of each work session. This keeps everyone aligned and aware of challenges that need addressing.
“It is always a good idea to follow up on these tasks in an email or handout after the meeting,” veteran yearbook adviser and Treering Yearbook Evangelist Ed G. said.
3. Over-editing
Constantly revising and over-editing pages can eat up valuable time. While some revision is necessary, excessive tweaking can lead to delays. Establish clear guidelines for when a page is considered "final" to avoid endless editing cycles. Unless your yearbook tradition includes a fall delivery or ship-to-home, you want to make your final deadline.
“If students get the yearbook later than expected, they won't care how perfect it is,” Ed G. said. “They will remember getting it late and not being able to get all of their classmates' signatures.”
He advocates for sharing a disclaimer so students and families know it is a volunteer-driven effort. (You can make it your own by editing it here.)
4. Disorganized assets
Managing photos, articles, and other yearbook content without a proper organization system can lead to wasted time searching for files. A well-organized photo management system is crucial.
“Upload photos as soon as possible after an event and use tagging and folders to keep organized,” Kate H. said. (She leads two volunteer yearbook teams for her son’s elementary school and daughter’s dance company.) “Bonus points if you can add your photos to the spread at the same time too.”
5. Unclear roles and responsibilities
When team members are unsure of their roles and responsibilities, tasks can fall through the cracks or be duplicated. Clear role definitions help ensure accountability and productivity.
“I think every kid on the team was assigned to the same pages this year so it was unclear who was actually in charge of it,” middle school club leader Ali J. said.
Tips for leading students
While it’s important to allow students to take ownership of the project, they will still need guidance and support. You can do this by:
- Assigning yearbook spreads to one or two students max
- Having pre-assigned job descriptions/roles
- Being available to answer questions
- Providing actionable feedback
- Teaching them to use the Help Center
Application by parent volunteers
Clarity in roles helps prevent duplication of effort and ensures that all aspects of the yearbook are covered. Teams should have codified expectations for:
- Who will photograph each event
- When photos should be in their folder
- What activities will be open for submissions and how this will be communicated
Regular productivity check-ins (see stand up meetings, above) either in person or via video calls, keep everyone informed and engaged.
6. Unresolved conflicts
Interpersonal conflicts that are not addressed can create a toxic environment in the yearbook club, lowering morale and productivity. Addressing issues promptly is key to maintaining a productive team.
Early detection, while uncomfortable, can eliminate problems later on. Address it (kindly) as soon as it happens so your team can press forward.
When you do get that face-to-face moment, maintain your professionalism:
- Communicate with specifics: instead of “You’re always unreliable,” try “You volunteered to take Fun Run photos and did not have a backup in place when you were a no-show. What is your plan to get pictures?”
- Keep it focused: the conversation should center around yearbook responsibilities and not on personal issues. You’re not meeting to be a relationship counselor, life coach, or even a friend. You’re a project manager looking to complete a job.
- Be proactive: document what will happen next. If your yearbook volunteer wants to remain in the role, write out what it will look like with clear expectations and deadlines. Also include an “out” clause if your volunteer continues to be unreliable. Share a copy with school administration if your volunteer is a student or co-worker.
Teambuilding
Obvious statement: effective teamwork makes for a successful yearbook project. Here are our favorite ideas to improve rapport and trust up front.
Tips For Leading Students
Formal activities, such as an exercise, and informal ones, such as a bell ringer, help students open up. Debriefing can also increase empathy: ask students what they can do to make yearbook interviews less intimidating for students outside of the yearbook team.
Application by parent volunteers
Parents aren’t going to want to sit around constructing marshmallow and spaghetti towers. Instead, schedule some forced fun:
- Pickleball and a playdate at the park
- Share team members' baby on the parent group's social media channels and ask followers to guess who (while asking for baby pics for the yearbook)
- Coffee after drop-off
- Yearbook Team Night Out at ax throwing, a driving range, or a craft café
Careful refinement of your workflow and the elimination of yearbook productivity blockers will reduce stress and improve morale. By identifying and addressing these common barriers, you can significantly increase productivity and ensure the smooth and timely completion of your yearbook.

4 ways to shake up your end-of-year yearbook party
As the end of the school year approaches and yearbooks get delivered, it’s the perfect time to throw a yearbook party. What better way to remember the year than to go through your yearbook and host a signing party?! We know when it comes to throwing a school party that everyone just thinks of one thing – pizza – but yours can be so much more. A class party should be about celebrating and making memories, not just eating food (to be honest food is always the first thing that pops into my mind, but I digress).
As this year has been so different, we wanted to make sure you had some ideas on how to celebrate the memories made in the yearbook, whether you were in school or virtual, and for students who bought a yearbook or not. If this year taught us anything, it's that you have to find the time to be present and live for the moment - celebrate with one another. Social distancing can, in fact, be social!
Here are a few in-school party ideas:
Throw a blast from the past party
As a parent volunteer or teacher, there are a lot of ways you can take your students back in time. So when you’re ready to throw your yearbook party, set the scene by printing out some fun pictures you’ve taken throughout the year and hang them around the room. Or, if you’ve kept any previous party decor from other celebrations like Halloween or pie day, you can create themes throughout the room to reflect the year that has passed. Decorating the room with old photos and decorations is a great way to remind your students of all the good times and bonus, you get to recycle old projects, while keeping party expenses down!
To liven up the party and get the students excited, have them bring in their favorite projects of the year to reminisce on all the great things they’ve learned. This party will encompass all the memories from the yearbook, the decorations, and even their learning experiences. While all the fun is happening, students can sign yearbooks and share something nice about each project they brought in.
If you can, really blast to the past by bringing each student in fake feather quill pens for them to sign each other’s yearbook.
Host pop-con with popcorn
A fun way to throw a party in the classroom is to get students involved in a craft and whether they bought a yearbook or not, throwing a yearbook party is about celebrating memories and making more. A similar craft to a yearbook that elementary students can make is a comic strip! Give each student some time to go through the yearbook and then celebrate by letting them create their own mini-book or comic strip of their favorite school-year memory. Letting them create this craft on their own will help them develop mentally, socially, and emotionally.
And everyone loves a good play on words, so add some popcorn for everyone to enjoy while they make their Pop-Con comics! Even if you still have to be socially distant, separate the popcorn in individual cups or baggies. After everyone has enjoyed their popcorn and drawn their comic, have them go around the party and sign their yearbooks (or comic strips) as they chat about all the good times. This party gives all the students an additional souvenir of the year and more fond memories of their classmates.
Make a magnet memory
If you work in the classroom, you know students love to bring something home to show off. This yearbook party, which involves making a mini book magnet, creates another memento for students to bring home celebrating their year – just like the yearbook. You’ll need some more supplies for this craft including a hot glue gun and magnets. Similar to the last craft, start your party off by letting the students explore the yearbook to find what memory they want to recreate. Provide 3x4” cardstock paper for students to fold and draw pictures of recess, lunch time, masks or anything else that sparks excitement.
After the students get their time to cut out and color a little mini book, let them sign their mini yearbook and send them around with their own pens to sign everyone else's real-sized yearbook. Make sure everyone turns in their drawing, so you can glue the magnets on and return their crafts before summer break.
This party ensures all students have a memento for the year!
For those celebrating the end of the year virtually, here are a few remote party ideas:
Throw a yearbook reveal party
When you’re celebrating school milestones virtually, it can be tricky. But a fun way to experience the yearbook is to reveal it! Using Zoom or another platform, take your students through each page of the yearbook, almost as if you are reading a story aloud. Another way to liven a yearbook reveal party is to have a surprise guest come in to share a few pages. You could use someone like the principal or another teacher as long as your school’s guidelines permit.
Give the students time to see each page, comment on its contents and share excitement about the inclusivity of themselves and their classmates, which will likely be the pages they love most. If you throw any kind of contest for your students’ drawing to be on, give them a shoutout. Some yearbook companies even have features that allow you to sign yearbooks digitally, which is definitely a perk with schools having to do many things virtually this past year.
This year was a challenging one that resulted in many unique moments for students. Because of this, the yearbook will be looked at for many years to come. Take time to celebrate the fact you and your students have made it! Congrats Students, teachers, and parents... you did it!