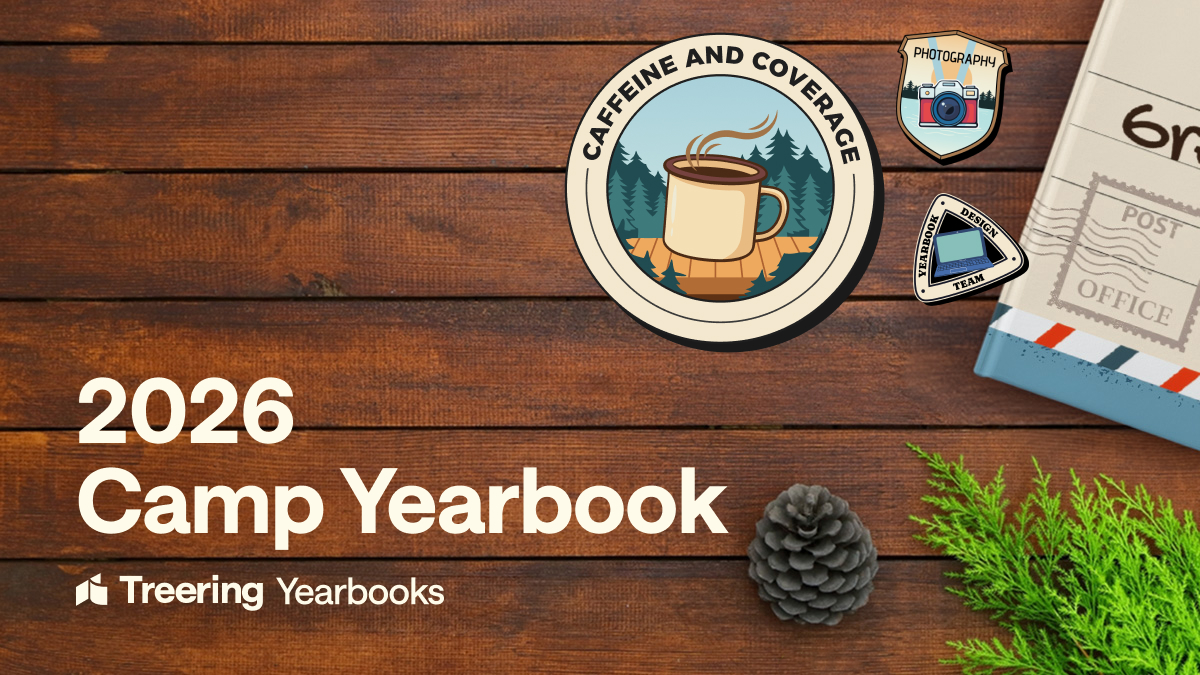
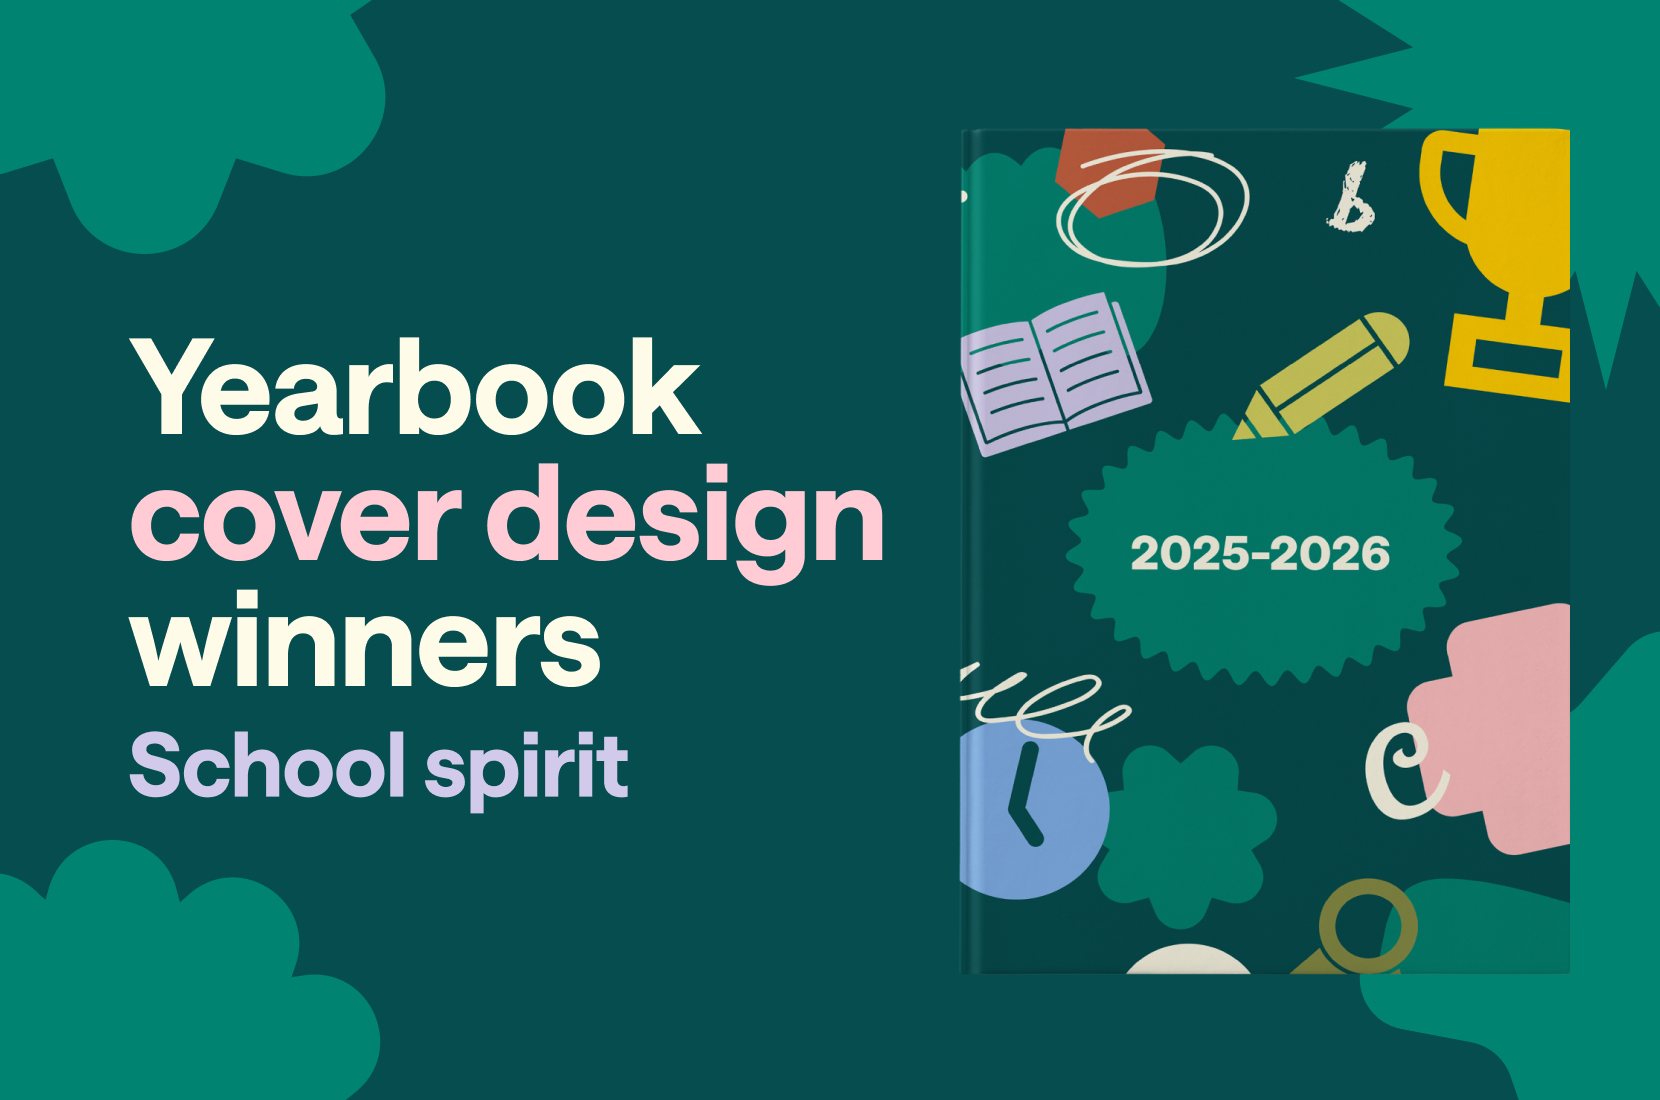
Most popular


Subscribe to our blog
Most recent

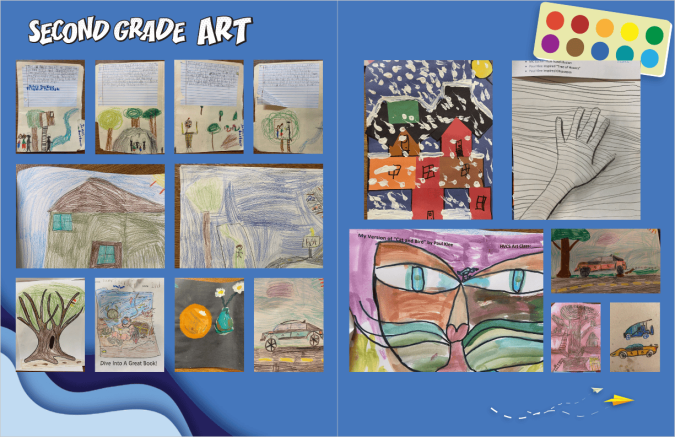
Five yearbook activities not to miss
“Just putting pictures on pages” and other misleading statements about yearbook production do not capture what happens in the newsroom. However, it’s easy to take a heads-down approach to design as the deadline approaches. We all just want to finish! Nevertheless, amidst the rush, there are essential skills that you shouldn’t overlook. You’re going to want to save these activities.
1. Teaching yearbook
Because no teacher program provided the comprehensive graphic design, marketing, journalism, editing and proofreading, photojournalism, contract negotiation, and volunteer management training that makes a great yearbook adviser. Breathe! (Club leaders, you too need to facilitate students’ creative and collaborative development.)
We created the Teaching Yearbook series so you would have grab-and-go resources to enhance your yearbook classroom.
2. Speaking the language
Understanding yearbook and design terms means the team can have a conversation about the effectiveness of a dominant bleeding into the gutter without raising (too many) eyebrows.
3. Creating a plan to cover everyone
Creating a plan to cover everyone involves more than just taking photos. It requires thoughtful consideration of how to represent the entire student body in your yearbook, even if you don’t offer custom pages.
Every student is more important than every activity.
4. Teambuilding activities
Yes, games are important. Those forced fun activities help you break down the proverbial walls. (That’s the introvert talking.) More important: building a team of the right people.
Time spent investing in the right people and building healthy relationships will only benefit your book.
5. Managing yearbook complaints
Ouch. No one wants to field criticism of the yearbook when it is in print for all to see. No one volunteers to field emails with “friendly suggestions” for next year. From active listening to clear and transparent communication, having a plan in place for managing complaints ensures that any issues are addressed promptly and professionally.
This is one of those “better to have it and not need it” kind of things.
A pro photographer's playbook for perfect team shots
Our guest expert is David Burns, President of Color Portraits - a longtime Treering school photography partner servicing Illinois and Wisconsin. He's been framing perfect team shots since back when "post-game snacks" meant a chocolate bar with nougat and parents weren't yet reading ingredient labels.
After 20+ years and thousands of school photo sessions across the Midwest, I've seen it all—from squinting soccer teams in harsh sunlight to last-minute makeup photo scrambles for absent students. At Color Portraits, we've mastered the art and science of school photography, turning potential chaos into seamless operations that produce stunning results. These battle-tested strategies will transform your yearbook from good to unforgettable—without the headaches, delays, or disappointed parents.
Efficient scheduling strategies
For group photo days, we recommend scheduling one group every five minutes. This allows photographers to:
- Set up each group while the next one arrives
- Arrange students in height order for quick positioning
- Maintain a smooth flow throughout the day
For larger groups (school plays, entire grade levels), allow 10 minutes to prevent scheduling backups.
Middle school/junior high considerations
Middle schools typically schedule sports pictures three times yearly (fall, winter, spring). We recommend:
- Scheduling after school to accommodate parent-volunteer coaches and uniform changes
- Taking pictures during each sport's season for proper uniform distribution
- Capturing individual photos as athletes arrive in uniform, followed by group shots when coaches arrive
Composition tips for various group sizes
Create rectangular rather than square compositions to properly fill the frame. For optimal results:
- Utilize stairs, risers, or bleachers to ensure every face is visible
- Incorporate props for club photos to add character and personalization
- Consider photographing sports teams in their natural environment (soccer teams by goals, track teams on the track)
Lighting techniques: indoor vs. outdoor
Indoor photography:
- Provides consistent controlled lighting
- Allows for fixed flash distance and stable exposure settings
Outdoor photography:
- Cloudy days offer less light variation but muted skies
- Sunny days provide vibrant backgrounds but create shadows and squinting
- Position groups with the sun behind them and use flash to reduce shadows
- Avoid direct sunlight into the lens
Student identification strategies
Send digital images to coaches or club sponsors for proper student identification. Maintain basic row formations to facilitate easy identification.
Balancing posed and action photography
Our standard sports shoots focus on group and individual photos outside of game days. For action shots:
- Collect images from parents or yearbook staff taken during actual games
- Create collage pages featuring action shots from different grade levels
- Position these collages before or after formal group photos
Handling makeup sessions
When students miss the original photo day:
- Leave space in the original formation to add missing students via Photoshop
- This approach looks more natural than retaking group photos
- Retakes often create new absences, compounding the problem
File organization recommendations
Create an intuitive organization system:
- Establish separate folders for each team and club
- Request proper labeling (team grade level or club name) when parents submit photos
- Always back up all images to cloud storage or external devices
Accommodating photo restrictions
For students with privacy concerns:
- Ask parents if listing the child as "Not Pictured" is acceptable
- Omit names completely when parents request
- Prioritize parental decisions regarding their child's privacy
Timeline planning for yearbook deadlines
Plan your photography schedule strategically:
- Capture club photos early in the school year when groups form
- Take sports team photos during their respective seasons when uniforms are available
- Complete all team photography by February at the latest
- This timeline provides yearbook editors ample preparation time
This comprehensive approach ensures your school's sports and club photography will be efficient, professional, and ready for yearbook publication.
.jpg)
4 tips to get you print ready
As soon as January rolls around, teachers, students, and parents begin the countdown to summer vacation. Are we thinking of finishing the yearbook yet? Before the glorious moments of sunshine, vacations, and empty calories arrives, the myriad end-of-the-year festivities dominate our, ahem, social calendars. From Teacher Appreciation Week and school elections to school carnivals and yearbook singing parties, the final days of school life are packed. In between all the things, the yearbook is awaiting its final moments of the design cycle. Working with the Treering Community Advocate Team (CAT), we put together this list of things to know before flipping the switch to go print ready.
1. Help is here!
Really, help is here, here, and here:
- On the blog, find ideas.
- In the Help Center, receive 24/7 support including video tutorials so you can move at your own pace. Additionally, over the phone, live agents will help you flow portraits, set up your cover art correctly, apply theme packages, update your page count or deadline, upload your own designs, and do anything else you ask.
- In live Yearbook Club webinars, learn and connect with other yearbook coordinators.
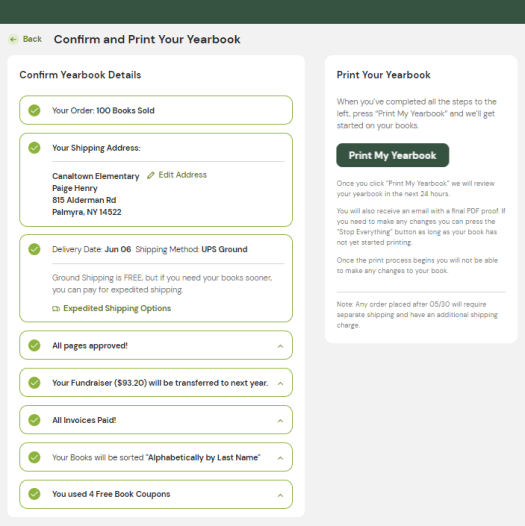
2. Before you go print ready, proof in print
A month before you expect to finish your yearbook, order your printed proof. A printed proof is an exact copy of what your yearbook will look like once you toggle the Print Ready switch and send your book to print. Works in progress are welcome! We encourage you to double or triple check
- Portrait names and class/grade assignments
- Cover art alignment
- Formatting and page count
3. You have options: sorting
Every school handles yearbook distribution differently, that’s why we let you choose how you want your books packed. You can opt for books sorted
- Alphabetically by last name
- Grade, then alphabetically by last name
- Teacher, then alphabetically by last name
Are you ready to make your yearbook dreams a reality? Tick the boxes to send your hard work to production.
4. Cross the finish line
You tell us when you’re ready to go to print. With flexible deadlines and no late fees, you can take all the time you need to make sure your book is absolutely perfect before sending it off to be printed. At this time, you will confirm the bulk shipping address, approve all the pages for printing, and decide how to use or receive your fundraiser earnings.
As soon as your book is set to Print Ready, you'll receive the Final PDF of your yearbook directly in your email inbox. Take a few minutes to carefully review the PDF and make sure everything is exactly as you want it. Look out for any errors or mistakes that might have slipped through the cracks. This is your chance to give your book one last look before it goes to print and to make sure that everything is exactly as you want it. If you find something that needs correcting, you can choose to pause production for a short period of time during the review process to make those changes.

35 super awesome teacher superlatives ideas for your yearbook
You probably know by now that a good yearbook superlatives list is enough to get your whole school talking. But you know what really get your readers to crack some smiles? Teacher superlatives.While many schools have traditions of turning their faculty portrait pages into light-hearted affairs, nothing gets your teachers and faculty a spotlight in the yearbook quite like an awards or superlatives section just for them. And for good reason:They’re an opportunity to celebrate the hard work and dedication teachers put into the school year while giving a nod to the character traits and quirks that make your faculty so memorable. (Plus, nothing beats the feeling you’ll get when you’re able hand a superlative certificate to the winner of “Most likely to win a rap battle.”)It doesn’t matter if teacher superlatives are voted on by students or by faculty themselves, if they’re straight-up funny or just plain interesting, this is a feature that’s hard not to love.Read on, as we unveil our list of 35 teacher superlatives ideas and tips for writing your own.
35 super awesome teacher superlatives
While we’ll spend some time shortly talking about how to write your own yearbook awards for teachers, we figured we would dive right in with some ready-made ideas:
- Most likely to have a new hair style/color
- Most likely to be your friend on Facebook
- Most likely to be found enjoying nature
- Most likely to bring a pet to school
- Most likely to be seen on the big screen
- Most likely to win Jeopardy
- Most likely to pack their bags and travel the world
- Most likely to win a rap battle
- Best advice and wisdom
- Most friendly
- Most enthusiastic
- Mostly likely to create world peace
- Best storyteller
- Funniest
- Most distinguishable voice
- Most school spirit
- Most likely to break out in dance
- Most artistic
- Best smile
- Most likely to not give weekend homework
- Most likely to have a desk full of apples
- Most likely to know the score of last night's game
- Most inspiring
- Most quotable
- Most intimidating vocabulary
- Best beard
- Best wardrobe
- Scariest death glare
- Most likely to make sarcastic comments
- Most likely to scold you and give you a detention
- Most likely to be mistaken for a student
- Most likely to scold you for eating food near the computers
- Most likely to be accidentally called mom/dad
- Most likely to catch a student texting in class
- Best taste in music
Of course, some of these might do the trick for your teacher superlatives and some of these might not. That’s why it’s a list of ideas. If you’re more the do-it-yourself type, we’ve got some helpful tips below on how to write your own superlatives. In either event, we’ve created a free template for you to use as you build your superlatives list. Check it out here.
Writing your own yearbook awards for teachers
To generate your own list of teacher superlatives, sit down with your staff and begin with an old fashioned brainstorm. Starting with your existing senior superlatives list or yearbook awards list makes the most sense, so simply reframe your list of superlatives so that they’re teacher focused. For example, “Class Clown” becomes “Funniest Teacher” and “Teacher’s Pet” becomes “Favorite Teacher.” A lot of the same rules apply to yearbook awards for teachers as they do for students, especially if you’re trying to write funny superlatives: Which teachers are fair game? Are the superlatives funny? Or are they mean? It can be a fine line, so be careful and get a second opinion if you think something’s pushing it a little too far. From there, add to your list using some school-specific superlatives:Does someone embody school spirit like no other? Do some of your school’s teachers have idiosyncrasies so well-known around the building that they’re a shoe-in for one superlative or another? As you work through the logistics of who’ll do the voting (Just faculty? Just graduating students? The whole school?), you’ll know you’ve hit the right mark when you hear the chatter start in the hallways and see the smiles creep across students’ faces. That’s because including teacher superlatives and other types of awards in your yearbook is an easy way to give special recognition to faculty—a group who help make the school year what it is, but often aren’t recognized in the yearbook.


5 graduation photo and caption ideas
It's that time when end-of-the-year events on campus dominate our social calendars and social feeds. Whether you're doing a quick post-ceremony graduation photoshoot with friends or snapping last-minute custom page poses for the yearbook, here are five graduation photo ideas plus some fun Instagram captions to use. I met up with my neighbor, Avery who is a high school senior, varsity athlete, super babysitter, and future marketing professional for these video tutorials and inspirational photos.
Remember, the best photos are the ones that align with your personality.
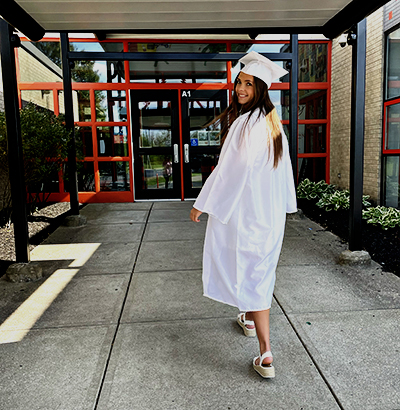
Pose 1: looking forward to looking back
A simple graduation pose you can do pre-ceremony is the over-the-should smile. Set a "mark" for your subject to do the look so you can focus there. The concrete in front of the school helped us time the shots. Unless you use a telephoto lens on a proper camera, ensure your background is more interesting than that parking lot.
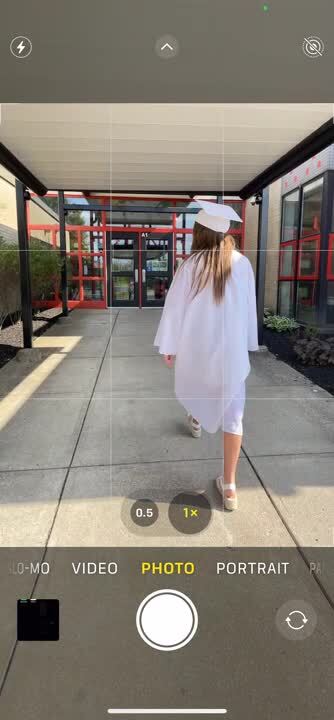
In the video above, notice the multiple flashes. This means the cell phone is on "burst" or "multi-shot mode" which gives you more options with which to work.
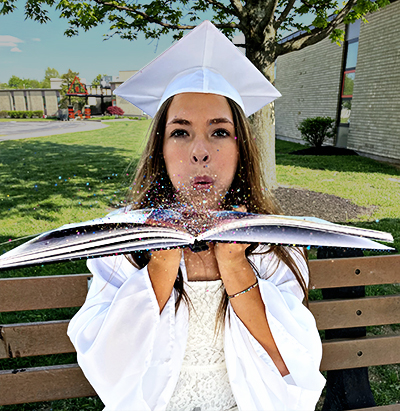
Pose 2: all that glitters
Your first day of grade school probably involved some glitter, so why not celebrate the final day of grade school with it?

During the shoot, Avery and I found coarse glitter has more movement and picks up better with a cell phone. (It still wasn't fun to clean up.)

Pose 3: portrait perfection
Portrait mode on a cell phone improved our Insta-presence by adding depth to photos.
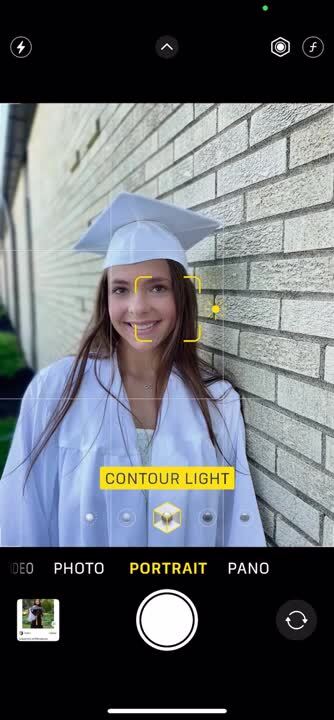
To get the most from portrait mode, add space between your subject and the background. I had Avery lean against the wall in a relaxed standing pose. at an angle. The angle allowed for the mortar lines (leading lines in photography) to draw the viewer's eye to her face.
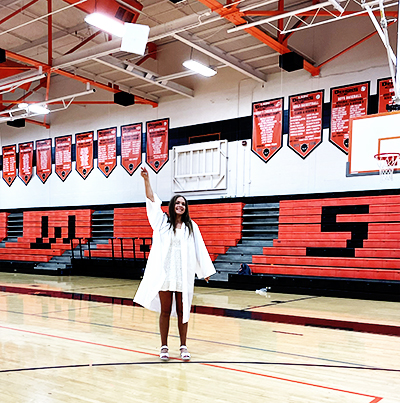
Pose 4: MVPose
The cap toss is the image most of us think of when we picture graduation. Using burst mode, snap several photos of your senior doing his/her own version.
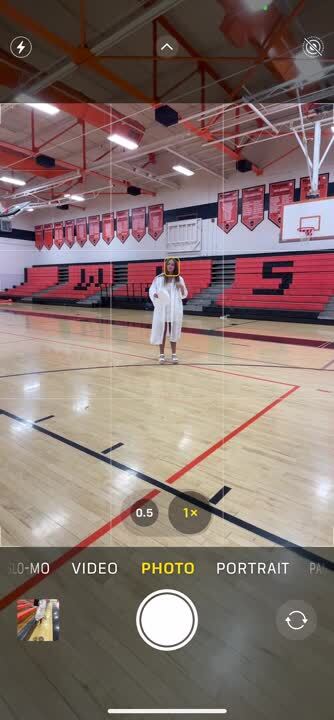
Because yellowish-green gym lighting is notoriously tricky, you'll want to use your in-camera photo editor to reduce the warmth and add a slight coolness to the tint. This pose also works well on the football field because there is plenty of overhead clearance.
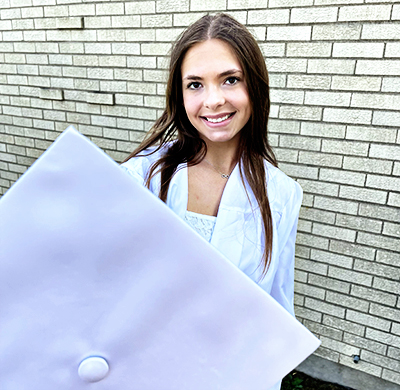
Pose 5: cap it off
Remember our discussion of depth of field and portrait mode? Another application is for the cap. Many students decorate theirs, so make it the focal point of an image.
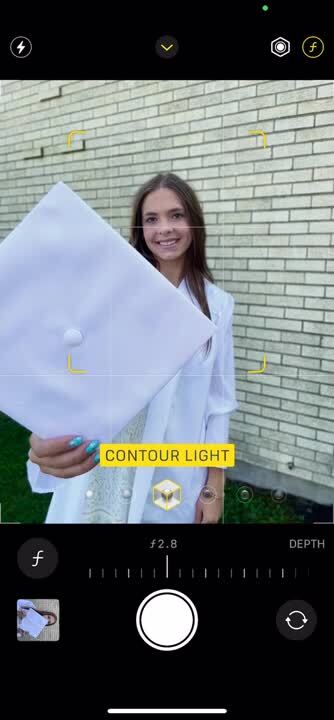
In the video, you can see how raising the phone just a bit flattered Avery more. My yearbook adviser always said, "Zoom with your feet," and it's stuck with me decades later.
Tips to capture a great graduation photo
Because authenticity goes a long way, here are a few ways to make the poses below your own.
- Try to avoid stiff or unnatural poses. Instead, move around and experiment with different angles until you find a pose that feels comfortable and looks good.
- The background of your photo can add interest and depth to your pose. Look for interesting locales that complement your outfit and pose. Off-campus, visit community murals, local landmarks, and parks as your graduation photo spot.
- Props can add visual interest and help tell a story in your photo. Consider using props like sports equipment, a yearbook, confetti, or a graduation cap.
- Experiment with different angles to find the one that flatters you the most. Try shooting from above, below, or at eye level.
- You can sit, stand, jump, walk, or even lie down for your senior photo.
If you're saying cheers to the end of an era and the start of a new one, may your memories be filled with joy.

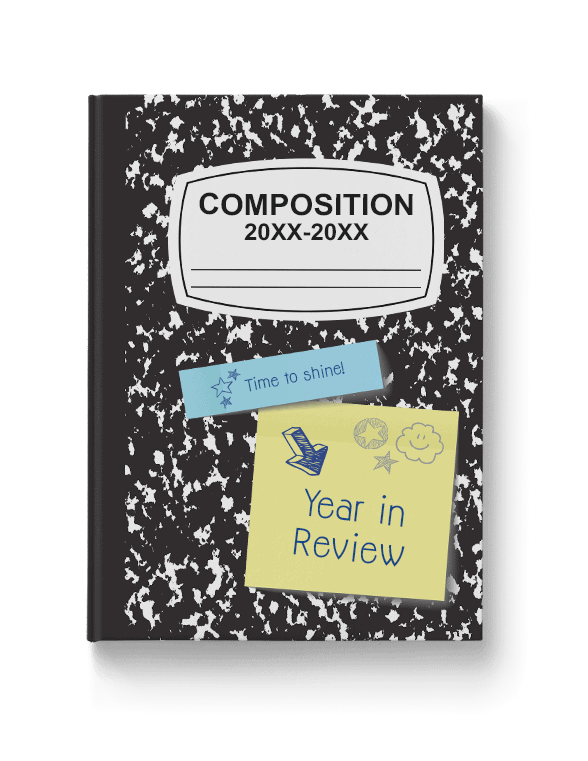
The 5 game-changing blog posts you’ve (somehow) been missing
You might be missing these favorite yearbook ideas. If any part of your yearbook process feels stuck, scattered, or stale, one of these posts is probably the solution you didn’t know you needed. Read them. Share them. Build them into your curriculum or club routine and watch your yearbook program transform.
1. Easy +1: a guide to leveling up your yearbook
This comprehensive guide outlines five key ways to elevate your yearbook beyond collage pages. It provides practical steps to add something new to next year’s book: a focus on storytelling, expanded coverage, better photography, or modular design.
Use the five focus areas to create
- Rotating workshop stations early in the year to build foundational skills.
- A self-assessment rubric for your team.
- A “Level Up” day where each leader identifies one area to improve in their section.

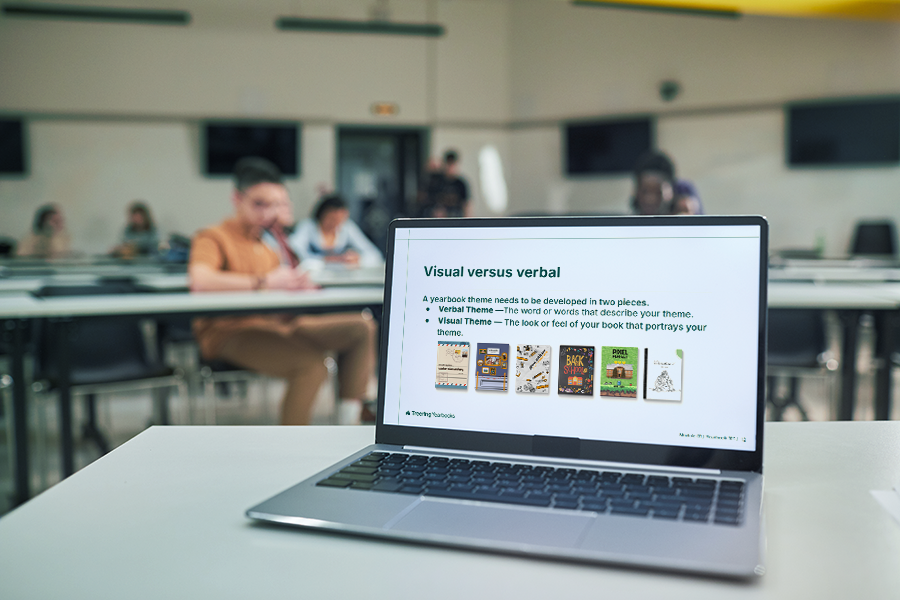
2. How to choose a yearbook theme
This piece walks you through the theme process without relying on chaotic verbal brainstorms. (Some yearbook creators even find its anti-brainstorming angle a little divisive. And we liked it.) It provides teaching support to non-designers and new advisers with practical, flexible guidance.
It includes prompts, real-world examples, and tips for involving students at all grade levels.

3. 10 people to thank
Yearbook creation doesn’t happen in a vacuum. This gratitude-focused post highlights the unsung yearbook heroes, including the front office staff, IT teams, principals, coaches, and more. Yearbooks are a high-stress, deadline-driven project; injecting gratitude is a reminder that the yearbook extends beyond your class or club.
Make gratitude part of your yearbook culture:
- Include a recurring “Who Helped You This Week?” check-in during staff meetings.
- In the yearbook, you can include a “Behind the Book” thank-you spread.

4. Adviser advice: keep, change, stop
One of the few tools that seamlessly transferred from student teaching to the newsroom is “Keep, Change, Stop,” a structured reflection tool. It helps teams evaluate the yearbook process with three simple prompts: what to keep, what to change, and what to stop doing. (Clever name, eh?)
It’s an adaptable debrief for editors, staff, and advisers alike.
In this blog post, four yearbook advisers share their POV. Based on their real-life examples, we have a framework to drop what’s not working and preserve beneficial habits each school year.
Doing this exercise with middle and high school yearbook creators encourages student voice and leadership in shaping the next year’s book. “Keep, Change, Stop” promotes a healthy, intentional yearbook culture.

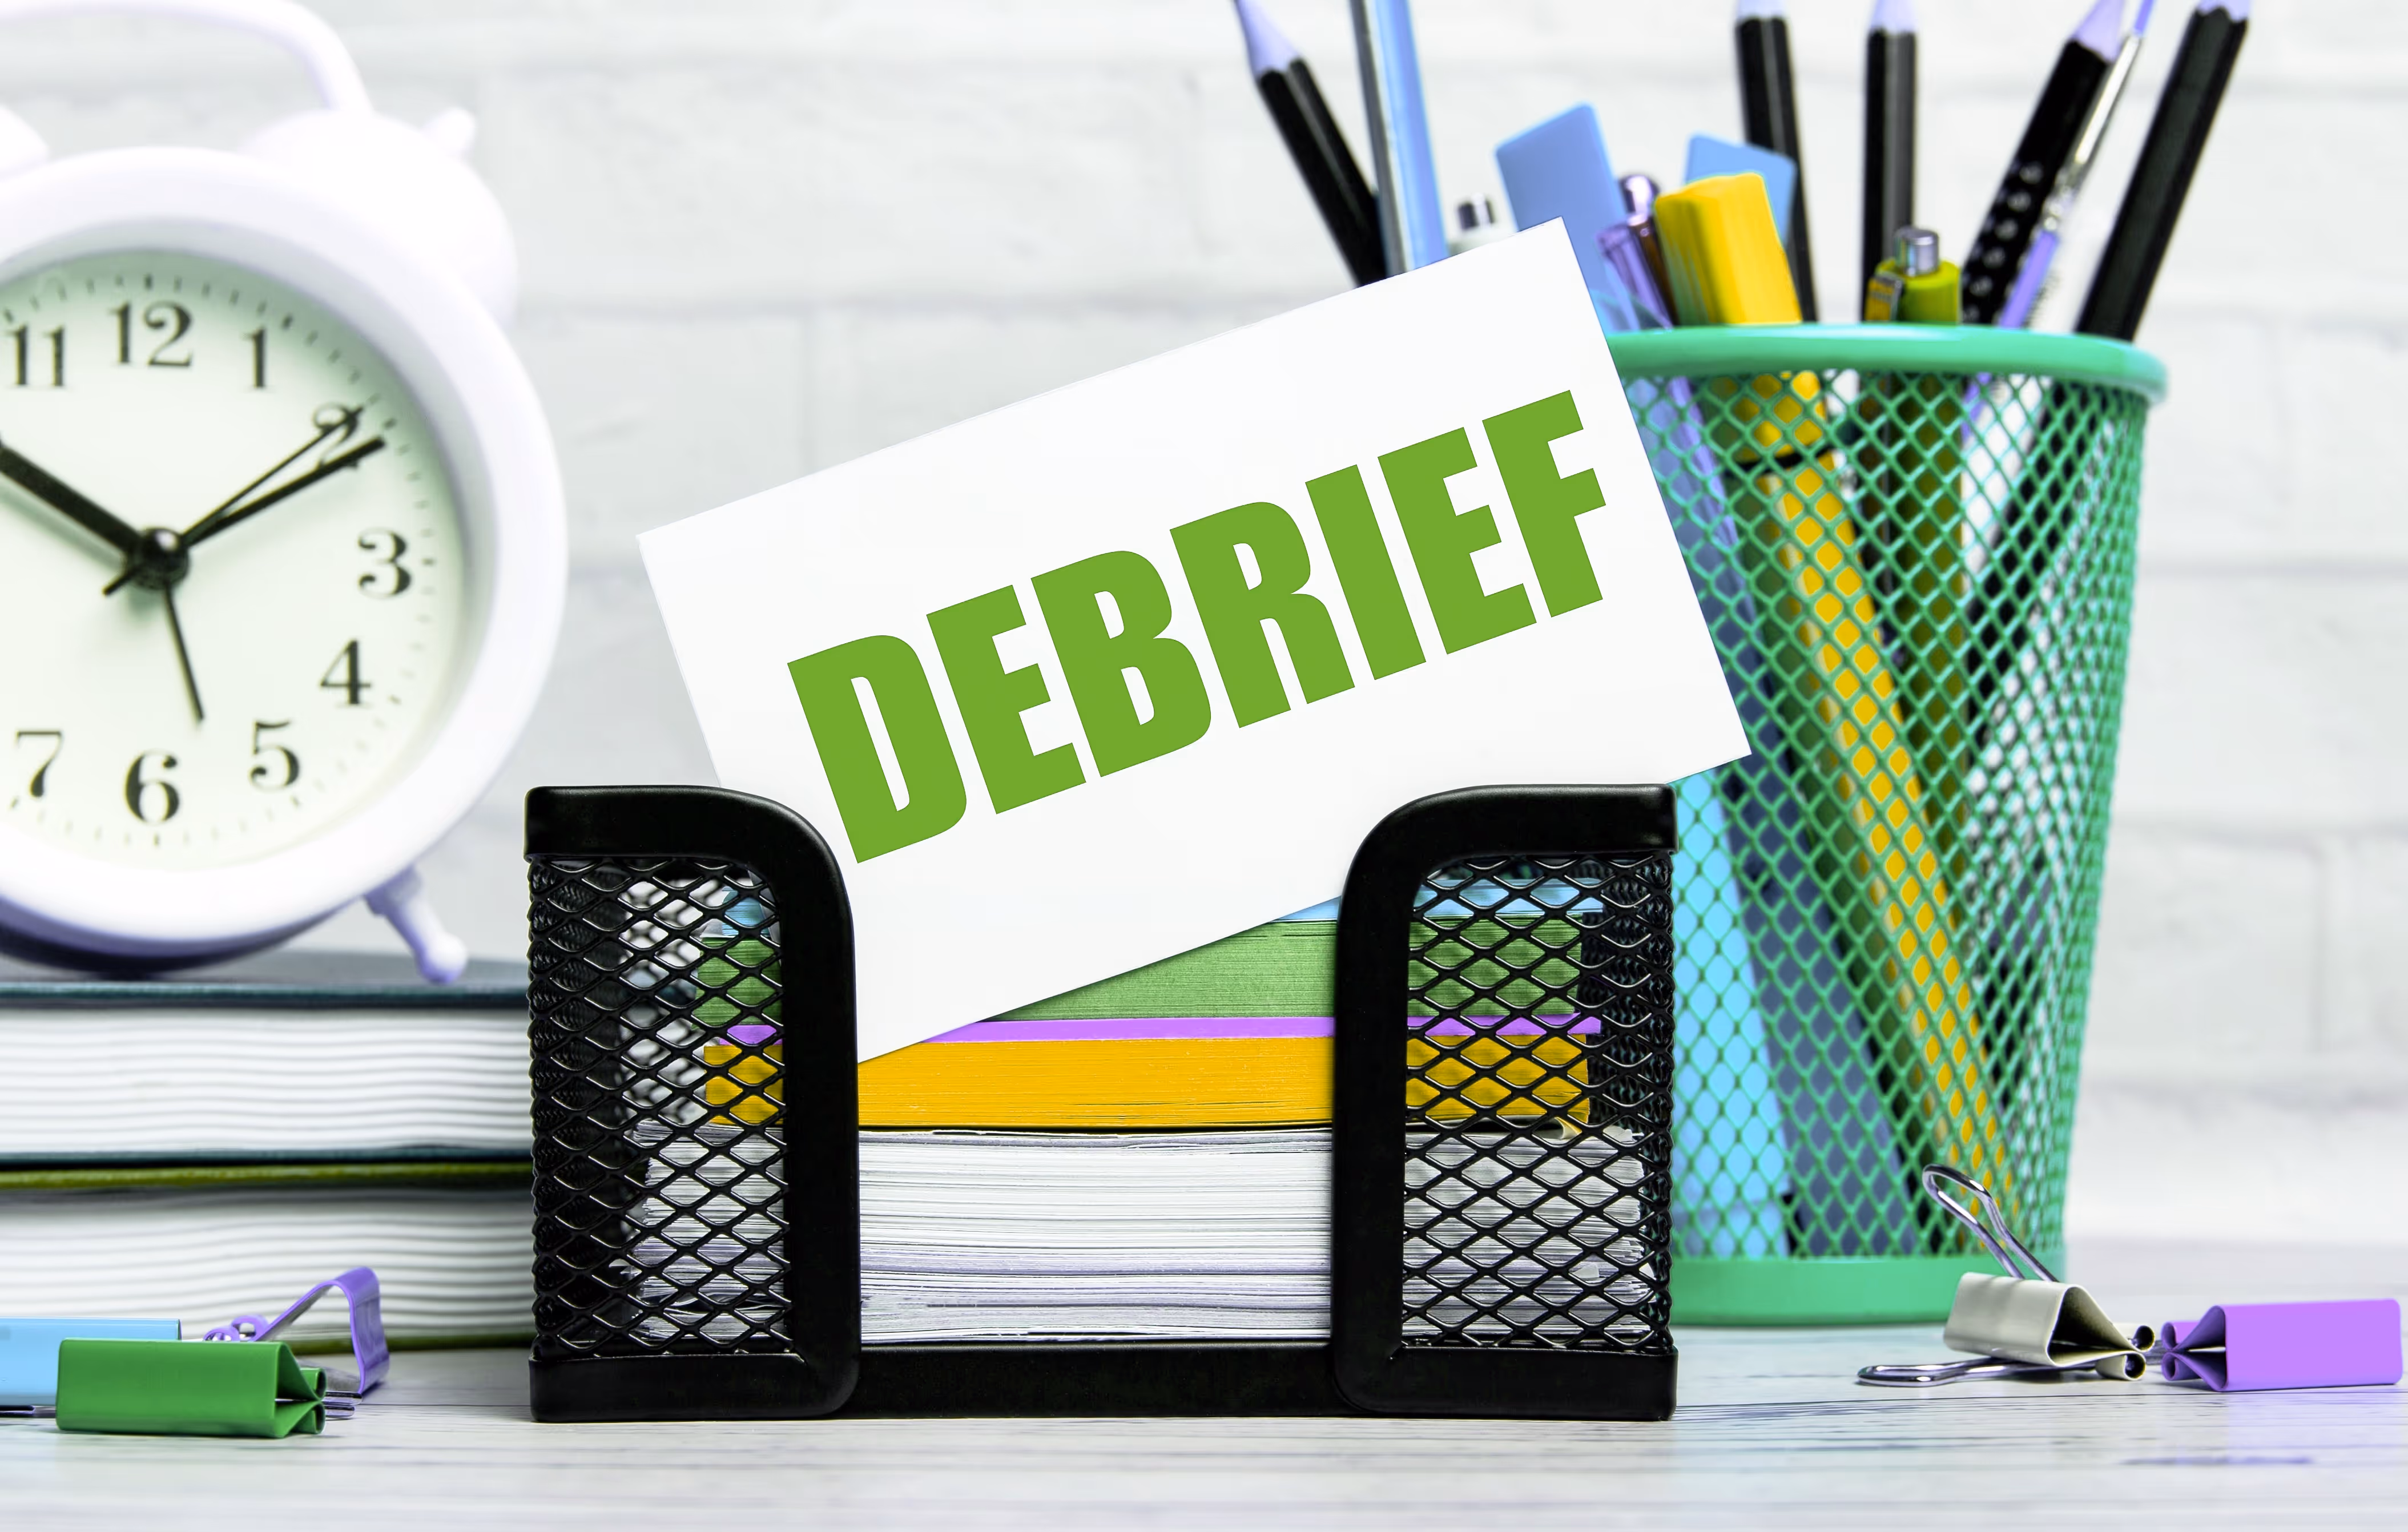
5. Yearbook debriefing: a summer reflection
This five-minute read outlines a strategic, low-stress way to reflect on the yearbook process over the summer. It offers questions and prompts to help advisers and returning staff capture what worked and what needs to shift before the next yearbook creation cycle begins.
This post helps you process what happened while it’s still fresh, and with a little distance.
To use it now, assign editors a summer reflection form based on the post’s questions and use their input to build your back-to-school agenda.
We all want our yearbooks to stand out, and sometimes the best yearbook ideas (wink, wink) are hiding in plain sight. We hope these five blog posts deliver the clarity, creativity, and strategy you and your staff need.

Can our school afford to start a yearbook program?
Financially risk-free and school programming don't intersect often. When they do, pay attention. Traditionally a yearbook program begins with a deposit, requires minimum orders, and ends with an invoice. That's no fun! Certain schools cannot pay to play. Others can't afford to remain in the (yearbook) game. Would you believe there is another way? (Say yes, and keep reading.)
Does my school need a yearbook program?
Teachers, administrators, and parent groups seek opportunities to enhance the student experience, foster community spirit, and leave a lasting impact. A yearbook program checks all those boxes at once. A yearbook isn’t just a book; it’s a time capsule. It captures the essence of each school year— friendships, achievements, trends, and more. Whether it’s the class photo or the quirky candid shots from the pep rally, the yearbook immortalizes memories that would otherwise fade away.
How to get started
Here’s a handy checklist to get your yearbook program off the ground:
- Gather your team: assemble a yearbook committee—teachers, parents, and students who share a passion for preserving memories.
- Find a publishing partner: the right fit here can make all. the. difference. Talk to company representatives, ask for a sample to see the quality, and be sure you understand what you can afford.
- Arrange training for your yearbook team.
- Spread the word: let everyone know about the exciting yearbook project. Generate buzz among students, parents, and staff. Treering has plenty of free marketing tools and ideas. (Even if you don't choose us!)
- Plan Ahead: set deadlines for photo submissions, design, and ordering. Keep everyone in the loop.
- Celebrate the Unveiling: host a yearbook reveal event. Popcorn, excitement, and memories galore!
The Treering difference
Just thinking yearbook, may be overwhelming. It's one more proverbial ball to juggle. That’s why Treering focuses on making things as easy as possible for everyone involved: yearbook team members, front office staff, teachers, parents, and students.
No deposits, contracts, or minimimus
Schools can afford Treering's financially transparent and risk-free approach because we don't saddle schools with yearbook debt, contracts, guaranteed minimums, or hidden costs. Phew. Removing those huge hurdles at the outset lets you focus on creating a high-quality yearbook highlighting the best moments and events.


Yes to personalization and support
Custom pages are a hit with students and families who have the option to include two free personalized pages that appear only in their copy.


Treering schools never pay extra for
- Training and support
- Moving deadlines
- Yearbook themes, clip art, and fonts
- Creating a custom yearbook cover
- Using portraits from any photographer
Additionally, the on-demand printing process means you’ll get lots more coverage of spring events and sports. Treering only prints what you order, so there are no overruns.
A tradition worth starting
Starting a yearbook program establishes a special tradition within your school community. Imagine the excitement during the yearbook reveal, the buzz as students eagerly flip through its glossy pages and the pride of seeing their own faces alongside their peers.
Remember, a yearbook isn’t just a book; it’s a legacy. So, go ahead—start your school’s yearbook journey with Treering. Your families and students will cherish the memories and you’ll be able to showcase all the great things happening in your school community! You’ve got great stories to share and Treering can help.
Treering would like to thank Dara Arouh, a Georgia-based yearbook mom of two, for contributing this blog.

The only yearbook page template you need
A yearbook page template is one of the best ways to save time (and a ton of sanity) during the yearbook layout process.
All too often, though, we talk to yearbook advisers who are skipping them for the same reason: They don’t want to use the same template over and over and over again, on every page. They think that’d be boring.
Fair enough.
In fact, we won’t even try to argue. That would get boring. But you know what? There’s a way to fix that.
You can take one yearbook page template and turn it into four different ones that’ll give your yearbook pages that cohesive, but not boring, look. The trick is so easy you’ll be laughing, and so effective you’ll pinch yourself.
What is it? Why does it work? We’ll get to that. But let’s start by looking at what makes page templates so valuable in the first place.
Why yearbook layout templates are a go-to resource
When yearbook design is done well, the pages flow, the photos stand out, and the copy complements the visuals.
If you try to achieve all this from scratch, you’re looking at an huge amount of work that requires pro-level design knowledge and a significant time investment. (And let’s be real: You can’t always find that on your yearbook committee.)
That’s why page templates have become a go-to resource. Yearbook page templates:
- Simplify the design process: Templates allow you to drag and drop photos into placeholders, add copy, and… that’s it. No need to stress about page setup or search for a volunteer with a design background.
- Control the overall book design: Templates give you a set structure. This means yearbook advisers can control the layout process without micromanaging or limiting the people who help out with design.
- Save time: Templates require less prep time and overall work. Plus, the learning curve is minimal—anyone with even a small amount of computer savvy can use page templates.
- Help teach design principles: Templates can help students volunteers learn the principles of great design. Students can express their creativity within the template structure, and gain more responsibility as their skills progress.
Since page templates are so helpful and there are so many options available, it’s tempting to fill your yearbook with a variety of layout styles. But that makes more work, and—good news here—it’s not necessary.
The solution—one that saves even more time and stress—is to get creative with just one template.
Sounds crazy, right? It’s not. One template, flipped into four, can result in a far better outcome than a variety of templates. Here’s how to do it.
How to create four unique layouts from one yearbook page template
Find a yearbook page template you love, and make multiple new ones by recreating it in three rotations. Because this type of thing can sound confusing, here’s a visual example of how to do it.
Original:

Now, let’s flip it vertically:
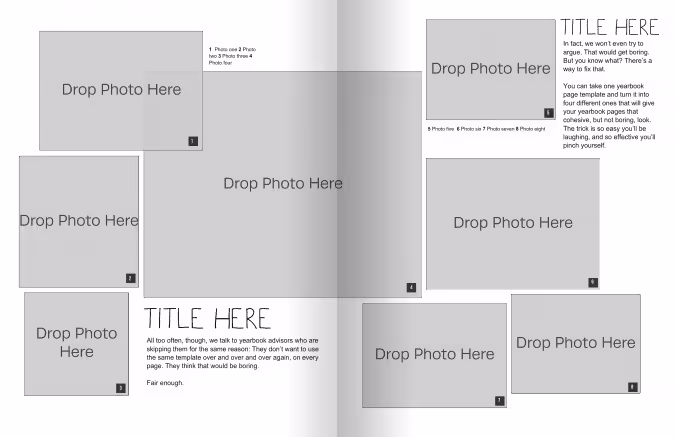
Then, we’ll take that template and flip it horizontally:
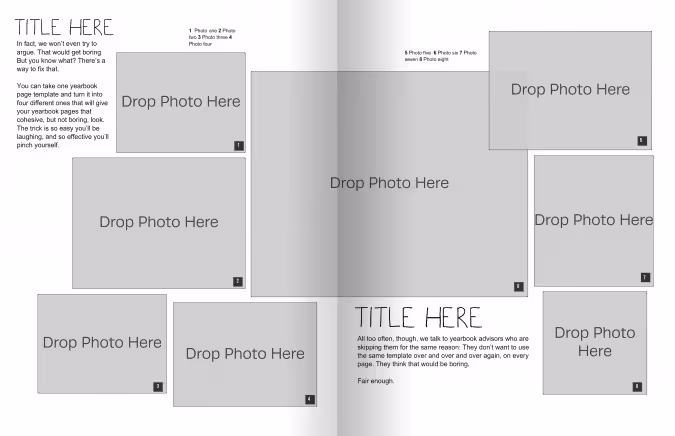
Last, let’s go back to the original template and flip it horizontally:
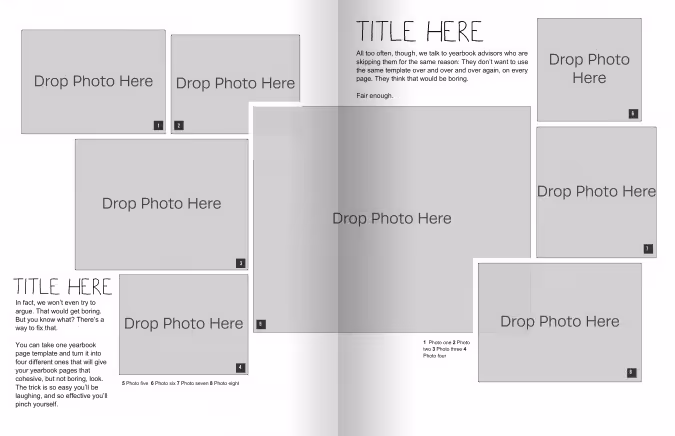
Notice how each one looks similar to the other, but still different enough to give some variety? That’s exactly what we’re going for.
By re-drawing the original template in different directions, you end up with four page layouts. Each one is unique enough to add variety to your pages, yet similar enough to give your yearbook a cohesive feel.
If you want more than four options, you can further adjust each template by adding or removing text or photo boxes to create new layouts. Or, you can mix up the portrait and landscape orienttaions of the photos.
These small alterations don’t take much time, but they give your entire yearbook a fresh feel. By approaching your yearbook layout this way, you get all the benefits of a yearbook page template—without the repetition.
Teacher appreciation printables
By participating in Teacher Appreciation Week, students and parents recognize the efforts of their teachers. We’ve created two free printables to help make it easy because this week can be a powerful way to build rapport between home and campus life, which can ultimately enhance the learning experience for everyone involved. Additionally, participating in Teacher Appreciation Week can teach students the importance of showing an attitude of gratitude.
The science behind being thankful
Studies show that when you share gratitude with others, your brain becomes re-wired in a positive way. Gratitude helps you:
- Feel happier: Gratitude can make you feel good by making more of the happy chemicals—dopamine and serotonin—in your brain.
- Think better: Gratitude can help you use the prefrontal cortex (thinking part) of your brain more, which helps you make good decisions and solve problems.
- Reduce stress: Gratitude can help you worry less and feel less scared by calming down the part of your brain that makes you feel anxious.
Now that’s something for which to be grateful.
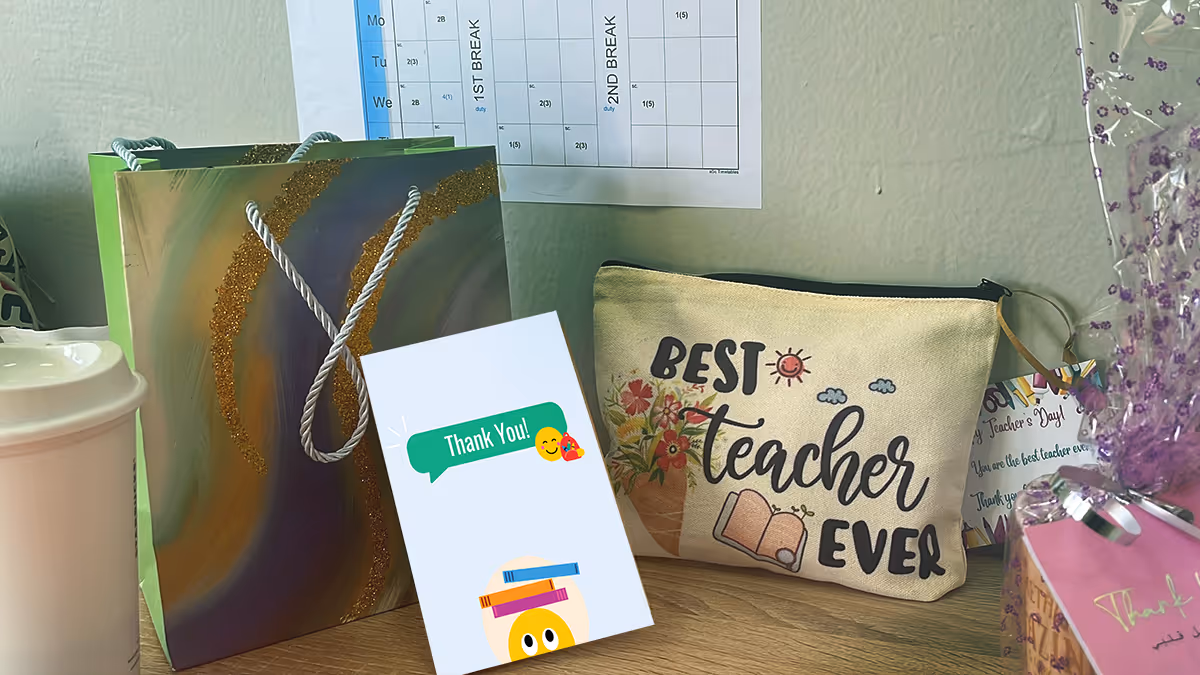
Free printables
We made these printables available as a convenient way for parents to participate in Teacher Appreciation Week. Simply download and print the materials from the comfort of your own home for your child or work with other classroom parents to cultivate a display on the classroom door in the teachers’ lounge. Whichever you choose, you and your child can personalize the messages, which can make them more meaningful and memorable for the teacher.
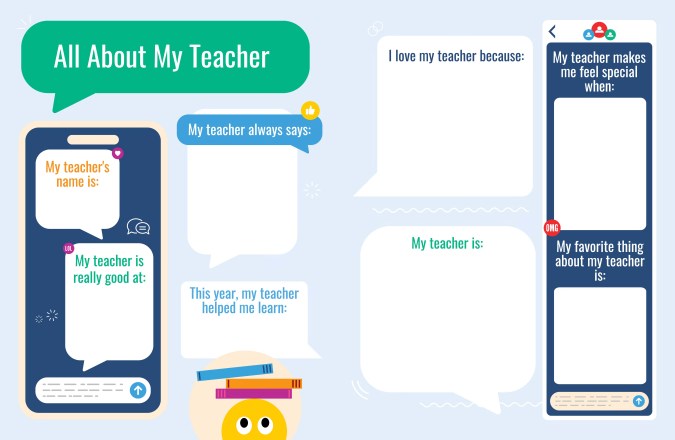
"All About My Teacher" printable
This full-color mini poster with fill-ins is a fun way for parents and their children to document the impact of their teacher. Download it here. (Did you know this page is also available as a pre-designed yearbook spread you can drag and drop into your Treering yearbook?)

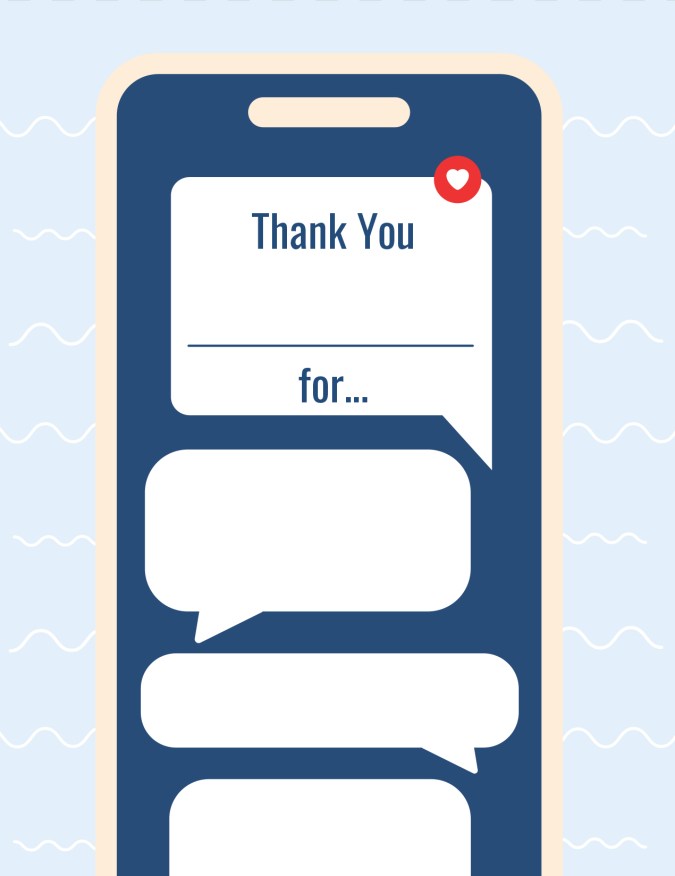
Teacher appreciation card
We’ve made it easy to write a letter thanking teachers for all their hard work and dedication. Fill in the blanks of the card below. Thank you cards can be compiled into a scrapbook or displayed in the classroom. Download it here.
We hope these printables help to create a fun and festive atmosphere in the classroom. Teacher Appreciation Week is a way for students and parents to express gratitude towards the teachers who have had a positive impact.
We see you, teachers; your hard work and dedication are recognized and valued.

Table of contents tips
Form and function. A yearbook table of contents needs both. A well-designed one can make it easier for students and families to navigate, even in a smaller book. It’s another avenue to communicate your theme. And it’s also a layout worthy of those images that didn't make it elsewhere in the book.
Do you need a table of contents in your yearbook?
Yes, especially, if you do not do an index. A table of contents is the proverbial road map or neon directional sign for your book. It’s also professional.
Normally, I’m not a proponent of “everyone else does it.” This is an exception. Yearbooks are reference books. Reference books have tables of contents. Therefore, yearbooks should have tables of contents. (Somewhere, my son’s logic teacher is smiling.)
Tips for small yearbooks (<60 Pages)
If you're working on a smaller yearbook, here are a few additional things to keep in mind when designing your table of contents:
- Keep it Simple: Stick to the essentials and only include major sections or events in your table of contents.
- Use Space Wisely: You may not need a double-page spread; integrate your table of contents on the title page.
Tips for larger yearbooks (>100 pages)
For larger yearbooks, consider the following:
- Add Sub-Sections: Include sub-sections or categories to help readers navigate through the content more easily.
- Use Visual Cues: Incorporate visual cues such as icons or graphics to help readers quickly identify different sections of the yearbook. These should of course correspond to your theme.

How do you arrange a TOC for YB?
It may be tempting to tackle this first since it spans the first few spreads of your yearbook. Wait! You may increase sections or move pages through the design process.
- Let your ladder be your guide: A yearbook ladder is essential when planning your book and for creating the table of contents. Make sure your ladder and table of contents align.
- Determine the level of detail: At minimum, include the major sections: people/portraits, events, clubs and organizations, athletics, and arts. Larger yearbooks may need to create sub-sections.
- Focus on clarity: Ensure your sections and page numbers are easy to read and understand, even at a glance.
4 tips to integrate your yearbook theme
Because every detail counts when creating your epic school yearbook, there are a few ways to apply your theme to your yearbook’s table of contents.
1. Use Theme Colors: Incorporate theme colors into the layout for text, borders, or background elements.
2. Include Theme Graphics: Add graphics or illustrations related to your yearbook theme to enhance the visual appeal. This could be icons, symbols, or images representative of theme elements.
3. Custom Fonts: Choose fonts that complement your yearbook theme and use them consistently throughout your table of contents. This will help tie the design together and create a cohesive look and feel.
4. Creative Section Titles: Get creative with your section titles and use language that reflects your yearbook theme.
A well-designed table of contents is a requisite element of a school yearbook, helping to guide readers through the content and enhance their overall experience.

The write stuff
No one reads yearbook stories. Sound familiar? I felt that way in my first five years advising. Focusing on photojournalism was almost an act of rebellion against the genius who mentored me in my high school’s newsroom. Yes, pictures are worth a thousand words and all that. By adding writing to your yearbook pages, you give names to faces and intent to actions. It’s more than so-and-so on the thing doing the thing; it’s context and clarity. It's a change for the better.
Copy as design
I’ve said it for years because my aforementioned high school adviser brainwashed me (in a good way): Content drives design. If you plan on increasing your yearbook’s written content, learn how to design with copy.
Headlines
Headlines are a great way to connect yearbook spreads back to the theme. On a spread about robotics, push yourself to make the main verbal entry point read more than “Robotics.” Your headline font, weight, color, and placement are just as important as the dominant photo.

Captions and stories
While not every topic may need a story, (nearly) every photo deserves a caption. Captions are entry-level writing opportunities. Compare the two spreads below. They are from the same yearbook. One is captions only; the other has a story.
The captions are close to the photos they complement. The story connects to the headline and subheadline.
How to introduce writing to the yearbook
As an adult, it can be tough to approach another adult and have a conversation (cool mom at the playground, I’m looking at you). Likewise, getting students to approach their peers isn’t the easiest skill to teach. As with all skills, take the easy +1 approach: start small, master that skill, and add another.
A progression, like the one below, builds confidence while building familiarity.
1. Introduce a question of the day (QOTD)
The heading says it all. Advisers or the editorial board select a question, and yearbook students ask four non-yearbook students the QOTD.
Yearbook creators are encouraged to start with their peer groups and branch out. The only caveat is that they cannot ask a student a QOTD twice until everyone has had a chance. No repeats. You can track this with a BOLO (Be on the Lookout) board, via a Google Sheet fed by a Google Form, or with your roster.
Do the math with me for a second: if six yearbook students each interviewed four students daily, that would be 120 student voices added to your yearbook in a week. With a larger staff of 18, that’s 360 new voices. Use these as Q&A moments in your portrait section or sidebars through athletics, arts, and student life spreads.
With those figures, you could get a meaningful quote from nearly everyone on campus each quarter.
2. Practice interviewing in class weekly
Repetition builds skills, and we educators know that. In the yearbook classroom or club space, the work of photoshoots, layout design, and marketing sometimes overshadows the process of creating. Take time to teach, practice, and evaluate your team’s skills. Here are a few ideas:
3. Take it to the street!
The key to a good yearbook interview is to have good questions. While there are hundreds of lists on the interwebs (we list some of our favs below), tailoring the interview to the subject will always give you the best material.
The best way to prep is to craft questions using the Five Common Topics: definition, comparison, relationship, circumstance, and testimony.

Once you have a list of questions—“Give me a quote for the yearbook” does not count—ask them!
The late Casey Nicols inspired a love of focus groups in me. As a journalism mentor, he encouraged me to bring in clubs or teams at lunchtime and interview the group. There was strength in numbers for them, as interviews were new for our yearbook staff. And our staff received some of the best quotes because they would play off each other.
As a result, their writing became interesting. Students read it. It became the expectation.
4. Start small
Remember, easy +1. If there is no writing in your yearbook, add captions. Play with sentence structure so it’s not always subject-verb-adverb. Add a prepositional opener. Make it a complex sentence. Then
You don’t have to do it all. Ever. Tell your community’s story your way.
Help with interview questions
Use these lists of interview questions for creating QOTD, practice interviews, and as launch pads for longer form copy.
You can even have students rank their favorite and least favorite questions. Make sure they have a reason why. Re-write the “bad” questions and craft follow-ups for the helpful ones.