Most popular


Subscribe to our blog
Most recent

Yearbook in 60 days - part 1: yearbook quickstart
Two types of people start a yearbook towards the end of the school year: those handed the crown minutes ago, and those with hundreds of other tasks for the school and now have “free” time to begin one more. Creating a yearbook in 60 days is doable. Promise. We’re breaking it down for you in four parts, each with two weeks' worth of tasks and inspiration. Consider this your yearbook easy button.
Throughout the series, there will be resources for inspiration and help.
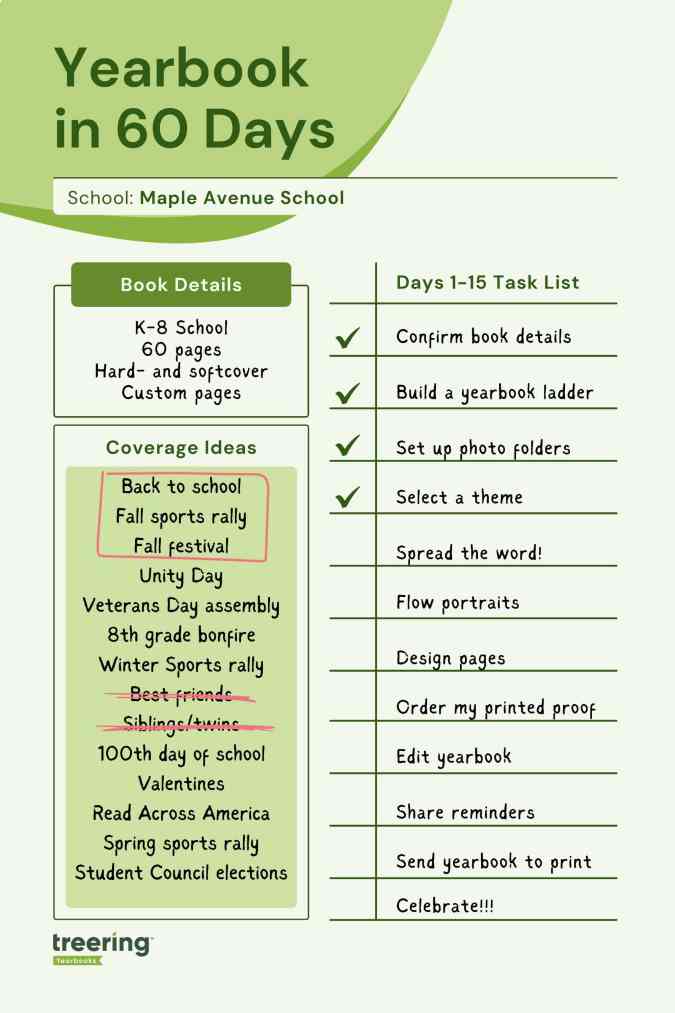
1. Confirm your book details
It’s tempting to jump into the glamorous yearbook tasks such as theme and design. There’s a little back-end work you need to do first for two reasons:
- Your dates will direct your workflow
- Your yearbook details determine the price of your yearbook
Dates
With Treering, you can change your dates at any time. Remember, your three-week turnaround begins once you hit Print Ready, and send your book to the printers.
For parents: custom pages deadline
Parents will see this date on their account, indicating when they should purchase the book or complete any customized pages. It doesn't impact the printing schedule.
Some parents {raises hand} need a little extra time and reminders to complete theirs. Treering recommends a cushion of about two weeks.
For editors: finish editing yearbook deadline and estimated delivery date
This is your one and only deadline for editing the book—and you set it! Select a date three weeks from when you want to distribute it.
You won’t be able to edit the delivery date directly. Treering automatically populates it by the date you choose for your deadline. If you need additional time to capture year-end events, no problem. Your three-week turnaround will align with your new deadline.
In part four, you’ll learn how to send your yearbook to print.
Pricing
The yearbook price will change in real time when you adjust the page count and cover finish. The best way to firm up your page count is to create a ladder (more on this below).

Shipping and index
Bulk shipping to the school is free. If you select this option, you choose how to receive your yearbooks:
- Sorted alphabetically
- Sorted by grade and then alphabetically
- Sorted by teacher and then alphabetically
Alternatively, many online or hybrid academies and schools electing to do a fall delivery choose the ship-to-home option. When parents order yearbooks, they also pay a flat rate shipping fee.
Book details resources
- Video: Chief editor dashboard
- Free Live Webinars: Treering’s Yearbook Club
2. Build a ladder
A ladder is a chart that represents the pages in a yearbook. It’s the industry-standard tool to help you stay organized. On it, you allocate a topic to each yearbook spread (that’s yearbook-ese for two facing pages).
Because yearbooks tell the story of the year, there isn’t a codified order to how things go. Typically, they include
- Academics: school distinctives, achievements, and activities
- Events: fundraisers, activities, performances, before- and after-school activities
- Organizations: clubs and teams
- People: student, staff, and faculty portraits
- Thematic content: larger books employ divider pages to separate sections
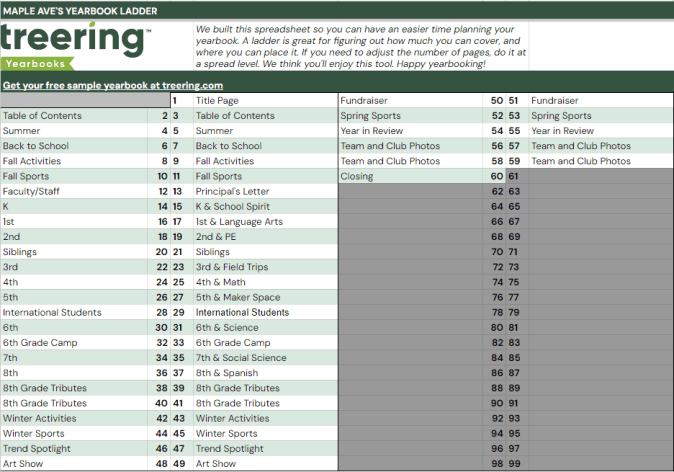
To build your ladder, look at the last few yearbooks and the latest school calendar.
- Brainstorm the non-negotiable events, sections (people, arts, sports), and yearbook traditions
- Brainstorm features, specials, and theme-related content
- Decide how you will organize the book
- Allocate spreads
We love doing this digitally because it can be fluid. If your page count is looking overwhelming because of time or budget, combine some topics. Remember to update your page count on your book details so it matches your plan.
Yearbook ladder resources
- Google Sheet: Yearbook ladder template
- Google Sheet: Example ladders (there’s a separate tab for elementary, middle, K-8, and high school examples)
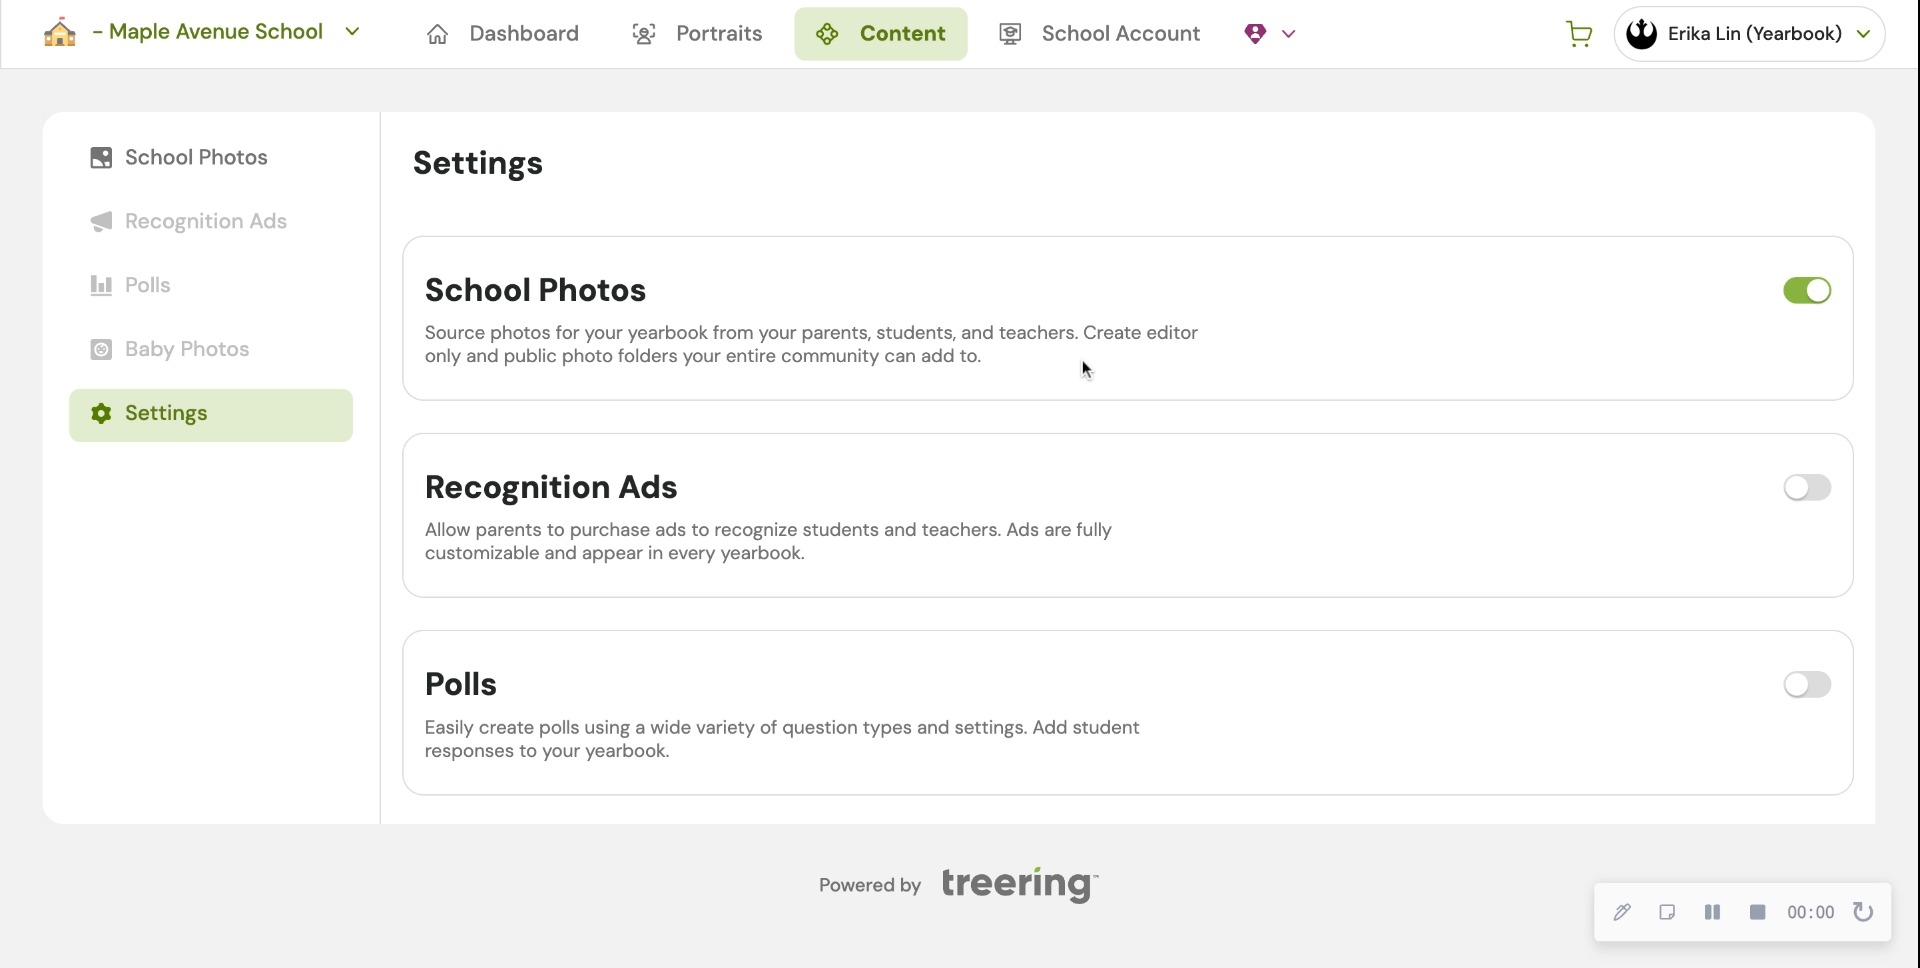
3. Set up photo folders
The best photo organization tip I can give came from Yearbook Hero Katie Parish. She said to create folders to mirror your ladder. This way, you know you are collecting content for every single spread you planned. And spoiler alert, your design process will look like this.

By investing the time to set up folders this way, you can simplify your workflow. Just open the corresponding folder and click, drag, drop, and done!
In the video below, you’ll see how to add folders and set up crowdsourcing features. Notice the Art Show folder is Editor Only. This means only you, the editor, can place photos in this folder. After activating their accounts, parents will see the yellow “public” folders and be able to share. At any time, you can make a folder Editor Only and vice versa.
In Part Two, we will give you five strategies to fill those shared folders with content so you can build your pages.
4. Choose a whole-book look
The Styles menu is where it’s at: you can create font and photo presets, adjust your margins (#TeamMarginsOff), and select the theme for your yearbook. Because I have 60 days to create a yearbook, I am skipping all the customization options and selecting a pre-designed theme to give my yearbook a unified look.
For a cover-to-cover drag-and-drop experience, the design team recommends the following Treering themes:


Theme resources
- Google Slides: All Treering’s yearbook theme kits
- Blog Category: Theme ideas and inspiration
Remember, get to know your dashboard; it’s the first thing you see each time you log in. Part two of this series will outline the promotion tools built in the yearbook builder and start the design process.
Yearbook with a friend
You can also recruit team members to help you build and market the yearbook. With Treering, you can set permissions and assign pages to help delegate your workload. Additionally, parents, teachers, and students can help gather content and promote book sales.
Organization resources for yearbook teams

Adviser advice: 10 tips for candid photos
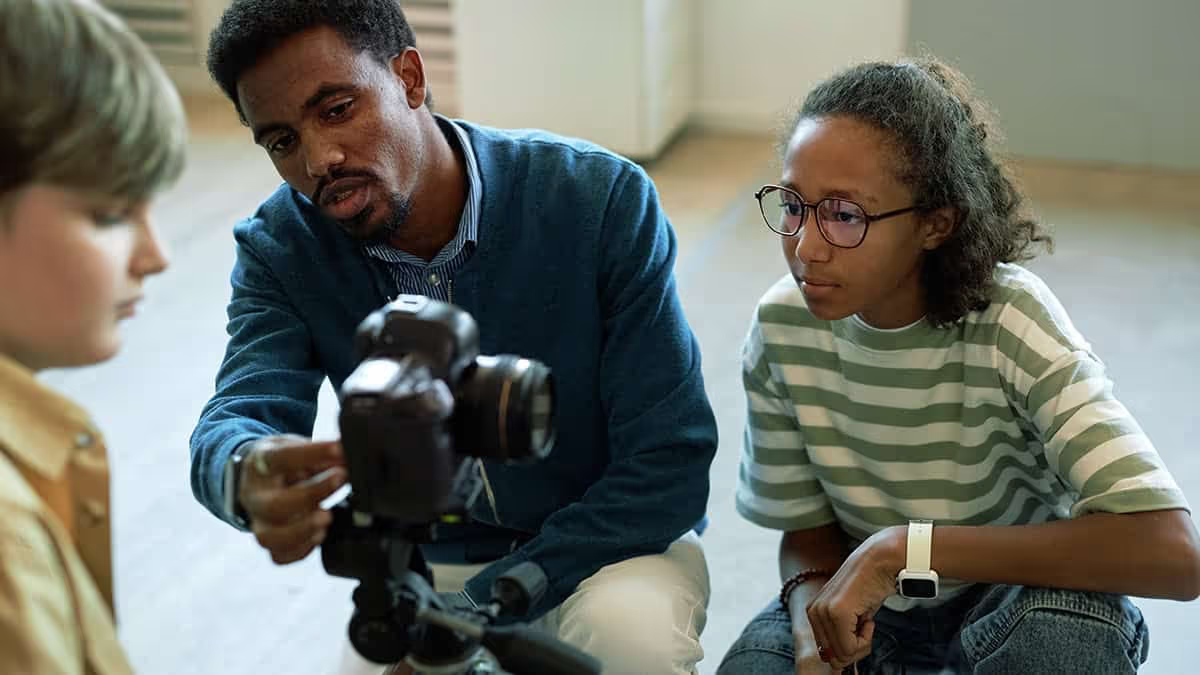
There’s something profoundly satisfying about capturing that one perfect image—when the light and laughter align so magically, freezing time in a way that feels effortless. According to Yearbook Hero Emily Wilson, those moments are rare, fleeting, and almost impossible to predict. To help, she shared her top tips for capturing authentic moments in candid photos.
Get to know Wilson and her developing passion for photography in her own words. (See what we did there?)
After my second child was born, my husband gifted me my first “real” camera. It was a Nikon D5000, and it felt cumbersome and clumsy in my hands at first. I’ve never thought of myself as particularly "techie"—just the word exposure makes me break out in a mild panic. But what I do know is how to tell a story, and that’s always been my default. Photography, for me, has never been about mastering every setting and toggle on a camera. It’s been about capturing moments that matter.
“Life isn’t about how many breaths you take, but about the moments that take your breath away.” Few movie quotes have stuck with me over the years, but this one has (thank you, Will Smith in Hitch). I think of it often, especially when I’m scanning the world through my camera lens, searching for those breathtaking moments.
Over time, I’ve learned that no amount of technical knowledge can replace an innate understanding of people—their emotions, connections, and desires.
Emily Wilson
10 tips for authentic yearbook photography
For the past five years, I’ve served as the yearbook advisor for a high school. It wasn’t something I ever planned—I had envisioned teaching only English, not journalism. I’d never written formal journalist pieces or worked on a yearbook before. The closest I’d come to anything remotely similar was scrapbooking and journaling. But armed with limited technical knowledge and an abundance of creative confidence, I decided to embrace the challenge.
While my student staff and I still have plenty of room to grow and refine our journalistic techniques, we’ve made significant strides. Here are ten tips that have propelled our yearbook forward, helping us create something we’re genuinely proud of.
1. Capture candid moments
Yearbooks are about documenting real life, not just posed portraits. Be a quiet observer during events, in classrooms, and on the sidelines. Look for laughter, concentration, or spontaneous gestures that tell a story.
2. Get to know your subjects
Whether you’re photographing a pep rally or the chess club, take a moment to connect with your subjects. A quick chat can help them feel more comfortable and natural, translating to more authentic images.
3. Tell the story of the year
Think of each photo as part of a larger narrative. The yearbook isn’t just a collection of faces; it’s a snapshot of a school’s unique culture, achievements, and challenges. Seek out moments that capture the spirit of the year.
4. Vary your perspectives
Avoid taking all your photos from eye level. Get low for a dramatic shot of the basketball team huddled on the court, or climb up for a wide-angle view of a school assembly. Changing your perspective can make ordinary scenes more dynamic.
5. Be mindful of backgrounds
A messy or distracting background can take the focus away from your subject. Frame your shots intentionally, and if needed, move slightly to avoid clutter like trash cans, backpacks, or bright exit signs that draw attention away from the action.
6. Use natural light when possible
School settings can have harsh or dim artificial lighting, so position your subjects near windows or use outdoor spaces when you can. If shooting indoors, experiment with angles and settings to avoid heavy shadows or overexposed areas.
7. Focus on emotion and interaction
The best yearbook photos highlight relationships and emotions. Capture the high-fives after a touchdown, the quiet focus during a test, or the joyous chaos of a classroom celebration. Emotion adds depth and meaning to your images.

8. Photograph the unexpected
Some of the most memorable yearbook images come from overlooked moments—like a student tying a friend’s shoe, a teacher’s reaction during a surprise assembly, or a band member backstage adjusting their uniform. Look for the stories others might miss.

9. Keep it balanced: action and detail
Yearbooks benefit from a mix of sweeping action shots and small, intimate details. Pair a mid-game photo of the soccer team with a close-up of their muddy cleats or a teammate’s hands clapping after a goal. These contrasts add richness to the narrative.
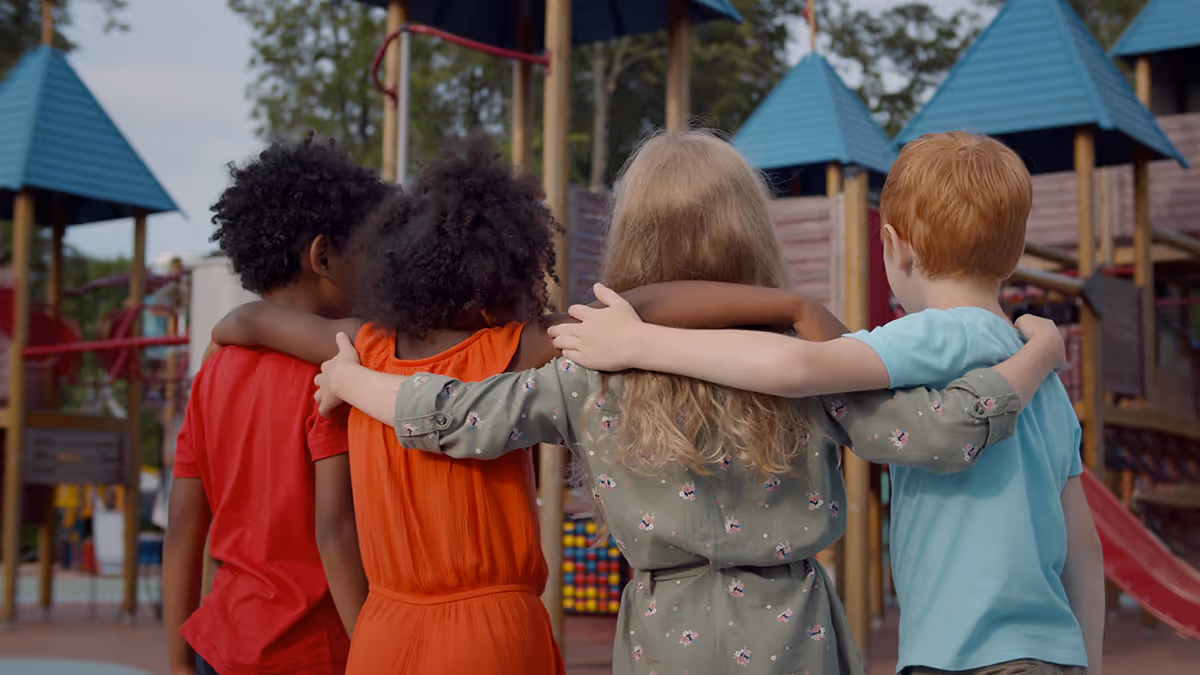
10. Involve the whole school community
Yearbooks celebrate everyone in the school. Don’t just focus on the obvious highlights, like sports and performances. Include the quiet moments in the library, the budding friendships in the lunchroom, and even the behind-the-scenes work of staff and volunteers.
Beyond the lens
Photography is about more than just pointing a lens at a subject. It’s about anticipation. You have to almost feel what’s coming before it happens, predicting not just the movements of your subject but also the reactions of those on the fringes of the frame. Sometimes, the most compelling images come not from the people you’re focused on but from those nearby—the onlookers. These unexpected participants bring depth and richness to the story unfolding in your viewfinder.
Take, for example, a family portrait session. You might be working to capture the perfect posed shot, but suddenly, one of the kids is overtaken by a fit of giggles. Naturally, you’ll want to pivot and catch those big, toothy grins and wild, waving arms. But as a parent and a storyteller, I’ll instinctively glance at Mom, too—her expression in response to her child’s laughter. Those are the authentic moments.
Those are the moments that matter. They’re the ones that, years from now, will make you pause, smile, and maybe even tear up as you reflect on how quickly life moves. It’s these moments that take your breath away.
Learn more about Wilson’s yearbook journey here.

3 (but really 7) design elements to up your yearbook's visual appeal
Personal anecdote: In 1996, I joined my first yearbook staff. Shout out to Mr. Wayne Weightman who took a chance on a loud introvert and turned her into a creator. Fast forward a quarter-century (sheesh) and his yearbook design lessons are still impacting students—some of whom are now educators—and scores of creators.
The easiest element: spacing
One pica was the standard back in the day when orange wax pencils and cropping squares were the norms. Each spread was designed on grid paper measured in picas. Below is an example of one pica standard yearbook spacing. It's clean. It's traditional. It's fin
Contrast that with tight spacing. This is one-half pica (the design equivalent of red stilettos). Your spread just had a glow up.
The dominant element: hierarchy in yearbook design
Hierarchy tells our buyers what’s important, and for all you ELA teachers, it’s the outline of the spread. Spoiler alert: size matters.
The yearbook design lesson here is to immediately attract your reader’s attention with a dominant image or module. Use the golden spiral to build off your dominant. Use this ready-made yearbook design lesson to help launch your discussion with your students.
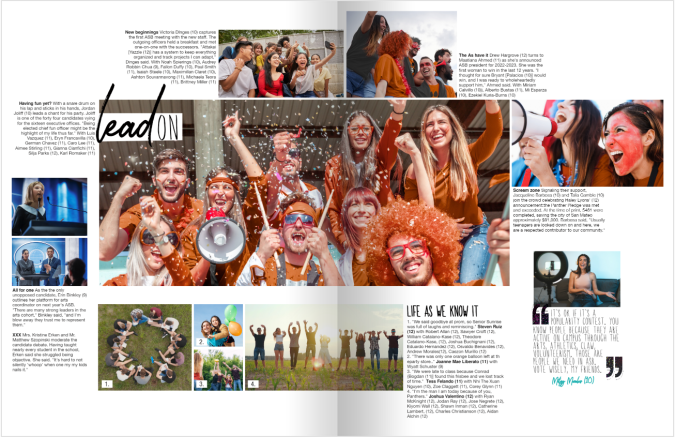
1. Photographs
The most interesting, story-telling, awe-inspiring photo should be dominant on your spread. Connect your headline to this image. You can build off your dominant photograph to fill your spread.
2. Headline
Advertising genius David Ogilvy said, “On the average, five times as many people read the headline as read the body copy. When you have written your headline, you have spent eighty cents out of your dollar.”
Since a headline is our entry point, it should connect yearbook buyers with the focus of the spread. Avoid “Football” when every photo pictures football–your buyers are smarter than that. If you must spell it out, use the folio. Appropriate puns, alliteration, and rhymes are literary techniques to use.
3. Body copy
My yearbook students once tried to 86 captions because “no one reads them.” Another Mr. Weightman yearbook lesson: “If they were worth reading, people would.” Ouch. (And true.)
Lessons centered around the art of open-ended questions made interviewing more of a conversation. Students would develop 10 questions and always end the interview with “Is there anything else I could have asked?”
Oh, and in case you’re wondering, people did read those captions.
If you’re just getting started, practice using anecdotal quotes to fill in captions and add detail. Captions should include facts and sensory details while identifying the subject of the photograph and their grade. More writing lessons abound in the Treering Yearbooks’ free curriculum.
The fun elements: the acronym you and your students will never forget
Shout out to another design influencer: Robin Williams (not the genie). She’s a proponent of contrast, repetition, alignment, and proximity—master these four things, and everything you touch will be design gold. (I’ll give you one second more to figure out the acronym.) Teach these design elements individually, then combine them for the ultimate yearbook design lesson.
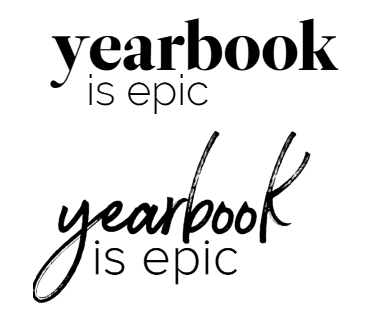
Contrast
Pair a bold font with a condensed one. Use opposite sides of the color wheel. Get crazy with font size (within reason). These design elements teach your reader where to look, and when used in concert with hierarchy, tell your students’ stories in an easy-to-follow manner.
Other ways to create contrast include shape (horizontal vs. vertical) and weight (thick vs. thin).
Repetition
From cover to cover, your book should look cohesive. Every layout will not be the same. I repeat, every layout does not have to be the same! Colors, fonts, sizes, and design elements should be consistent throughout your book. Remember, your theme is the brand, and your book is the platform by which you will develop it.
Alignment
Design is intentional. On your yearbook spreads, align:
- Copy
- Photographs
- Quote packages
Proximity
Put the things that go together, together. This seems like a no-brainer, and yet, it’s a yearbook design lesson worth refreshing year after year.

Yearbook design lessons are something you can teach throughout the year. Pin your favorite ideas (or steal some of ours).
Six ideas to fill pages
Page count can be a dirty word in the yearbook industry. It’s how we compare programs or evaluate pricing. It's also how we wow our readers. Peppering in showstopper spreads breaks up the monotony of photo collages, portraits, and team photos. These pages also fill your yearbook with even more personal stories and unique-to-this-year happenings. (And if we're being honest, these last-minute ideas can help you increase coverage with ease.)
1. Interactive pages
Drop-in yearbook spreads, such as about me pages make it effortless to complete the year's story. You can customize the questions and prompts on these fully editable yearbook templates and give students even more space to share their POV on the year. If you don't have a spread to fill, consider adding a sidebar so students can react to campus happenings.

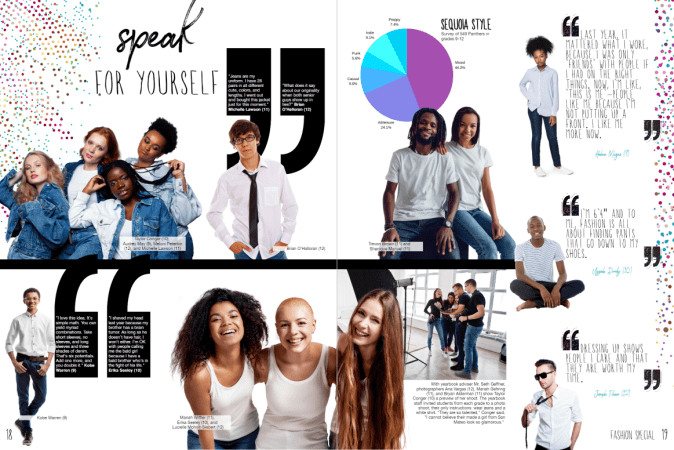
2. Spirit quiz
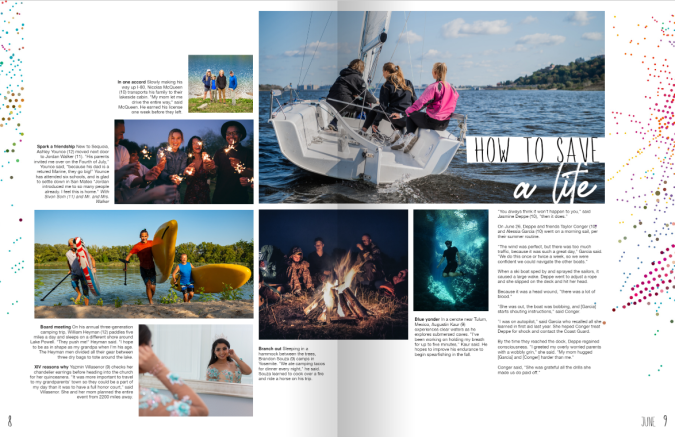
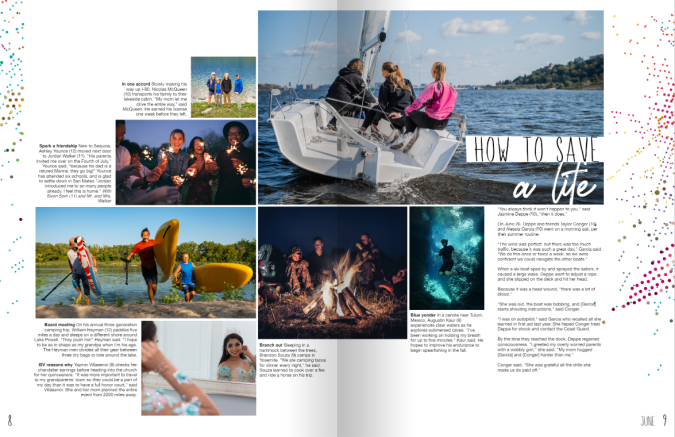
When Sequoia High School had over half a page to fill in their junior section, they added a teen magazine-style quiz. This spirit self-assessment featured eight additional students plus the school mascot while showing off what is uniquely Panther programming.
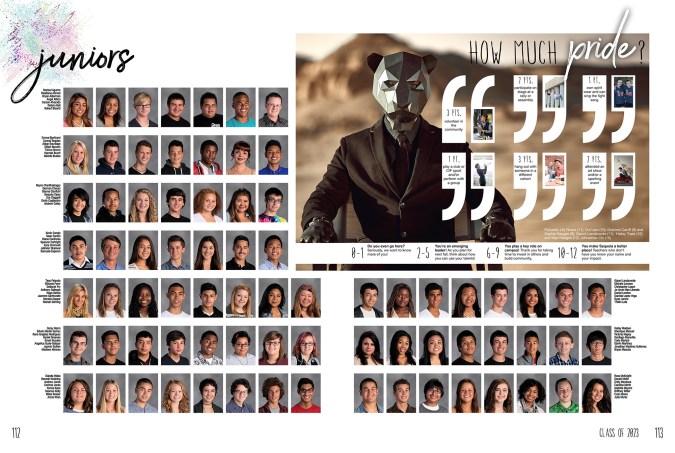
Make it your own
For your spirit quiz, determine which activities and behaviors define your student body and assign a point value. For example:
- Owning spirit wear +1
- Participating in a club +2
- Attending a musical or a sporting event +3
- Knowing the lyrics to the fight song or alma mater +3
- Serving the community+3
Use the scoring to affirm your community, even if it's a one or two. A simple "we want to know you more" will go far for students trying to find their way.
3. Then and now
We’ll save the yearbook-as-public-record soapbox for another blog. Know this: anniversary years are a great time to reflect on where your school community has been and where you are headed. Schools also use building projects, campus splits, and expansion projects to add reflective photos and copy to their yearbook pages. Does this sound overwhelming? A show-stopper spread in your theme copy or your people section is all you need.

In addition to featuring changes in the building, you can write about or share photographs from:
- Teachers and coaches who are alumni
- Current students of alumni
- Famous alumni (ICYMI: alumni are a huge resource)
- The local historical society
- Past yearbooks
- Blueprints
4. Pet spread
If you’re new to crowdsourcing, or in need of additional coverage, start with a pet spread. If we’ve learned anything from #caturday and #dogsofinstagram, it’s that sharing pet photos brings us joy and is a natural part of our culture. Case in point, when our design team asked the Treering staff to submit photos of their children and pets to use in sample spreads, the latter had nearly twice the submissions.
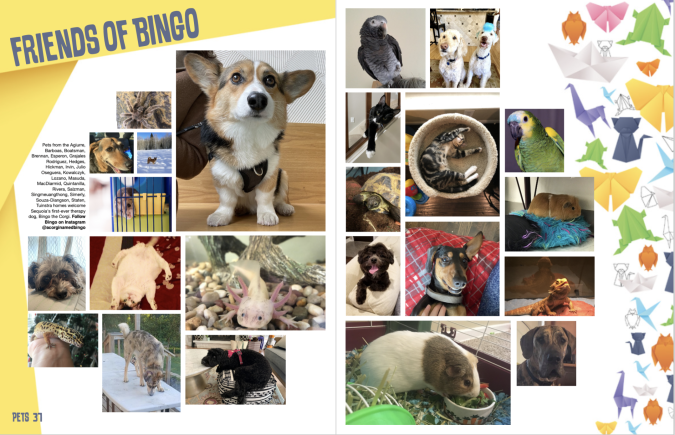
When your students crack their yearbooks open in five or 15 years, the sight of their furry, feathered, or scaly friend beside their artwork and activities truly captures a moment in time.
5. Art showcase pages
Student contributions extend beyond the field, club meetings, and stage. Those creative moments in the studio or during classroom art time belong on your yearbook pages. Also, like a pet spread, an art spread is a way to include those camera-shy students.

6. Fashion page
Expression isn’t limited to canvas and ink: Yearbook Hero Grace Montemar said her school included a fashion spread because it “allowed Yearbook Club to spotlight classmates from various grades whose fashion sense stood out from the crowd.” Featured students expressed their style and their inspiration with interviews.
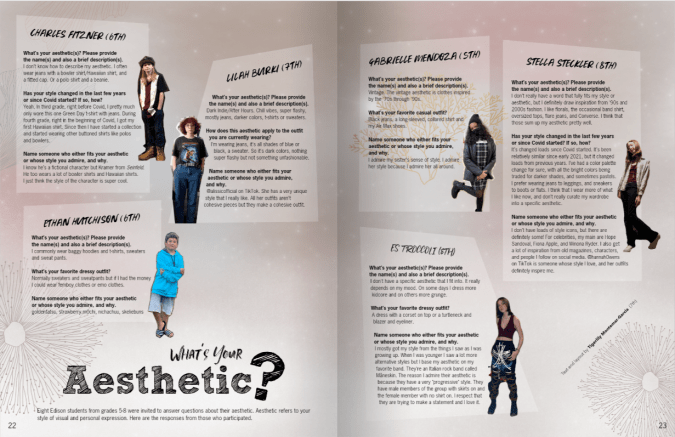
We love how this school asked students from each grade level to come to the photoshoot in a white shirt and jeans.
Do you have more easy ideas to fill pages? Share them via social and tag us!
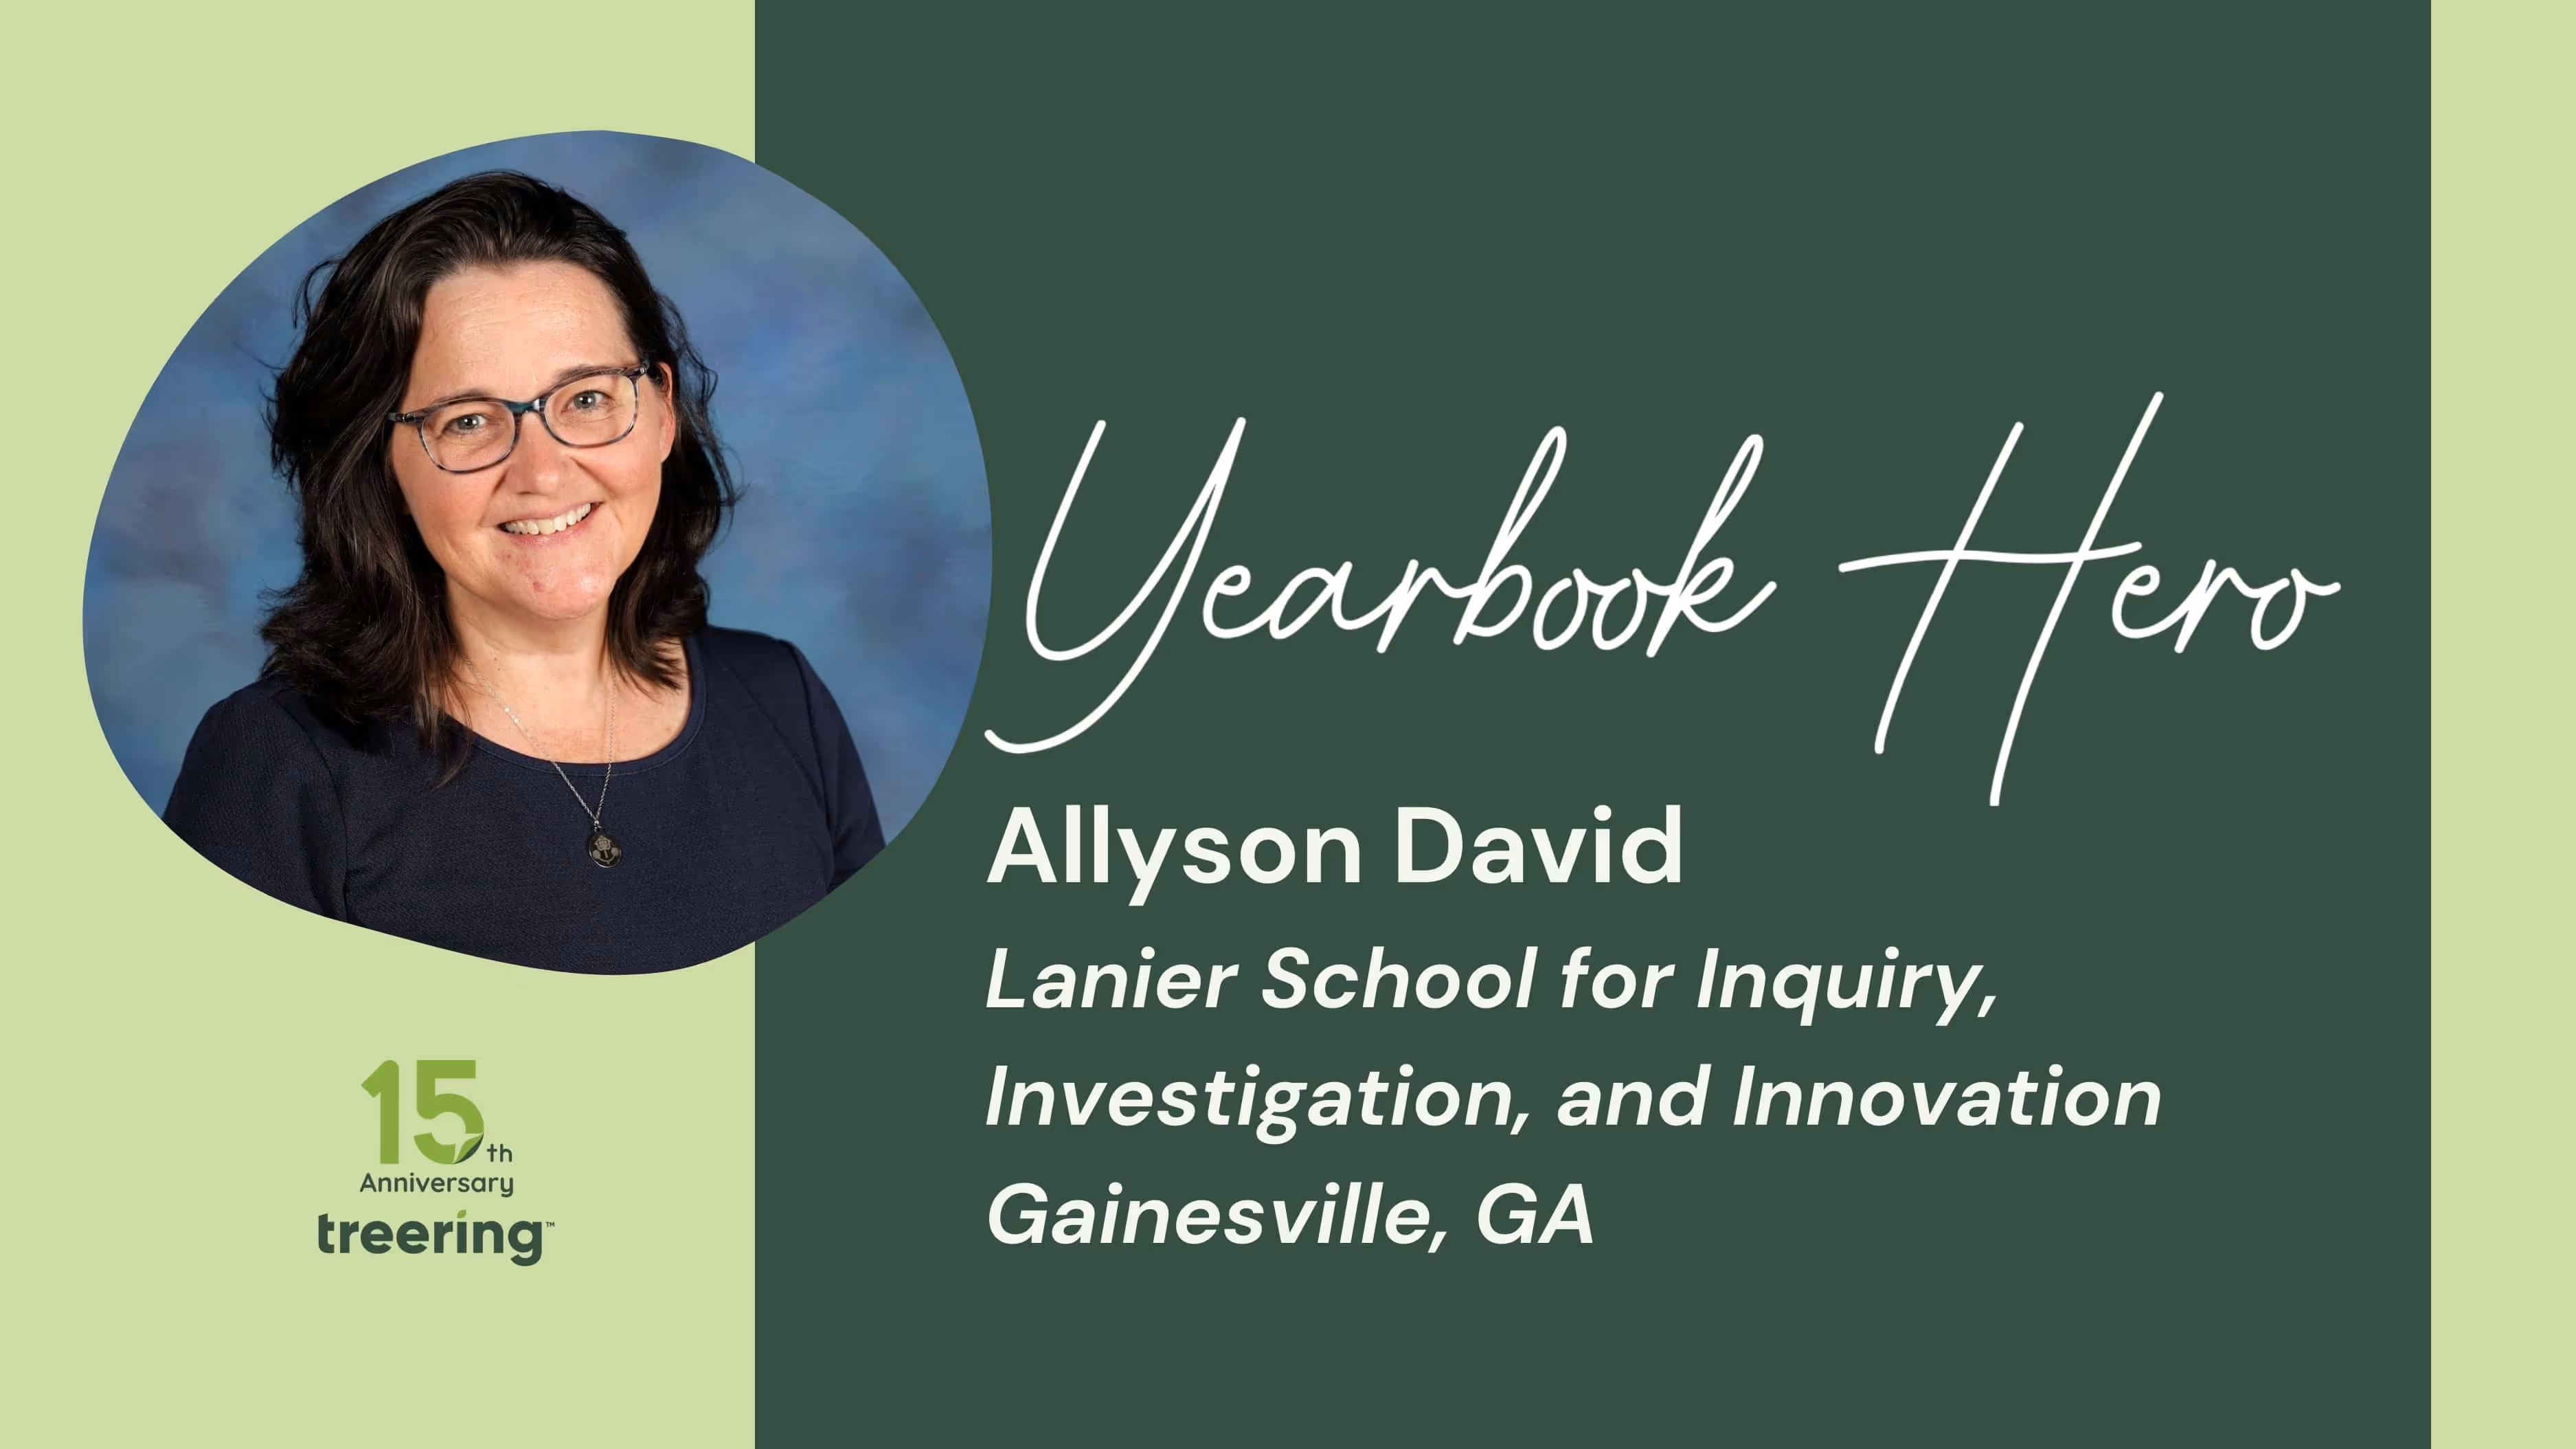
Yearbook Hero Allyson David
Treering Yearbook Heroes is a monthly feature focusing on yearbook tips and tricks.
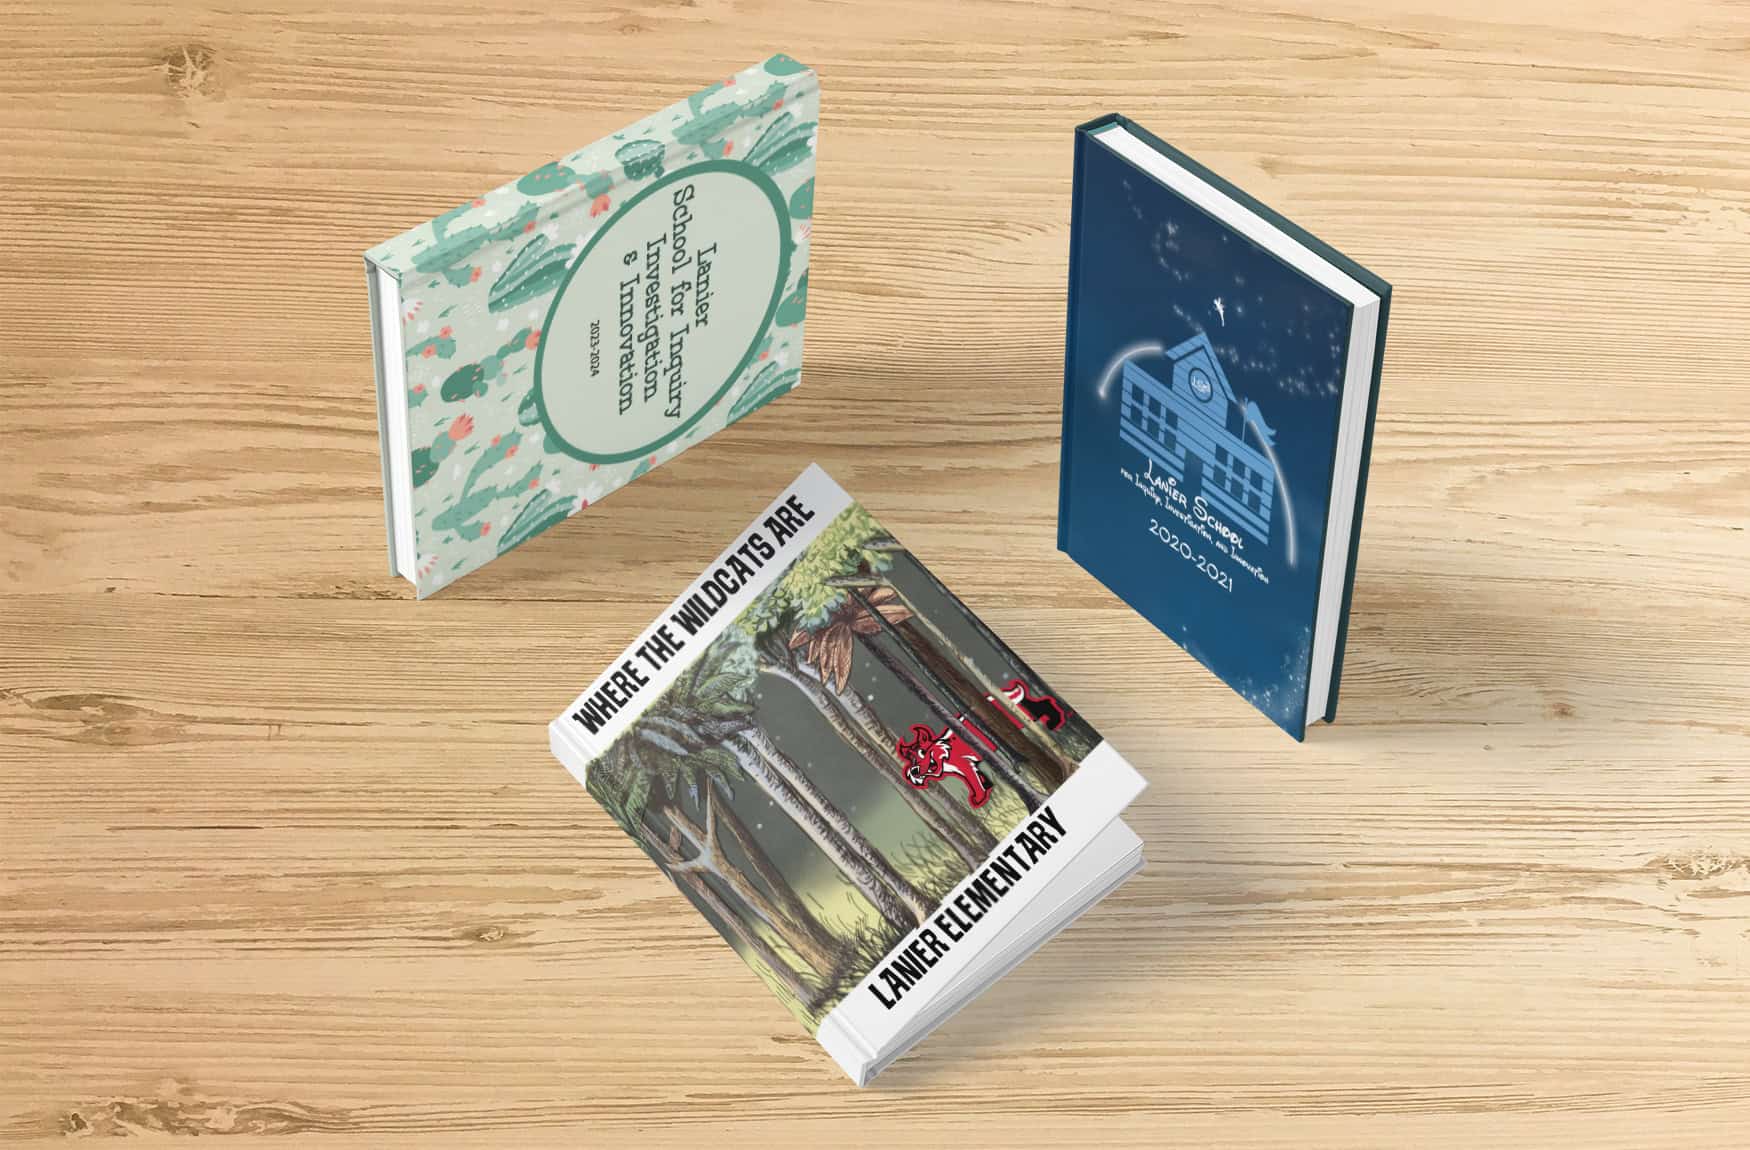
While at her desk in the library, media specialist Allyson David overheard the yearbook planning among the voluntold team. She asked to help. At the time, excess yearbooks filled a storage room at Lanier School for Inquiry, Investigation, and Innovation, and the school was losing money.
How did you turn things around?
My sister is a high school yearbook adviser, and she told me to look into Treering. After I received my sample, I took all the selling points to my admin. I told him we won't have boxes of leftover books, families can customize a couple of pages in there, and we can even integrate a fundraiser. It was a no-brainer: we went from losing money to making a profit.
You went from being on a yearbook team to managing the project solo.
As a media specialist, it naturally works; this is what we do. Since we are a Google school, teachers put pictures in a shared folder on Drive, which seamlessly integrates with Treering’s software. We have pictures throughout the year that I pull from to put in the yearbook.
I start designing with our fifth-grade ads. We sell quarter-page recognition ads to parents, grandparents, and extended families. Then I flow the portraits. The remaining pages go to school events.
Tell me how you come up with your yearbook theme.
The yearbook theme is based on the teacher of the year. This year, it’s cactuses. The teacher of the year this year is a SPED teacher whose classroom is decorated with cactuses. When I asked her why, she said, “Cactuses are resilient, and my kids are resilient. Both have to show up and be determined to thrive.”
I reveal the theme at the beginning of the year and put the cover on all the flyers and promo materials. It helps with sales: after the reveal, I get a surge. Now, we don't reveal anything else that's in it; they'll just see the cover, but they don't see any of the spreads or anything until it comes out.
You love the Treering themes!
My favorite one was when I made “Where the Wildcats Are.”
When we were using the other company, I would get frustrated every time I opened their design program, and I didn't look forward to working on the yearbook. With Treering, I see a theme I really like, and I envision this spread is going to look this way. It's exciting to go in there and actually see it come together. Treering is so much easier to use to resize pictures and change the shapes of graphics.
Something else I love about Treering is I have until April to get it together. Before, with our other company, I had to finish the yearbook in January. We have a signing day in May after lunch, so I get to hear what the students say about the book. Most of them don’t know I‘m the one who puts it together.
You’re the unsung yearbook hero.
I'm proud of that book; it doesn't bother me that they don't realize that I do it.
Yearbook Hero James Costa masters middle school
Treering Yearbook Heroes is a monthly feature focusing on yearbook tips and tricks.
Yearbook Hero James Costa moved from the Boston newsroom to the middle school classroom. Taking his skillset in graphic design and desktop publishing to yearbook production, Costa started as the yearbook adviser in November of 2023. Already months behind, he worked to collect photos, design pages, and create a visual look by himself. (Wait until you see the cover below.)
Now in his second year as a yearbook creator, he has moved from the campus’ Digital Learning Specialist to teaching five preps as a Tech Ed instructor. Combining his ten years of scaffolding instruction plus the experience of creating the book solo, Costa developed a team structure and workflow so students could help. Under Costa’s leadership, the members of Merrimack Middle School’s first-ever yearbook club are learning design, marketing, and the business of yearbooking.
There are no grades when you do a club. How do you keep students on task?
I understand certain students' strengths and try to encourage and empower them for that. They all have specific jobs. For example, I have a student editor who is detail-oriented. After a big photo dump in our Google Drive, she’ll organize all the photos into folders and delete duplicates. She has an assistant editor to help.
There’s also a yearbook club secretary, treasurer, and communications and outreach director.

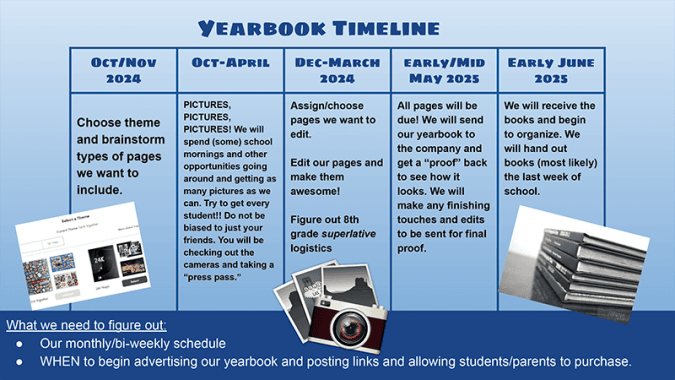
Starting in January, Costa and the street team released a monthly yearbook spotlight. They tease the theme, provide ordering info, and hype custom pages.
My superlatives coordinator is in charge of all things superlatives: making the voting form, taking pictures of the winners, and designing the spread. This is the first time we’ve done superlatives.
Some students are more into design and are on the design team creating spreads. We also have a street team that checks out cameras and photographs events.
I instruct them as much as I can in a whole-group setting, and they also need a lot of one-on-one attention. We have about eight consistent kids.
That sounds incredibly organized. What tasks are currently on your team’s to-do list?
This year is inspired by music. We’re using “Wrapped” and working out how to incorporate elements such as “This or That?” (Olivia Rodrigo vs. Sabrina Carpenter, pop vs. rap). Right now, we're in the stages of just kind of building the ladder and collecting a ton of pictures.
We're just seeing how it evolves and seeing what the layouts give us. I think it's going to be much different from last year's from a design perspective, hopefully, a little cleaner. I had a lot of collages that were kind of just pictures thrown together, but I know the kids like the layouts a little bit more.
Many of us on staff are in love with the “8-Bit” book you created last year. How did you carry it out?
The funny thing about 8-Bit is that I'll show teachers, and they respond, “It's like Mario,” and the kids see it and say, “It's like Minecraft.” So you see that big division in the generations.
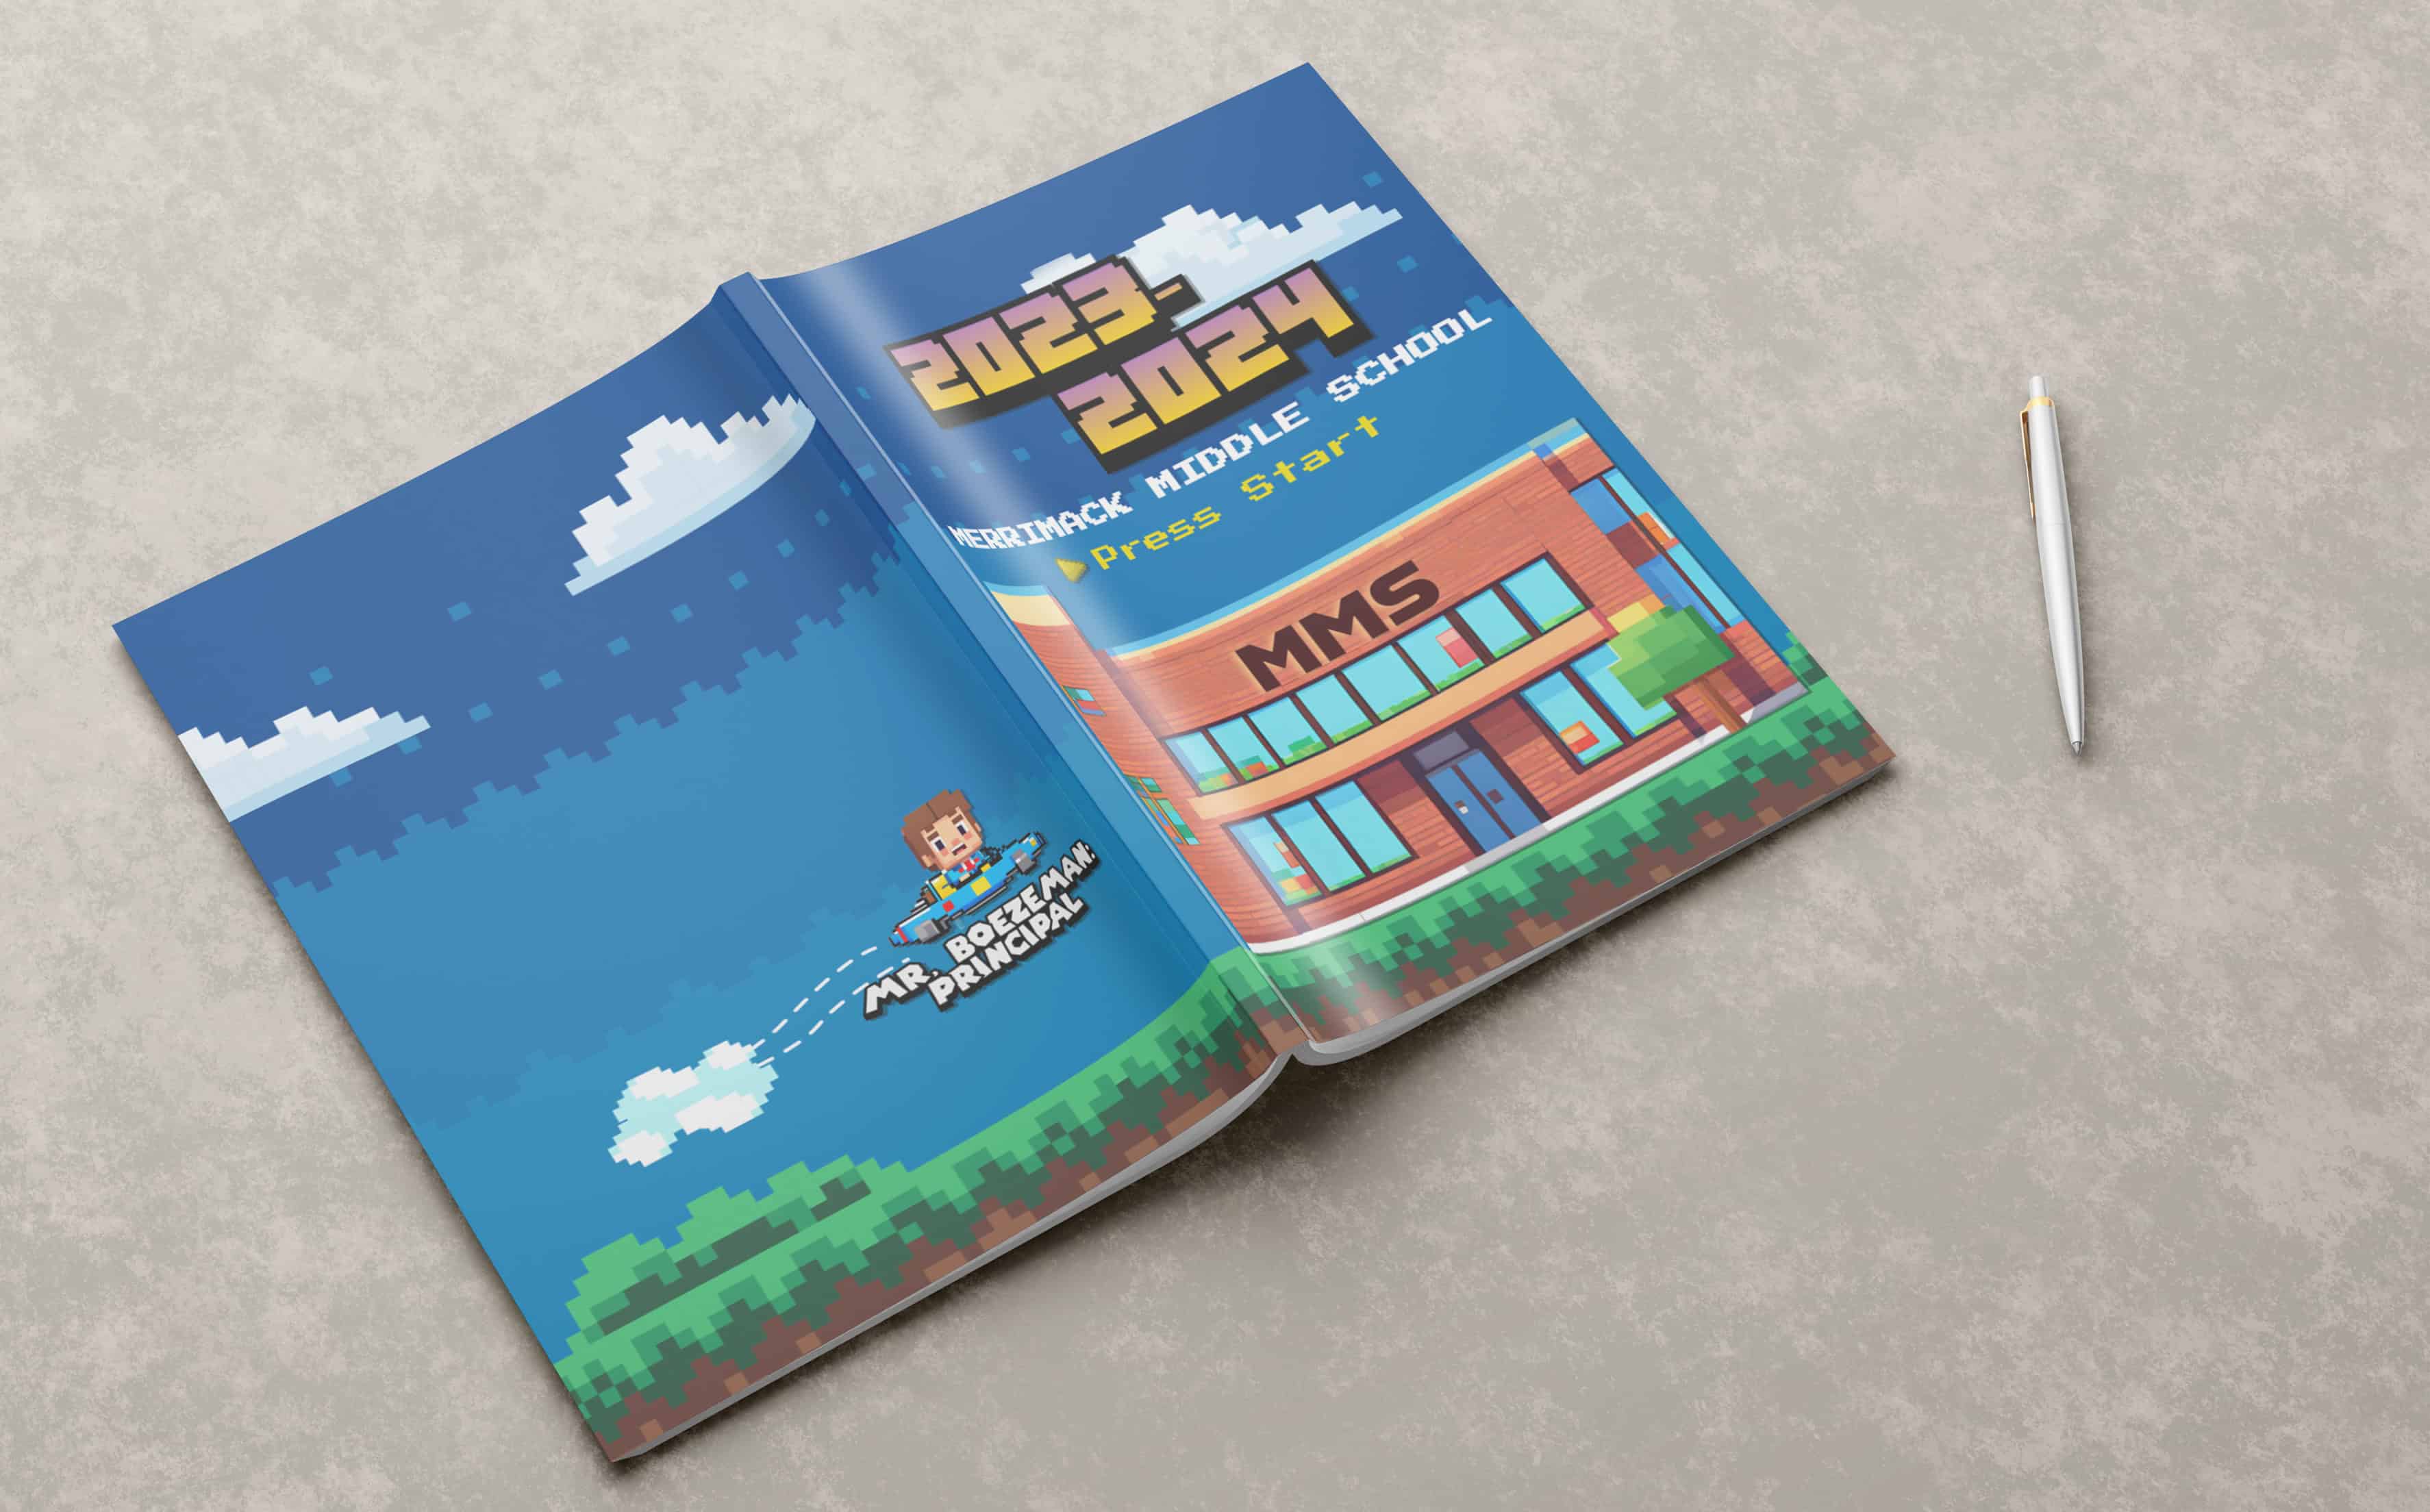
I started with the Treering theme backgrounds as inspiration. On each spread, you see an 8-bit avatar of a teacher. I made those with AI; it was a lot of work word-smithing the prompts to get them to look exactly like the teachers, but that was a lot of fun.
It sounds like fun is a core value of the Merrimack team.
I'm going to give the kids a big shout-out. If I have a tough week, and our yearbook meetings are Friday afternoons, I leave feeling like I had a great day.

Yearbook proofing tools
Raise your hand if you do your best proofing after the yearbook goes to print. We've all had that cringe moment when you notice two baseball players' names interchanged in the sports section or the student who joined the second semester flowed with the wrong class. We can all agree: proofing is critical for the yearbook creation process. Consistency and the proper tools will help you ensure no mistakes slip through the cracks.
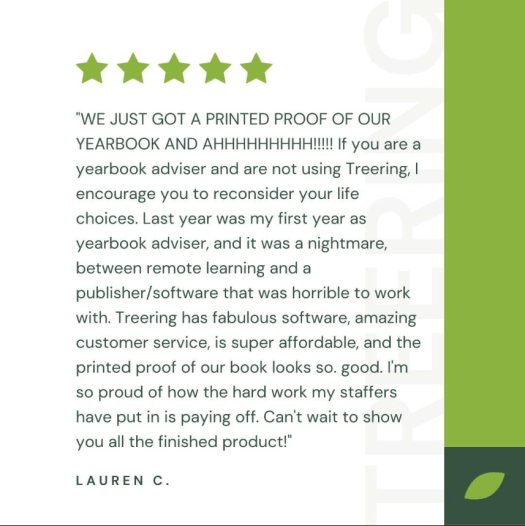
One-time: printed proof
Would you like a copy of your yearbook before distribution day to check your fonts, colors, layout, cover texture, and photo quality? We've got you.
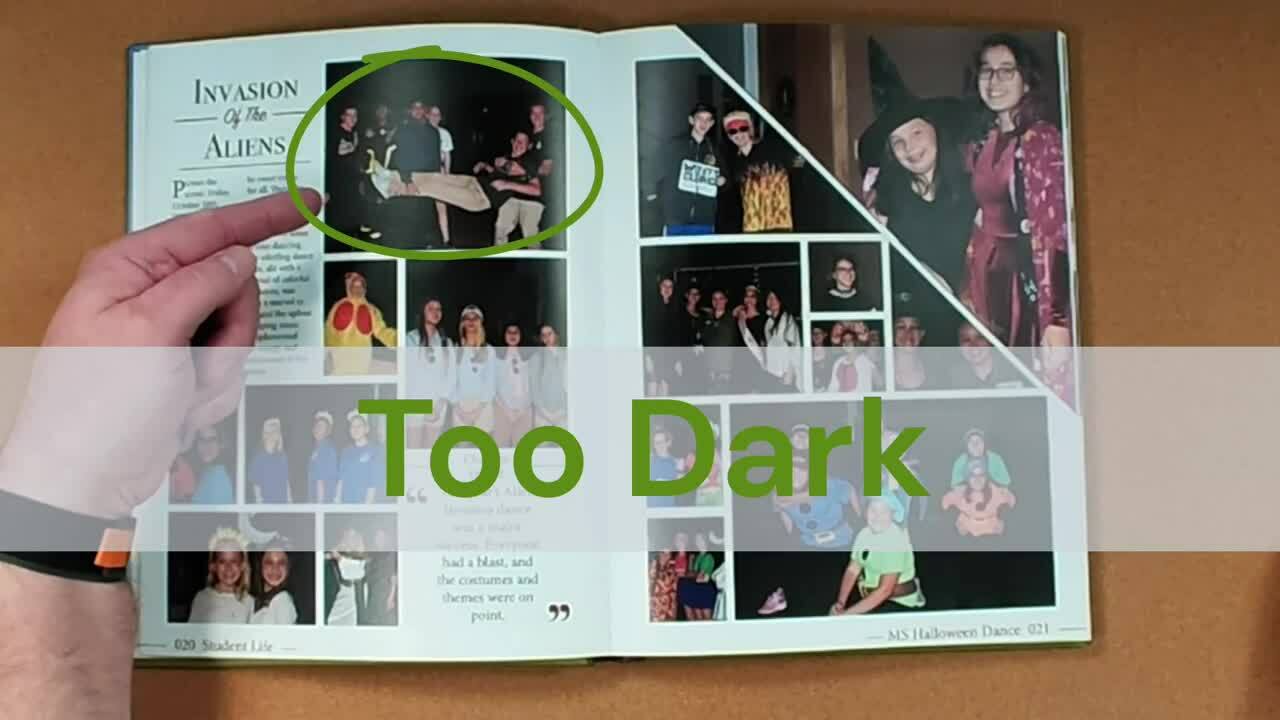
Once your yearbook is approximately 70% complete, order a printed proof of your yearbook to review the following:
- Cover alignment and bleed
- Portraits (accuracy, name size, and font)
- Gutter
- Bleed and margins
- Font choices, sizes, and colors
- Background contrast
- Spelling and attribution
- Photo clarity and color
Monthly: use PDF proofs
Print out a hard copy. Errors that are missed on the screen often jump out on paper. Create PDF proofs of class, event, club, and athletic pages to provide to the appropriate stakeholders for their review. Ask them:
- Is the content accurate? Is anything missing?
- Are names spelled correctly and referencing the correct person?
- Do these photos accurately represent the page's content and our student body?
Remember they need some time to review it, and should it require changes, you will need time to incorporate them.
Text proofreading tips
Read all captions, pull quotes, and headlines out loud. It may feel silly, and once you do it, you will see and hear the value:
- Tone, word choice, and sentence structure pop when you read them out loud
- If all your writing sounds the same, you may want to mix up sentence structure or type
Proofing yearbook quotes
Proofing is essential if your school uses expanded captions, pull quotes, or <gasp> senior quotes. A transcription tool for interviews, such as Otter.ai, which integrates with Google Docs, is handy for recording conversations.
Quotes must not be taken out of context. We do not alter quotations, even to correct grammatical errors or word usage. If a quotation is flawed because of grammar or lack of clarity, it may be paraphrased in a way that is completely true to the original quote. If a quote's meaning is too murky to be paraphrased accurately, it should not be used. Ellipses should be used rarely and must not alter the speaker’s meaning.
AP Style Guide
(Here's an article from CBS News and one from Slate that addresses language learners to review with your students.)
Sharing is caring: use printed proofs to tease the book
This isn't the first time we’ll make this suggestion, and it won't be the last.
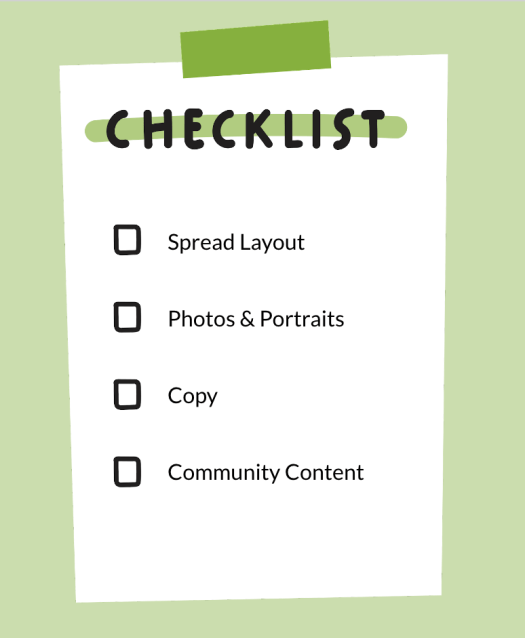
Ongoing: rubrics and checklists
The best time to begin proofing yearbook spreads is after you’ve finished each page and well before you need to go to print. Informal editing can happen on screen with an editor or adviser. We also highly recommend peer editing on a projector with the whole team. Use a rubric to help guide the conversation.

Proofing and editing aren't a one-and-done thing. (Sorry not sorry!) It takes time to craft the perfect story and to create a solid layout from scratch. And if DIY is not your thing, the thousands of layout templates in the Treering library are at your disposal.
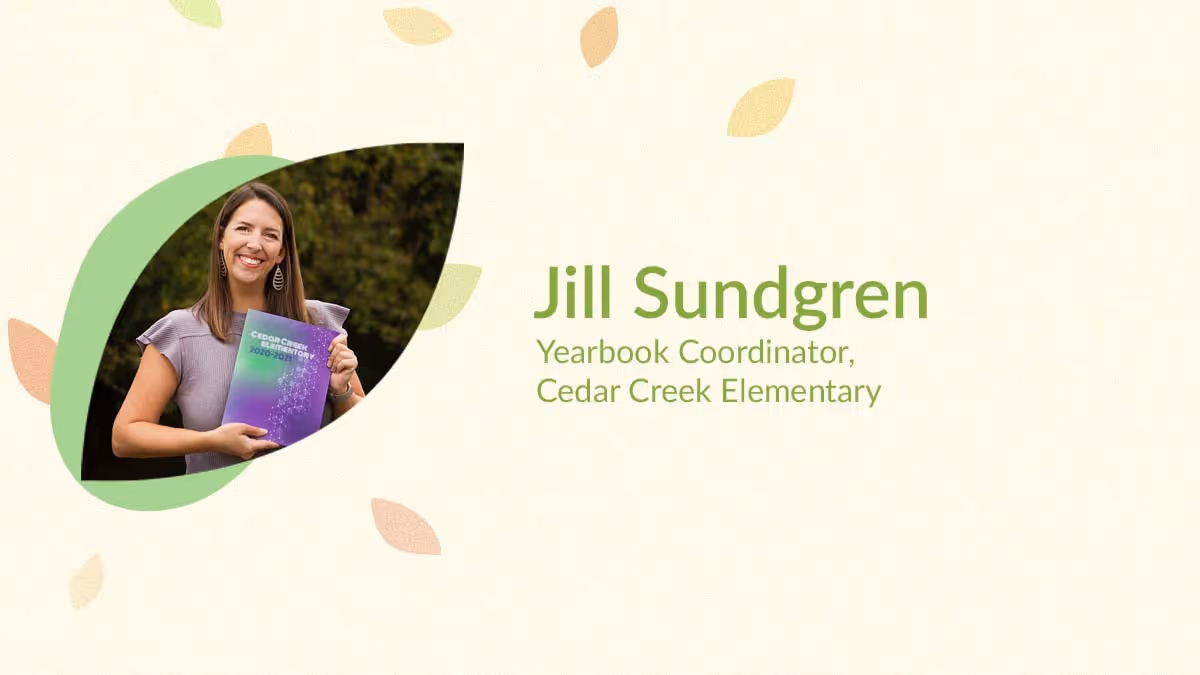
Yearbook hero Jill Sundgren crowdsources a yearbook
Treering Yearbook Heroes is a monthly feature focusing on yearbook adviser tips and tricks.
This year we at Treering called on all our schools’ parents, teachers and students to nominate yearbook heroes in a first-ever peoples’ contest: #YearbookHero. The yearbook callout contest was prompted by our empathy and true appreciation for our yearbook editors.
Jill Sundgren of Cedar Creek Elementary School, located in Olathe, Kansas won first place in the elementary division for the nationwide contest; she was nominated by parent and PTO president, Barb Hendricks, for spearheading the school’s yearbook and inspiring a yearbook committee to work collectively and creatively to capture and preserve the important stories of the year—even when parents weren’t allowed to be on campus!
What does it mean to you to be Cedar Creek Elementary's Yearbook Hero?
I am so honored (and a little shocked) to be named Cedar Creek's Yearbook Hero. But I do feel like this honor really should be extended to my entire committee. This yearbook was definitely a team effort from the design to the brainstorming of pages to layouts to photo gathering. It's so sweet that I am being recognized, but as I'm sure you all know, a yearbook is a huge undertaking and I don't do it alone! I think it's amazing that Cedar Creek is getting recognized for our efforts and creativity because we really do have such an awesome community of parents who make this all possible.
I especially want to thank Barb Hendricks for nominating me and getting me involved in the yearbook in the first place. I absolutely love being involved in the yearbook committee and can't wait to see what this year has in store for us. I think we learned a lot creating the yearbook last year and we are going to try and incorporate some of the ideas that came out of it into future books. I'm hoping to keep up the momentum and produce an even better product this year!
How have you been getting photos when parents aren’t permitted on campus?
Being unable to set foot on campus last year was certainly an obstacle, but with the help of our amazing PTO members, school staff, yearbook committee and community of parents, we were able to still capture the year in a holistic way.
First, we had to get creative on the types of pages we wanted to showcase. A lot of the programs and activities that we normally feature weren't happening last year, so we had to look at some things that happened outside of the school walls to fill the yearbook. We featured seasonal pages (summer, fall, winter and spring activities), sports teams and remote learning, among other activities. Our PTO has a private Facebook page where we solicited photos for some of these activities from parents - and our parents sure did deliver!
Our school still tried to make the year fun by continuing spirit weeks, outdoor photo ops and off-campus activities (for instance, our father/daughter activity was an in-home movie night); so again, we asked parents to snap photos prior to school of their kids dressed up and share with our team. Our principal also let us take photos (outside and masked) as kids arrived at school so we could fill in some holes for our dress-up spirit days. And, of course, we enlisted the help of the teachers to try and capture some photos inside the classroom as well. This all resulted in showcasing our year in and outside of school.
Our ultimate goal was to show that while the pandemic may have changed our way of living, it didn't damper our spirits or ability to have some fun!

Teaching yearbook: 5 photography mini lessons
Improving yearbooking skill sets is an ongoing process, and we sometimes forgo instructional time as deadline season creeps in. Using these five mini-yearbook lessons, you'll be able to improve your photography skills with a DSLR, mirrorless, or cell phone camera while still having plenty of time for yearbook production.
Lesson 1: rule of thirds
Imagine your photo divided into a tic-tac-toe grid, with two horizontal and two vertical lines, creating nine parts. Instead of placing your subject dead center, try aligning them along these gridlines. The asymmetry adds interest to your composition.

Action should flow across your photo, not off it. The same goes for eyes: you want your subject looking in.
Try it!
Head out to the school courtyard and practice the rule of thirds with your classmates. Practice taking both vertical (portrait) and horizontal (landscape) portraits, ensuring your subjects are placed along the gridlines for a visually pleasing result.
Lesson 2: angles in composition
By experimenting with these angles, photographers convey different emotions, perspectives, and stories in their images.

While these photos have the same subject, the variety of angles tells a different moment in the story.
Practice each of these photo angles during your lessons.
- Eye level: This is most common because the photographer captures subjects at the same height as the camera.
- Worm’s eye view: This varies between dramatic and unflattering, so use with caution. By lowering the camera, the subject appears larger.
- Bird's eye view: A great view to use when students are collaborating on a project, this captures scenes from above.
- Close-up (Macro): Cameras and their phone counterparts usually have a setting to help focus on small details or subjects up close. This is great for art class or some science labs (not dissections) when you need to reveal intricate textures and patterns.
- Wide-angle: Oh, the 0.5 that is trending! A traditional wide-angle shot captures a broader view and exaggerates perspective.
- Over the shoulder: Sometimes, the story is in the work, not the student. (This also helps with camera-shy students.)
- Overhead angle: For flat lays (e.g., what’s in my backpack modules), shoot downward from an overhead position.
Try it!
Stage a student at work in the classroom. Taking turns, yearbook photographers should circle and move around the subject, snapping photos using the above angles. For more application, one student can “direct” the photoshoot, explaining which angle to practice and how to achieve it.
Lesson 3: cell phone photography
Cell phone cameras make yearbook photography more convenient for students–it’s a familiar and comfortable way to document the day. While DSLR and mirrorless cameras give more control over light, cell phones are lightweight and on your person nearly 24/7.
As with a traditional camera, you want to hold the phone steady with both hands, elbows in. This adds stability and reduces blur, especially in low-light situations.
Additionally, remember to zoom with your feet. My yearbook adviser gave me this photography lesson back in the 90s, and it still holds. This means photographers move to the subject and avoid a single, stationary vantage point. Ultimately, the composition and photo quality will be better.
By pinching and zooming, you reduce the pixels in the photo, thus destroying its quality. It’s better to zoom and crop once the photo is on your spread.
Try it!
Turn the grid on your phone cameras (Android, iPhone) and repeat the previous exercises on the rule of thirds and angles. Remember, the principles of photography are universal.
Yearbook PSA
With a camera in most teachers’ and parents’ pockets, you have an additional photography crew on campus. Creating shared photo folders and communicating how to get pics in them allows more stories and POVs to be told.
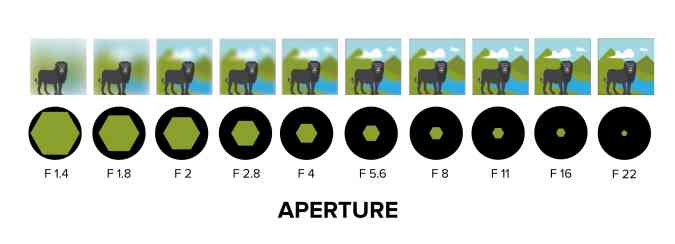
Lesson 4: depth of field (portrait mode)
Depth of field is a crucial aspect of photography, influenced by the aperture setting on a camera. The aperture is the physical opening in the lens that controls the amount of light entering the camera. The wider the aperture opens, the more light passes through.
Portrait mode on a cell phone mimics depth of field by using depth mapping, selective focus, and, sometimes, multiple lenses to create a shallow depth of field, similar to what is achieved with a wide aperture on a traditional camera. (Click here for the full technical read.)
Try it!
Using both a camera and a cell phone, take headshots of your yearbook staff. Try f/22, f/8, and f/1.4. Repeat, focusing on objects, such as a baseball or pointe shoes, in the hands of a student.
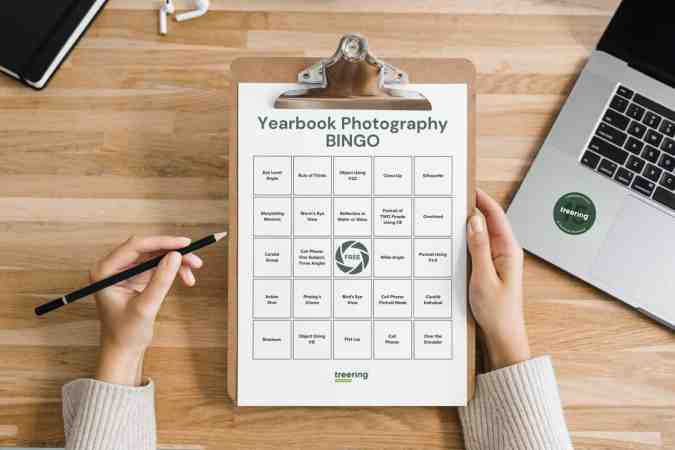
Lesson 5: assessment
Every unit needs a culminating activity. And since we love gamifying yearbook class, here is a photography Bingo card. You can use this in a few ways:
- Coverall: assign students the card to complete
- Traditional: make it a race to get five in a row
- Collaborative: as a group, work through the card; you may assign teams a row or column
- Minute-to-win-it: Give students a time limit (more than a minute) to achieve as many tasks as possible
What makes a great yearbook photo?
The short answer: storytelling photos.
A yearbook narrative of the entire school year. Candid moments, such as in-class discussions, reactions at a game or awards ceremony, or spontaneous interactions between friends, are emotive. While posed pictures have their place–the portrait section is full of them–action shots bring a sense of vitality and excitement to your yearbook.

By applying the composition tips above, your yearbook photography is already diversified. The variety of angles and depth of field alone will increase the visual appeal of each layout.
Taking multiple shots of your subject is a great way to ensure you get the best pose, reaction, and composite. Deleting unwanted images only takes seconds and not getting the most effective image in the first place is a missed opportunity that can’t be duplicated.
Additional photography resources for yearbook classes and clubs:
3 questions about school anniversary yearbooks
How to capture a milestone year in your campus’ history frequently pops up in adviser chats. Yearbook Hero Beth Stacy said her team “linked the past to the present” with their 75th anniversary yearbook. That’s the goal.
1. What’s the best way to show school history in an anniversary book?
Anniversary books don’t have to deviate from your normal yearbooking protocol. It can be minimal, such as in a 40th anniversary book, asking students where they want to be in the next 40 years. Or devoting a spread to a list of 100 things to love about your school in its 100th year (remember to include alumni). Or even showing photos of teachers on the staff page from the year the school was founded.
The ideas below take up a spread or two, so your focus can be the history currently written in the year at hand.
School Timeline
Schools commonly create a timeline outlining specific milestones and achievements. For Rock Academy in CA’s 15th anniversary, yearbook creators featured two pages of school history with old photos of current students.

The timeline included when faculty members joined, the expansion of course offerings, and photos of the first-ever graduate. Old photos had the year on the bottom right corner to denote the past from the present. They continued this trend on divider pages.
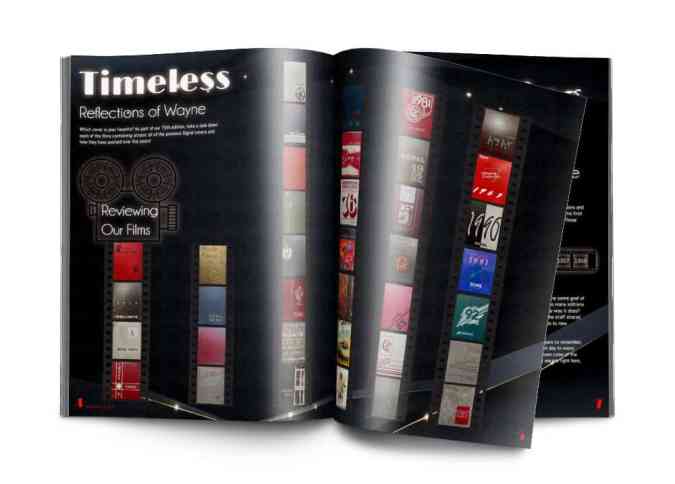
Cover the years
When Wayne High School in OH published its 75th yearbook, the editorial team created two spreads showing the school's history through their yearbook covers. The team at Wayne worked with the alumni association, the local historical society, and the school archives to find most of the yearbooks.

Then and now
(Side note: this would make a great anniversary yearbook theme.)
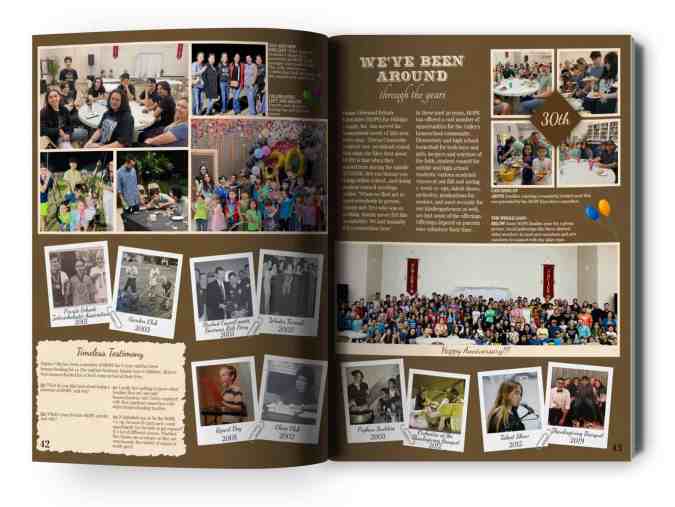
The team at H.O.P.E. in TX also took a trip to the yearbook archives. They scanned old photos from previous books to do side-by-sides with their present counterparts. They also researched the cost of goods from 30 years ago to show life off campus.
Adviser Rita Johson's team also interviewed alumni from the first graduating class and pictured previous advisers in the colophon. She said this was the first year they created a style guide; the yearbook design process evolved from more of a scrapbook to using mods. The team enjoyed exploring the school archives and found 19 yearbooks for the school's 30 years.

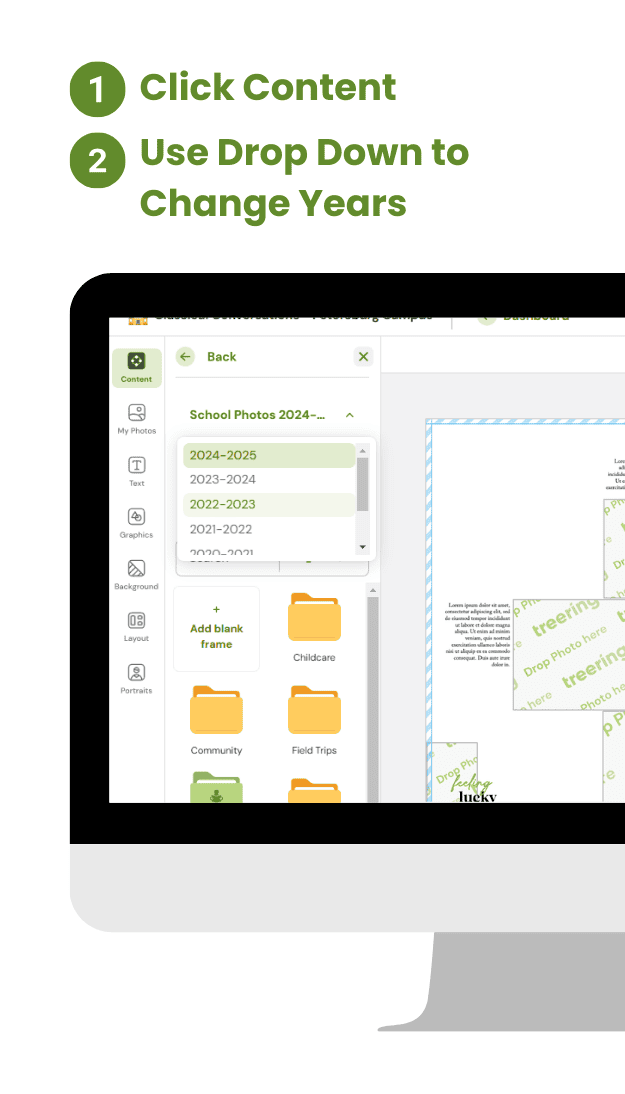
Pro tip: Save yourself the scanning. If you’ve been with Treering for multiple years, your yearbook covers and photos are in your yearbook account.
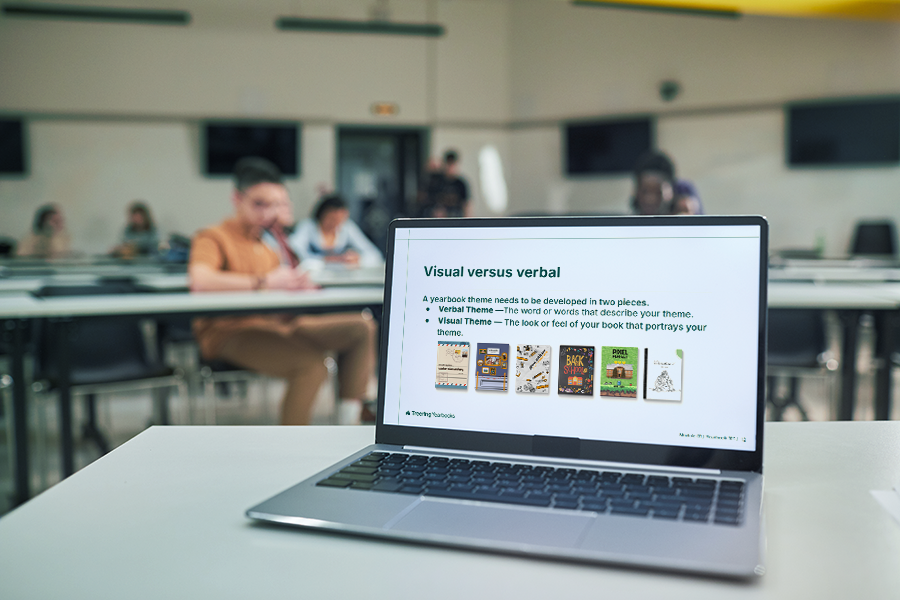
2. What’s a “good” theme?
Well-executed themes cover the school year both verbally and visually. It shows and tells. In a milestone year, like your school’s 50th anniversary, it may be tempting to try and carry this concept through the entire book. Full stop. Unless the winning point guard from the 6th grade basketball team is currently coaching his great-grandson, resist the urge to make your anniversary the yearbook theme. This year (the buyers!) will always be the primary focus.
Verbal theme ideas
Because yearbook creators love the look, we’re starting with the “sound” of the theme. Headlines, theme copy, and spin-offs should reflect your yearbook’s theme.
Evergreen Anniversary Theme Ideas
- Construction-focused: “Built to Last” or “Foundation for Tomorrow”
- Timeline focused: “Our Journey Here,” “Milestones Marked,” and “Then and Now”
- Younger school: “The Wonder Years”
- Older school: “Timeless”
Year-Specific Theme Ideas
- 10-20-30, etc.: “Decades of Excellence”
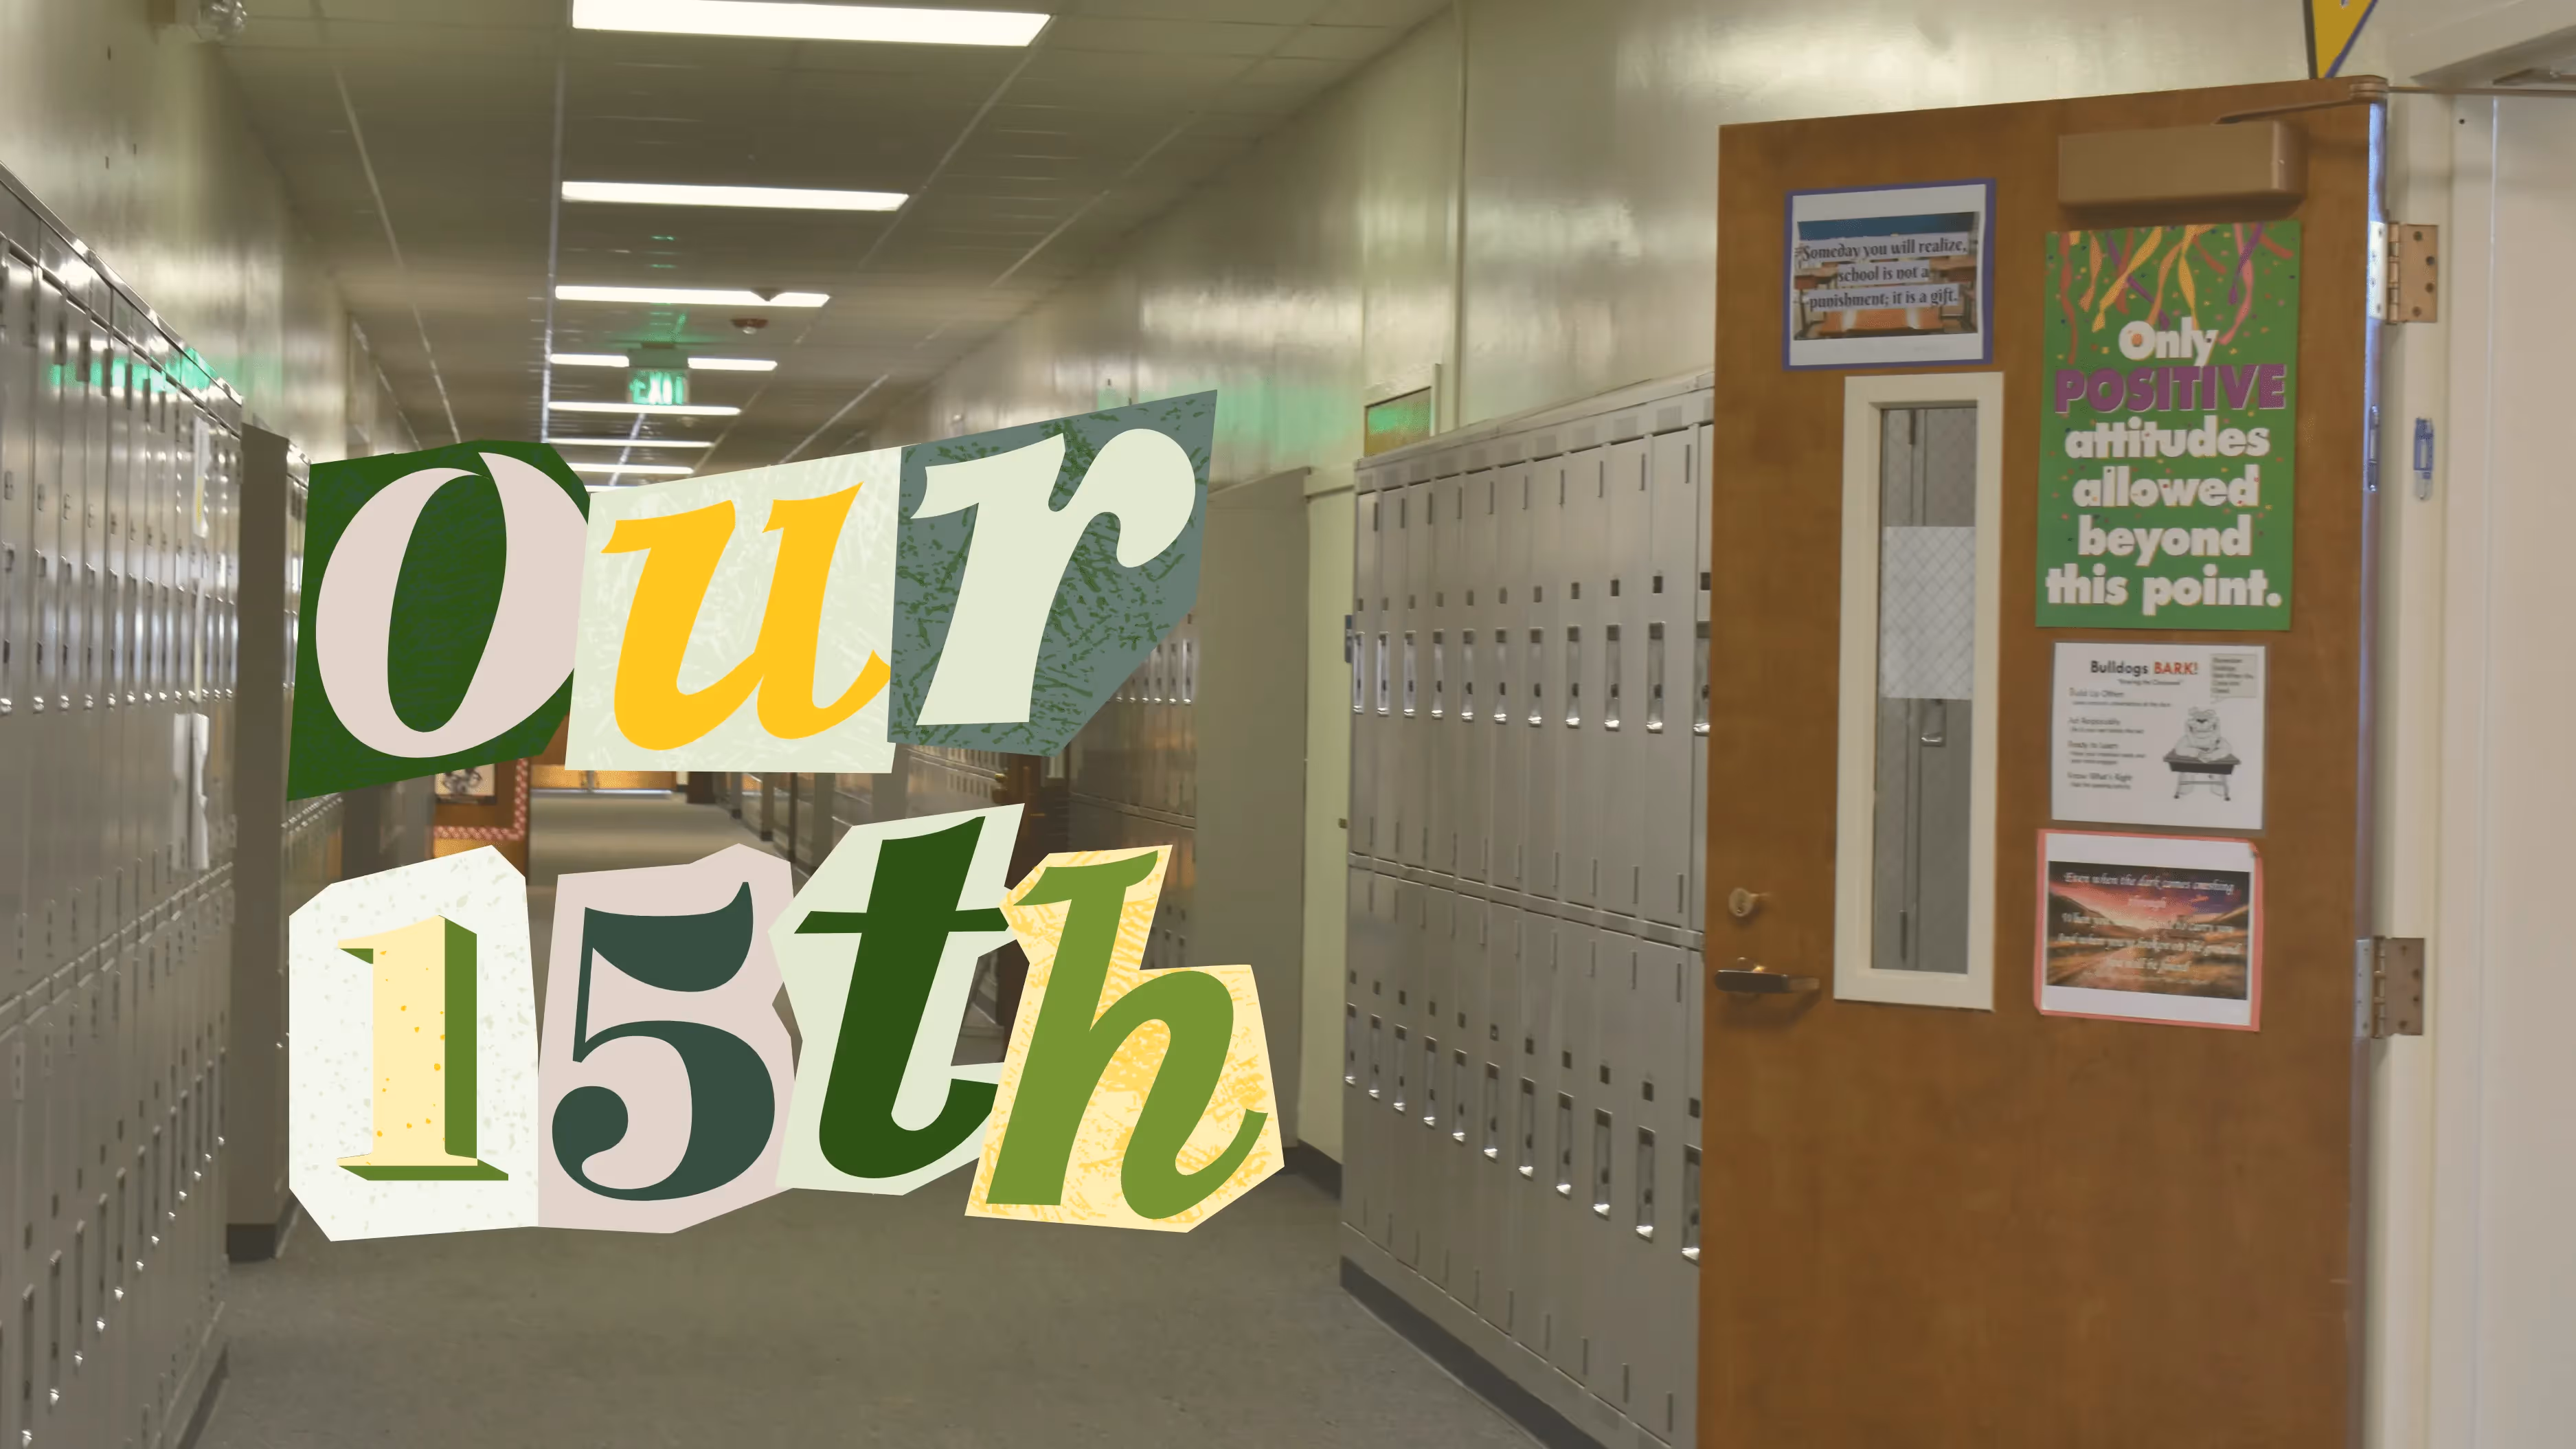
- 15: “Time to Shine”
- 50: “Golden Moments”
- 100: “A Century Strong”
Visual theme considerations
Align your theme’s aesthetic with the verbal tone. Taking a page from my junior year, the theme “Reflections” should have some mirroring in the graphics, if not some shine on the cover.
Traditional anniversary gifts—a list that dates back to the 19th century—prescribe the following:
You can easily add such elements to your cover finish. Bringing your “golden anniversary” to life can be as simple as adding gold foil. Treering also offers silver foil and clear UV embossing.

Inside your yearbook, you could (choose one!)
- Denote old photos by making them black and white or using a Polaroid-style frame (like HOPE did)
- Hide 20 pictures of your mascot (if it’s your 20th)
- Use blueprints or construction photos for a significant building project
3. When should I do an anniversary yearbook?
We see anniversary books for 10-100 years, and everything in between. The caveat here is that if your school is doing nothing, why would the yearbook? Align with your school community to get the final answer on this one.
Getting personal: Treering’s 15th anniversary book
As Treering’s 15th year closes, we created our first-ever anniversary yearbook. Our staff took yearbook photos on the conventional blue background. As a cross-functional team, yearbook creators interviewed staff members and collected photos of people in the home office as well as remote teammates’ home offices.
Unlike a school where students promote and graduate, many staff members are in their second decade with the company, and two of the founders are involved in the day-to-day. The history section features photos of the early offices and staff, the original 44 schools, and a history of Treering-produced theme art. It is heavy on nostalgia.
We look forward to celebrating many more milestones with you.
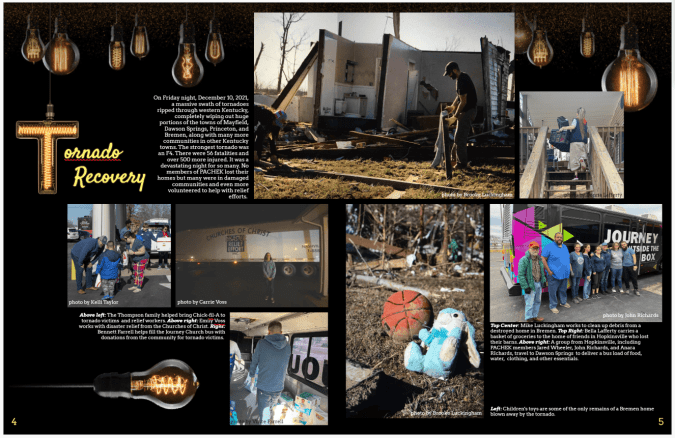
Covering natural disasters in your yearbook
As sad as it is, a lot of communities experience natural disasters, and their people must come together and rebuild. Sometimes it can be a struggle as a yearbook adviser, student editor, or team to decide whether or not to capture this historic event in your school’s yearbook, especially if you have younger students who may not fully grasp what happened. To help alleviate some of the back and forth and uncertainties, we’ve laid out a guide of best practices when covering natural disasters in your yearbook.

Are natural disasters yearbook-worthy?
Including current events is typically a staple for every school’s yearbook, since it is essentially a snapshot of what life was like that year. However, determining the best way to cover natural disasters, which are also considered events, isn’t always the first thing that comes to mind for yearbook editors. Or the easiest. And it’s not something for which one can completely prepare. Natural disasters can shape a school year and have an impact on everyone. Because of this, it is worth including it in the yearbook. It’s important to find uplifting ways to cover these stories when interviewing school members while respecting the boundaries of those who were impacted.
The right words and tone can emphasize how a school showcased perseverance in the face of a tragedy.
Include accurate and approved information in your coverage
Be it wildfires, tornados, hurricanes, or earthquakes, it’s critical to provide accurate information about the event. When looking back at a yearbook years from now, you don’t want the wrong date, for example, to be in print. The goal is for students to be able to look back to remember this part of their history. And ideally, the way it’s covered in the yearbook can show how the school and community overcame the crisis.
Unless you’re lucky enough to have a copyright lawyer on your yearbook committee, it’s critical to understand the basics of trademark and copyright laws when deciding on if/when to use professional photos to cover a natural disaster. You always want to make sure it’s an image you are allowed to use and that it’s free to the public. If this seems like something you don’t have time to research, instead it might be worth considering stock images that are available online, licensing images from your local newspaper, or using—with permission—photos your community has captured.
Along with photos, you should also consider the statistics to highlight. It’s important to remain sensitive and not include mentions of a death toll, for example. Instead, you can focus on other hard facts like the date(s), time, location, the scale of the natural disaster, etc. in your yearbook. If your school community collected donations, include those numbers.
When it comes to deciding on what information to include, a great tip is to make sure that your yearbook committee has an editorial policy in place that can be shared with the community. Covering any kind of crisis can be difficult, and some may always disagree with the way you did it, so it’s best to have a written policy so that teachers, students, and parents can be aware of how the yearbook team will plan to cover a crisis like a natural disaster or a death in your school community. Get your administrator's signature on it.
Lessons students can learn from natural disasters
A tragedy is not something anyone can overcome easily. It’s worth highlighting the hope of people within a community when they’re facing hardship together. Experiencing something of this nature becomes a part of one’s story and while it may take some extra dedicated time to determine how to showcase the lessons learned in a positive way, it’ll be beneficial to capture an impactful time such as this in a yearbook.
Interview questions for students and teachers impacted by disasters
- How did the [natural disaster] impact the community?
- What was, or is currently, being done to help rebuild?
- Are there any stories you’re comfortable sharing about the [natural disaster’s] personal impact?
- Where were you and what were you doing as this event unfolded?
- How has the [natural disaster] impacted how you view your day-to-day life at home and at school?
- What advice would you give to students who may face a similar natural disaster crisis in the future?
- What are you grateful for after this?
- What changes did you see within the community during and after this event?

Teaching yearbook: graphic design
In my credential program, I missed the comprehensive graphic design, marketing, journalism, editing and proofreading, photojournalism, contract negotiation, and volunteer management track that would prepare me to be a yearbook educator. Over the years, an idea library on my classroom shelves slowly came about: other school's yearbooks, folders of magazine spreads worth emulating, Treering's Big Idea Book and Marketing Un-Stumped, plus gobs of digital files. If your yearbook advising journey is relatable, try these small changes that will make an impact on your book's visual look.
This blog was adapted from Yearbook Hero's Lauren Casteen's Teaching Yearbook: Graphic Design webinar. If you're interested in joining this professional community to grow your yearbook pedagogy or to score some PD hours, register for one of our free webinars on Zoom.
Graphic design self-analysis
On a scale of 1-5, how do you currently feel about teaching graphic design? Keep in mind teaching and doing are two different skill sets.
Mild, medium, or spicy?

Below are some suggestions based on your self-reflection. This year, you may be Mild, and next year, you'll apply some of Casteen's tips and be Medium with a hint of Spicy.
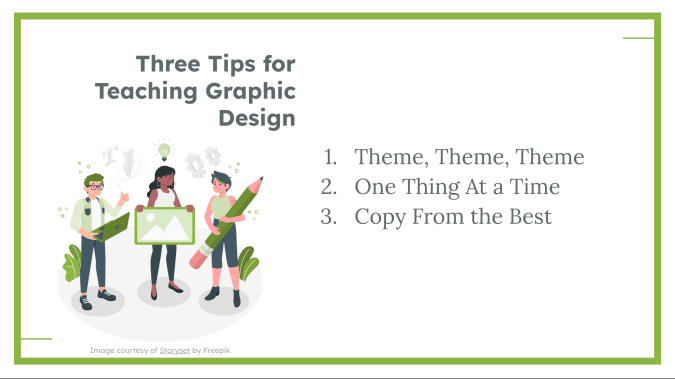
Yearbook theme
A theme helps keep your yearbook unified so it doesn’t look like a different person did every page (even if they did).
A theme does a lot of the graphic design work for you: it's like giving your students fill-in-the-blank notes as opposed to having them copy them by hand.
Lauren Casteen
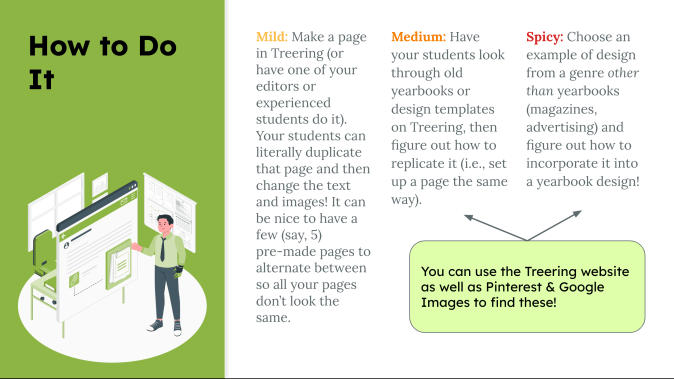
Mild
Choose a yearbook theme from Treering's Theme Gallery. Commit to it by using it for your whole book: each theme package includes layouts, backgrounds, and graphics you can mix and match. Using powerful tools such as auto page layout, you can create a beautiful book while learning.
When you're ready, move to Medium.
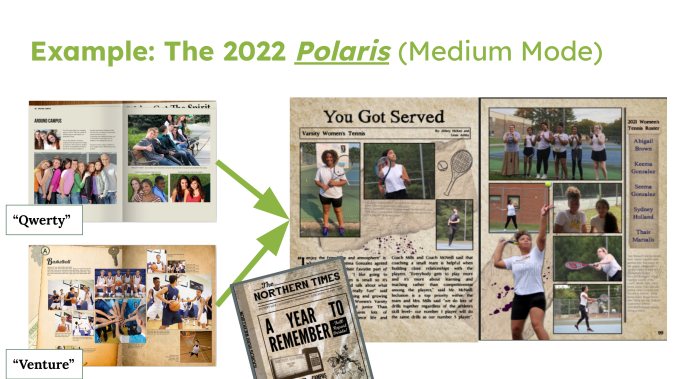
Medium
Casteen falls into the Medium category: she says they start with a Treering graphics package that supports the verbal theme, and then they adapt it. The 2022 Polaris team wanted a newspaper feel to go with "A Year to Remember." The staff blended QWERTY, which had a modern media feel, and Venture, which is filled with vintage items and textures, to create their book.
Spicy
You can design your own theme. Have students come up with a color palette using an online palette generator; use Treering’s font bank to match fonts. To build a unique look, consider including student drawings or artwork.
A style guide will help your designers remain focused. It will also help you, as an adviser, provide detailed feedback on how to improve the design. Here's Casteen's.
One graphic design concept at a time
Since graphic design is an entire professional field, and you could spend beyond four years in college studying it, there is entirely too much graphic theory and practice to complete in one semester or year of yearbook. By breaking it down, you can focus on what's essential for your team this year and build as you and your team grow. Here's how to do it:
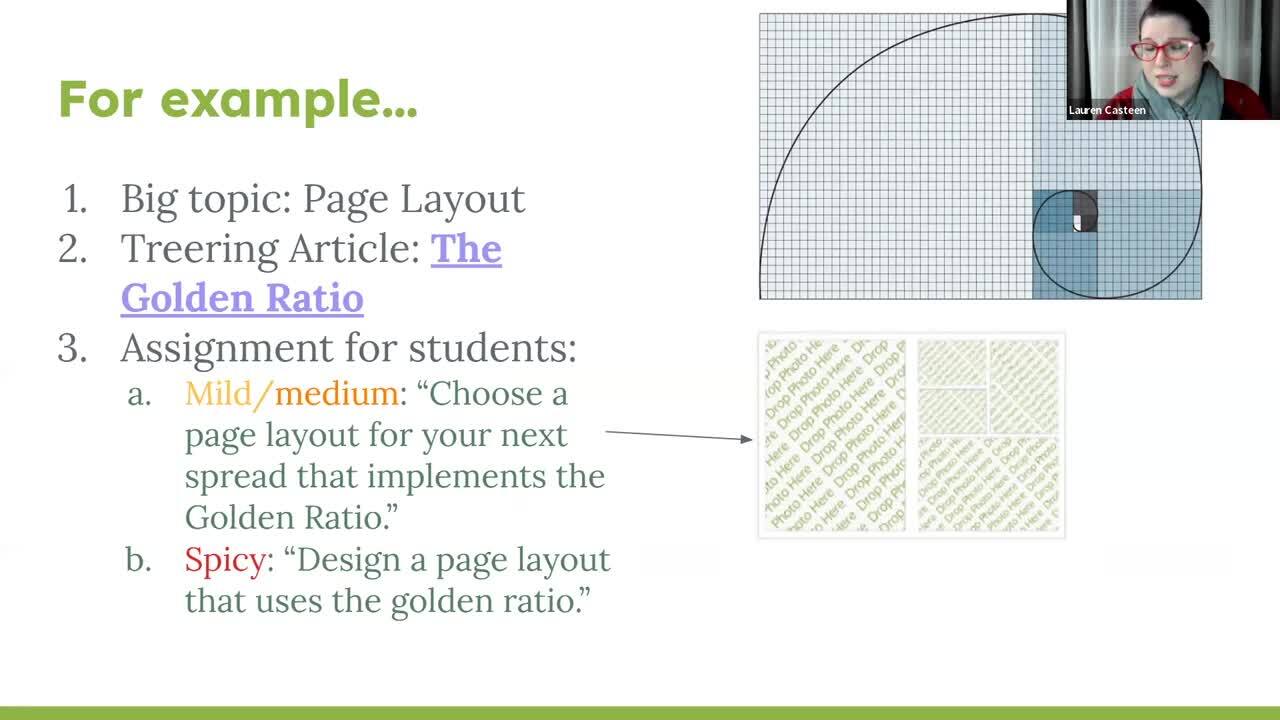
Find the Golden Ratio blog and others on the design page of the blog.
Balancing first-year and returning yearbookers
If you have returners on your team, some of them may be Medium or Spicy, and that's OK. Now that you have some scaffolding, tailor your projects for your student by skill level.
You can revisit each topic each year with your returning staff members to make it more challenging. For example, maybe your newcomers are choosing a pre-made layout instead of doing it themselves, or maybe they are designing a layout for a module rather than an entire yearbook spread. Focusing on one specific skill at a time makes it easier for you as the teacher to differentiate.
Copy from the masters
The masters are "masters" for a reason. Whether it is a magazine ad or a social graphic, inspiration is out there. You can apply a photo treatment you saved from Pinterest on a divider page or emulate a car ad layout in your yearbook.
Get started in graphic design
Lastly, here are the action items from Casteen's session. Select one for your launch plan:
- Pick a theme if you haven’t (or maybe choose a few for your students to narrow down)
- Look through Treering blog articles to find a focus skill to teach
- Make yourself a Sandbox page and start playing around
- Find inspiration for a page to replicate
If you're interested in joining another of our working webinars, check out the entire Yearbook Club webinar schedule.