Yearbook curriculum
Looking for inspiration, design tricks, how to make a great cover, promoting your yearbook and engaging your community?
Most recent

The history of the yearbook: How technology is reshaping it.
The History of the Yearbook Begins
We all know it’s a steadfast tradition in American schools, but what exactly is the history of the yearbook? According to a story by NPR, a Boston photographer named George Warren leveraged an advancement in photographic technology called the glass negative process to easily create many prints from one photograph. Warren encouraged his student subjects to purchase multiple portraits, share them with each other and then turn those collections of portraits into professionally bound books. The “Warren Yearbook” was born. The National Museum of History in Washington D.C. has the 1860 Rutgers College Yearbook on display, an example of a Warren Yearbook.
1900s and the Printing Press
The next big shift in the history of the yearbook came in the early 1900s with the invention and adoption of the printing press. Those books that were previously hand bound, one of a kind albums, could be mass produced with the creation of printing plates. Costs dropped, making the yearbook more accessible to schools and students from all walks of life. The stage was set for the growth of the traditional school yearbook
The Computer Age
Between 1985 and 2008 an explosion of technology brought on massive changes in the yearbook’s history, like desktop publishing, digital printing, social media and the widespread adoption of digital photography. The computer age disrupted almost every industry in the world including incremental improvements to the yearbook. Desktop software made it easier for schools to layout yearbook designs and digital photography provided a larger variety of shots from throughout the year.
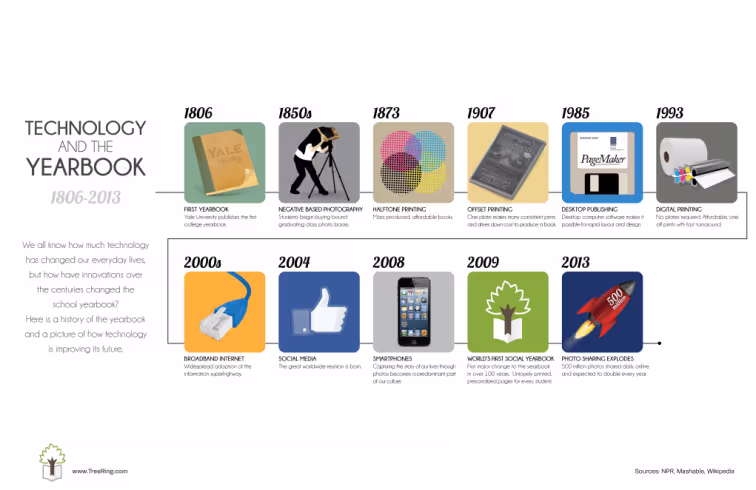
The Social Yearbook
In 2009, with the mass adoption of social media and its prevalence as a part of the American culture, the yearbook made its first major shift in over 100 years. Digital cameras and innovations in online software make it easy for students and parents to create their own memories and add them to their uniquely printed version of the yearbook.
Yearbook Photo Ideas: 3 Tips On Composition
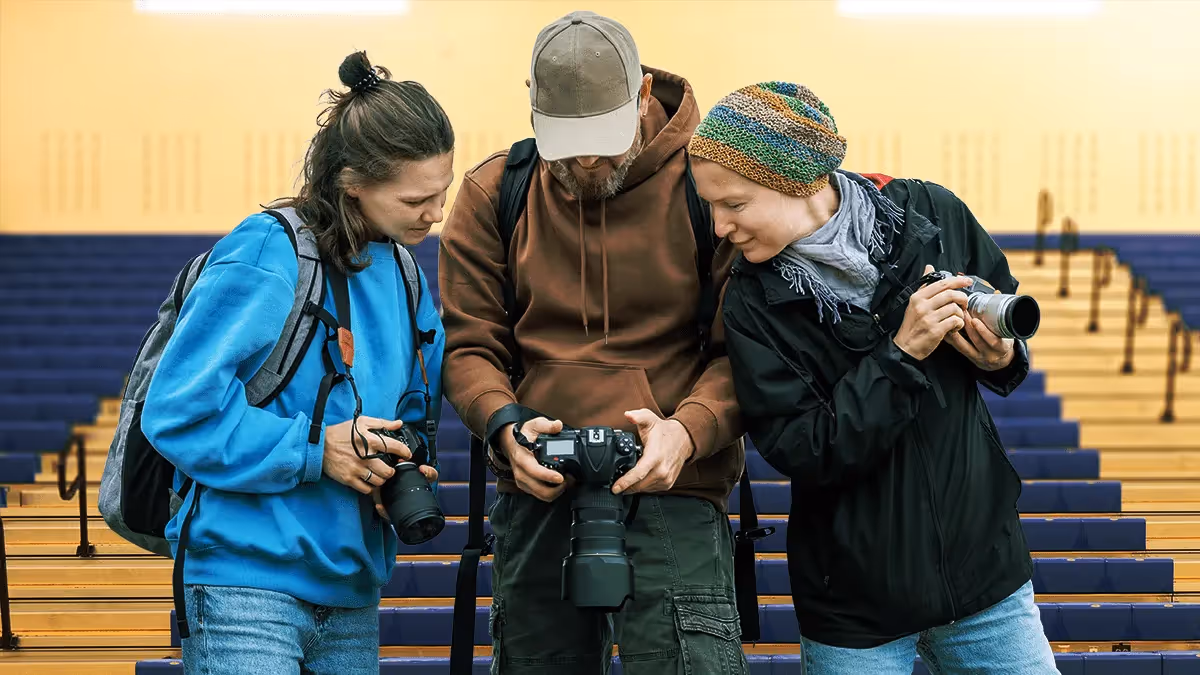
By improving the composition and lighting of your photos, you’ll be able to use any device with confidence. While drool-worthy mirrorless cameras are all the rage and DSLRs “look the part,” cellphones, tablets, and point-and-shoots can also produce great photos. The key is your perspective and awareness of the action.
Composition Basics
Composition creates compelling photos. When composing a shot, think about elements like background, framing, balance, leading lines, depth of field, and viewpoint. Even at sporting events or the school musical—when you’re limited on where you can stand—take some time to go through this list in your head to intentionally get the strongest photos.
In the digital age (did you read that in my grandma voice?), just clicking away and hoping for a usable image can be a waste of time. Being intentional for five to ten moments will help you anticipate action and yield more authentic images.

Background
If it’s not drawing the eye to your subject, you might want to get rid of it. Take time to assess what is behind your subject:
- If possible, remove distractions like garbage cans, signs, or other people
- At sporting events, stand on the opponent’s side so you get your fans’ reactions
- Position a photographer backstage or in the sound booth to capture behind-the-scenes action
Simple camera fixes such as adjusting the aperture (see “Depth of Field” below) or environmental ones (see “Leading Lines”) can help improve your photos’ backgrounds.
Framing
Your photos should focus on key interactions. For example, a tight frame on a student meeting their teacher on the first day of school captures a meaningful moment.
Alternatively, a wider frame might show the atmosphere of an event. Consider how close you want to be and what details you want in the shot.
If the event and space allow, move around to add diversity to how you frame your subjects. My yearbook adviser used to say, “Zoom with your feet.” It’s the second-best piece of photo advice I’ve received. (Lighting takes first billing for those of you playing along at home.)

Balance
While symmetry works well in group shots, you might also want asymmetry to draw the eye to a specific part of the frame. Think about how elements are weighted in the frame to achieve the mood you want.
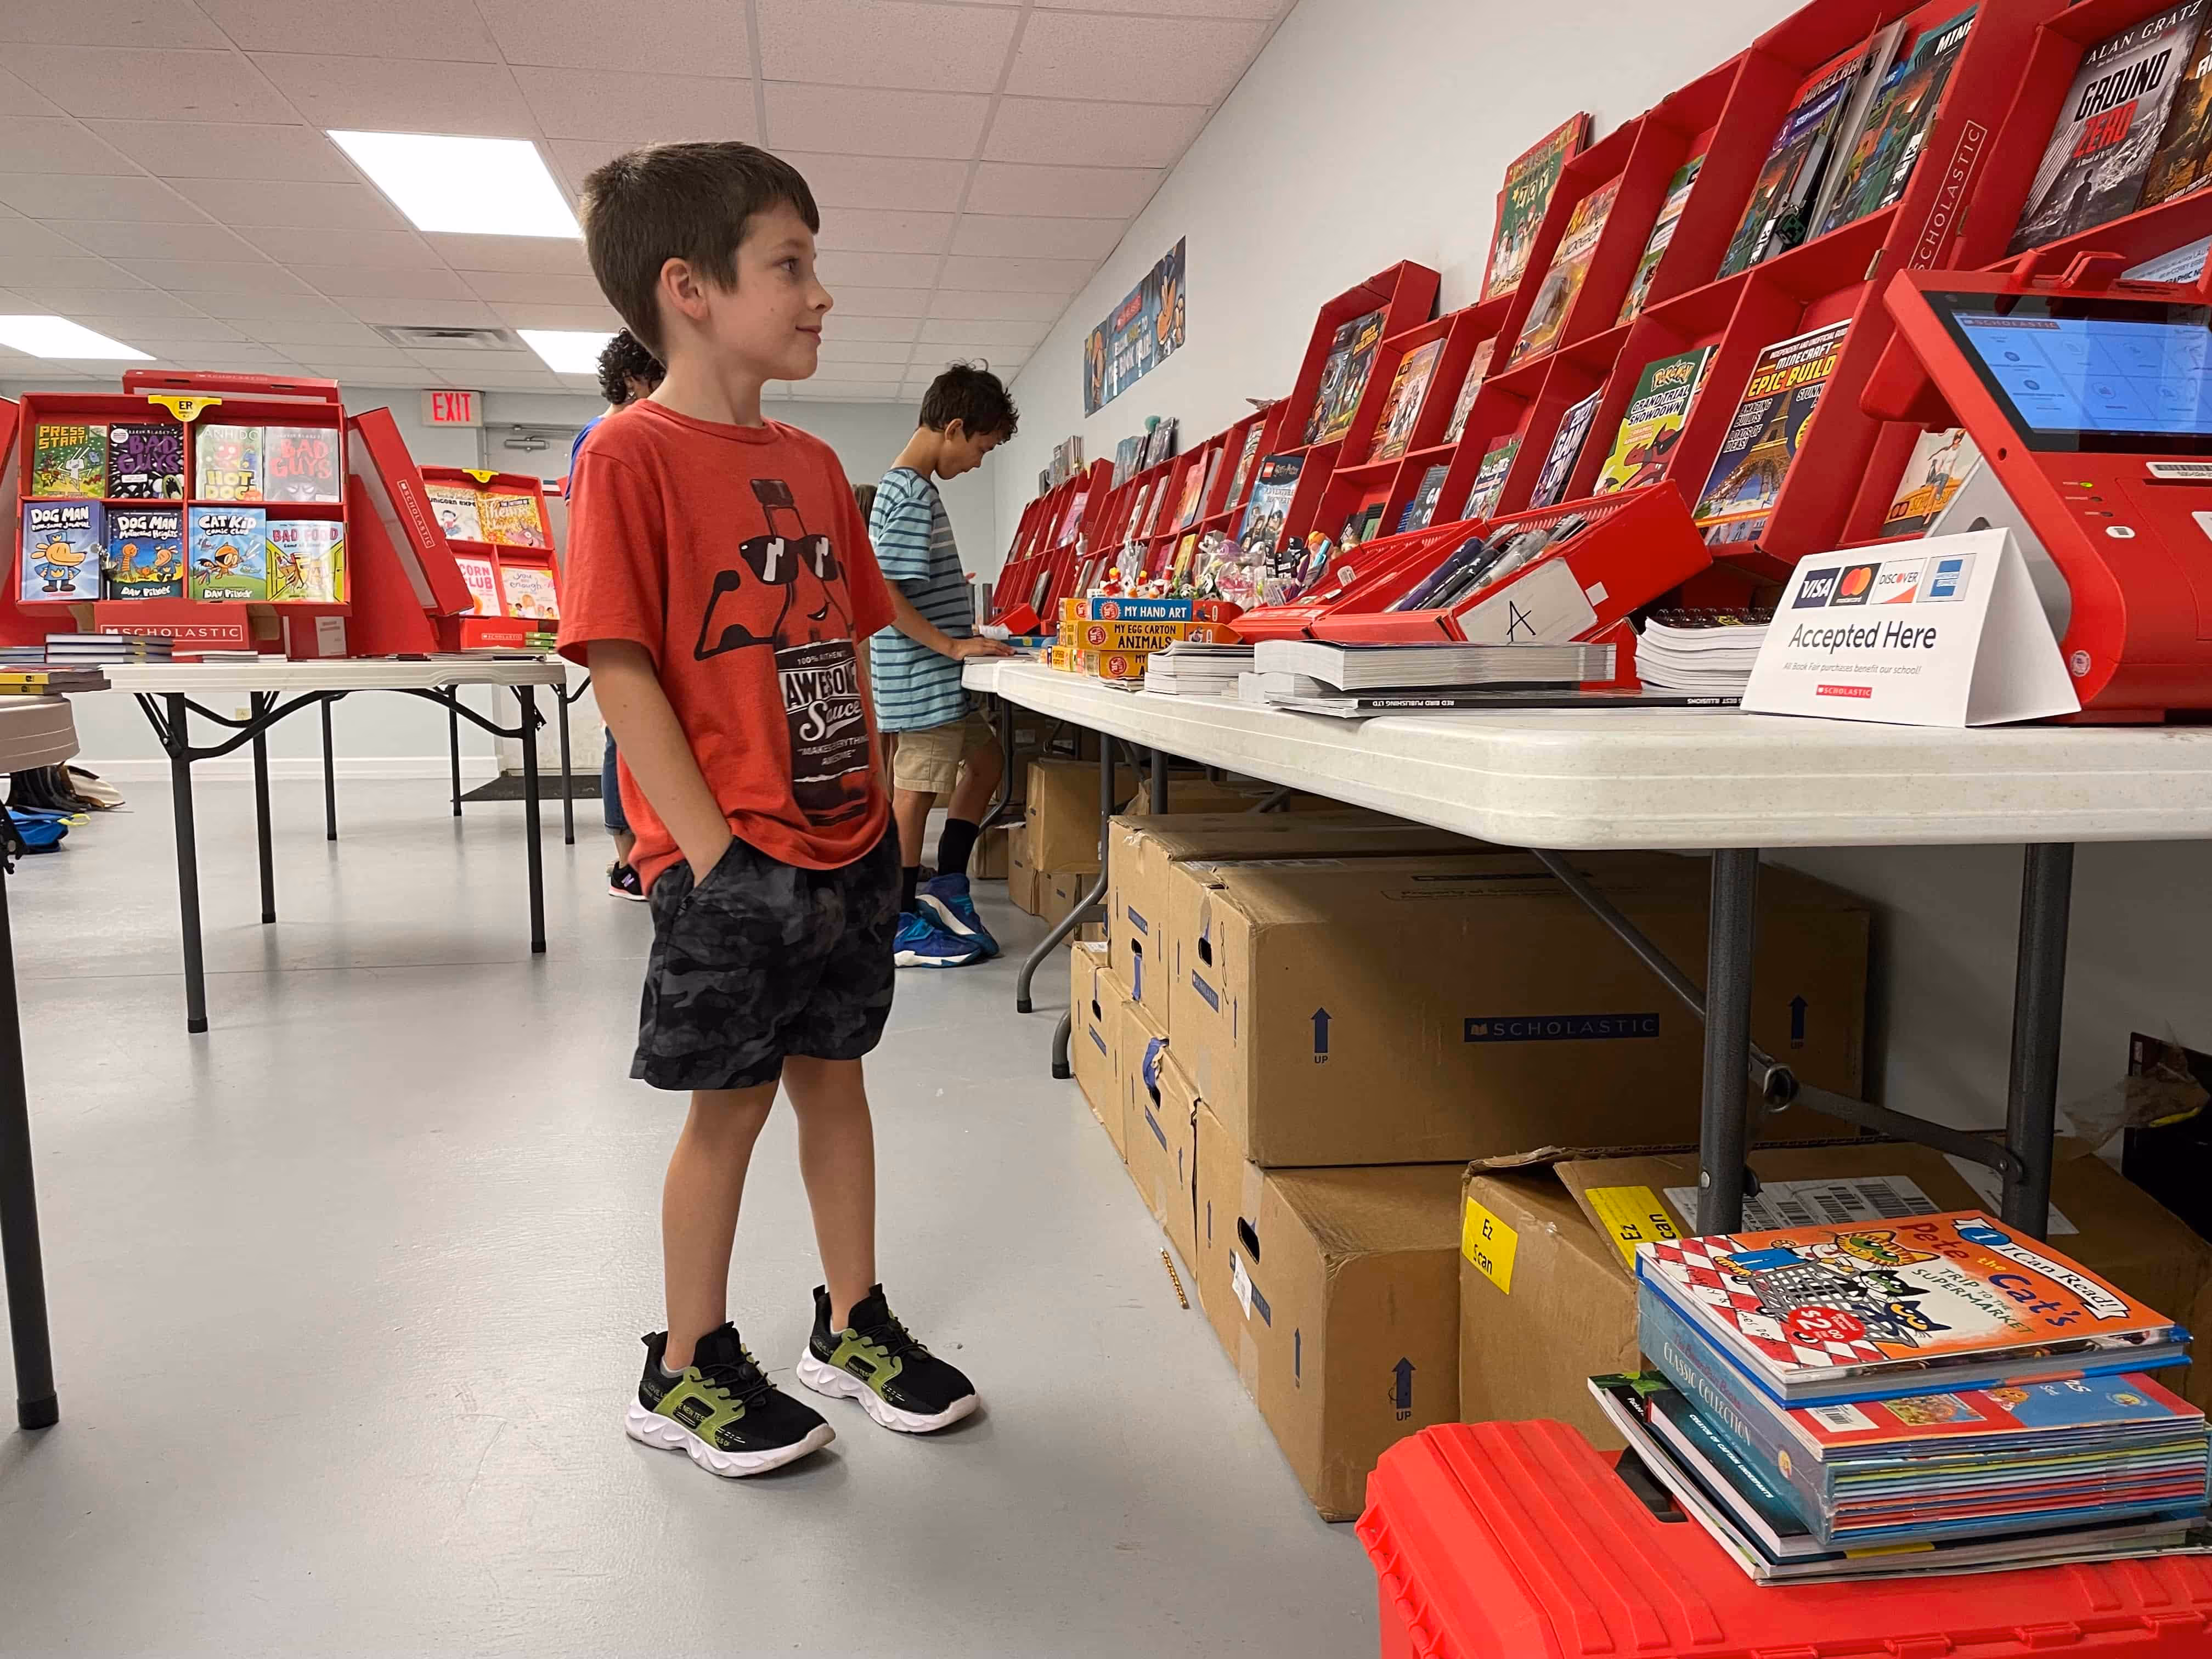
In the example above, the laptop is what holds us captive.

Leading Lines
Use natural lines—like desks, edges of buildings, or stripes on the school bus—to draw the viewer’s eye towards the subject.
Depth of Field
This can be easily achieved with portrait settings on phones and cameras. Blurring the background adds drama and focuses attention on the subject. Whether you’re using a DSLR or a smartphone, depth of field, or aperture, can elevate your images.
Viewpoint
Experiment with angles. Try taking shots from above, below, or behind to add variety and interest. Different perspectives help tell the story more creatively and capture aspects that a straight-on shot might miss.
Lighting Essentials
To say lighting is crucial is an understatement. In photography, too much or too little light can impact the photo’s quality. Be aware of your main light source. If you’re at an event, take a moment to assess from where the best light is coming.
Tips for Indoor Photography
Windows can be problematic if they are behind your subject. Unless you are aiming for a silhouette, keep them to your side.
If the lighting isn’t ideal, adjust. Sometimes, just asking students to move to a better-lit area can make a big difference. They’re usually happy to accommodate. For example, if you are photographing a dance, set up an area to take group photos with good lighting.
Using flash can also help in tricky lighting. For instance, in a situation with backlighting (like a window behind your subject), a fill flash will illuminate the subject and balance the exposure. In low-light conditions, adjusting your camera’s ISO or shutter speed with the help of a tripod can also help capture the shot without losing detail.
Outdoor Photography Considerations
Outside, natural sunlight is ideal, and just like inside, positioning is important. Move so the sun is off to the side or behind your subject to reduce harsh shadows and prevent squinting. Most professional photographers avoid outdoor photoshoots when the sun is overhead for this reason. (Basically, when the fun run is happening.)
We recommend using a tripod and angling yourself so the sun is at your subject’s side.
Remember that a good photographer’s eye matters more than fancy equipment. Whether using a DSLR or a smartphone, focus on framing, lighting, and timing to compose meaningful moments.
This blog is adapted from Sandra Violette’s Photography session from TRL 24 POV: I’m on the Yearbook Team. Violette, a professional photographer and PTO mom, serves on the Onboarding and Engagement Team at Treering Yearbooks.